A Fuselage is born:
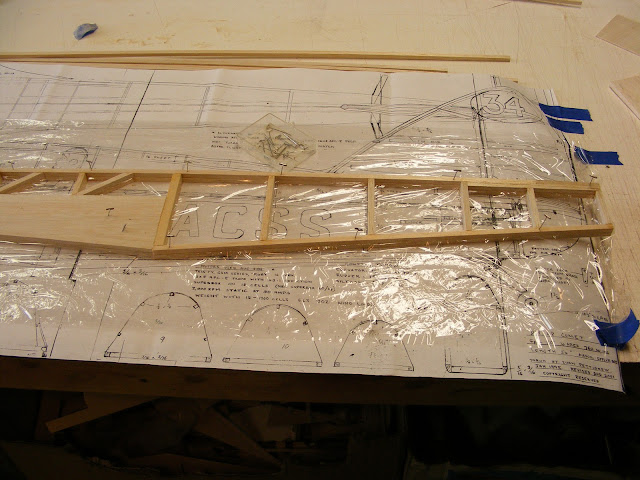
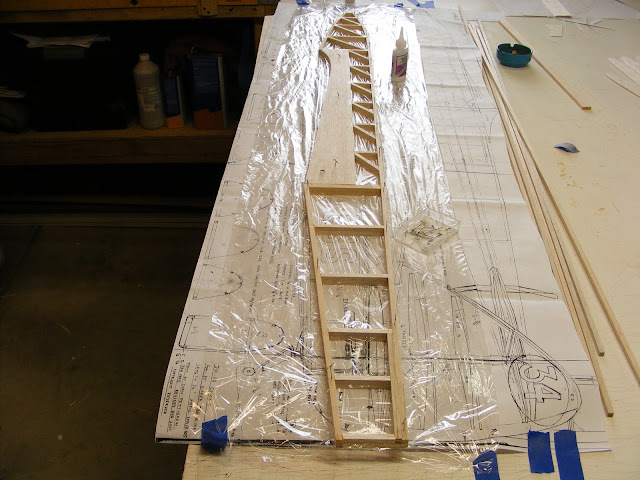
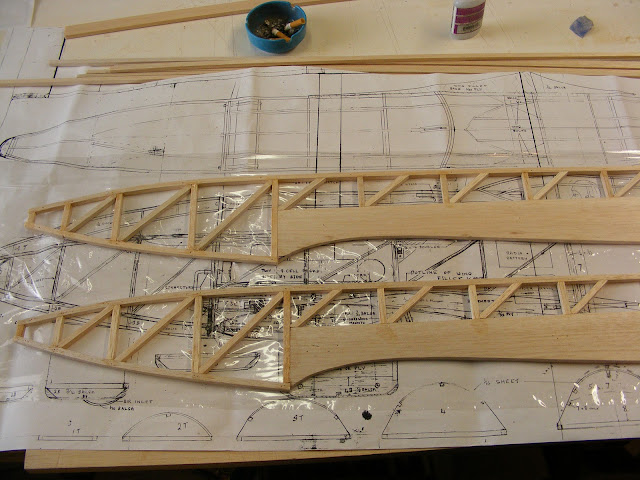
Building the fuselage was very straight forward and required no special skills. Built one side first. Cover that side with clear wrap and built the other side on top of the first. This insures that both sides of the fuse come out the same. Seen below with both halves. One on top of the other.
The result: The two fuse halves are as close to the same size and shape as possible.
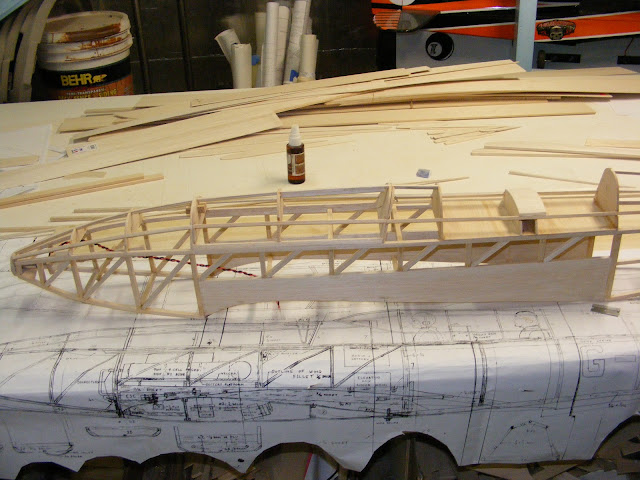
As you can see by the photo below, I cut out the fuselage upper contoured formers from the plan sheet. Traced them onto 3/32-in flat stock and cut them from the flat stock material. Next, pre-cut 1/4 by 1/4 lower formers from 36-in by 1/4 by 1/4 stock strips. Draw a center line on the plans down the fuse top view section. Place both sides of the fuse on the build board over the plans. Pin each side of the fuse at the front and rear of the wing saddle only. Pin the end of each fuse section to counter-part section. Keeping the top and bottom of each flush with the other. Insure that both fuse halves are perpendicular to the build surface. Keep it true and free of warps. Once satisfied with the placement of the main structure. Install the 1/4 by 1/4 bottom stringers and the corresponding top formers. Install the upper and lower fuse formers in succession. Start at rear of the wing saddle and work toward the tail first. Do not glue any of the formers untill you have all the rear section formers installed. Top and bottom. Check the alignment to make certain the fuse is still centered over the plans and that it is still perpendicular to the build surface. Once satisfied apply thin CA glue to all the matting surfaces except for the end verticle formers. A spacer will need to be place between these (see plans) then glue them and the spacer together.
Follow this same procedure for the formers starting from the rear of the wing saddle moving forward to the front of the saddle. When satisfied with the fit and placement on the plans. Glue with thin CA . Next come the tricky part. Place the forward most formers in place on the front of the fuse but do not glue at this time. Use a rubber band or soft clams to bring the two fuse halves together. Secure the front halves in their proper positions then proceed to installing the remaining fuse formers in place. Once all the formers are in place and you have verified placement and position of the fuse, glue all formers with thin CA. Before releasing the clamps or rubber bands apply medium CA to all previously glued joints and let it cure.
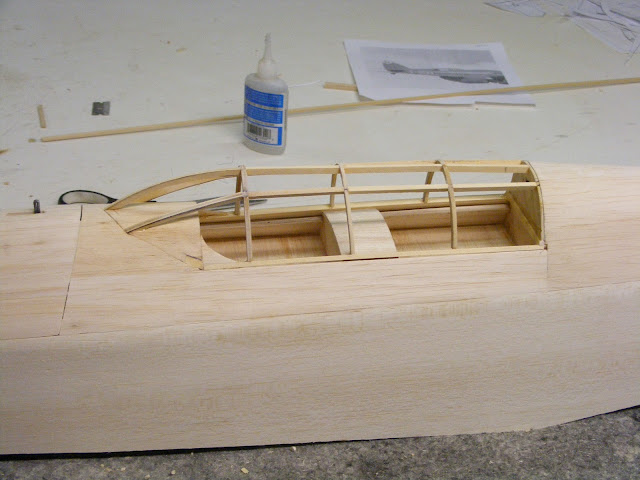
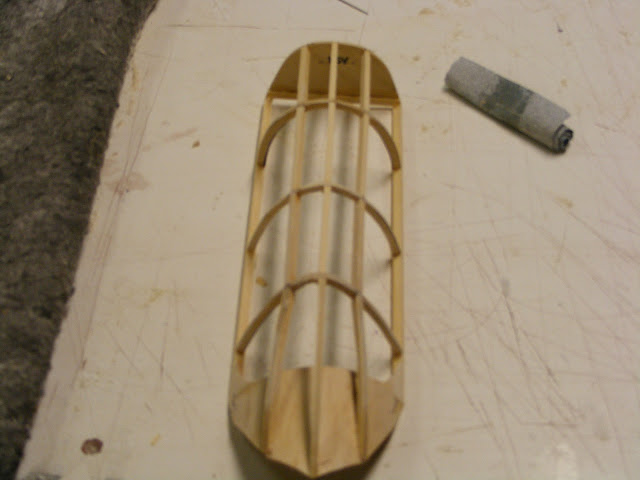
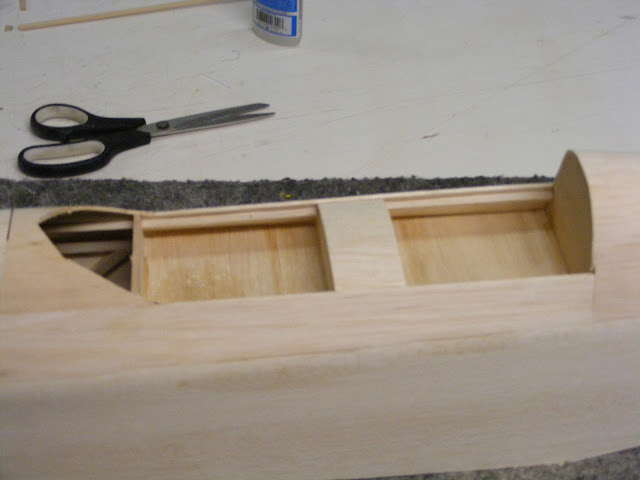
Notice in the photos above and below: The hatch section just above the wing saddle area on the top of the fuselage. The hatch was made at the same time as the rest of the fuse. You can hardly tell it’s there. This is by far the best time to make the hatch. You just build the fuse. Then make two extra formers for the hatch ends prior to installing the stringers. This is assuming a hatch is to be installed. Have the stringers installed on the main fuse sections first to stabilise the fuse formers before you move to building the hatch. Cover the inner fuse formers with clear wrap. Place the hatch formers on top of the fuse formers and pin in place. Cut, test fit and glue the hatch stringers in place. Remove the hatch section. That’s it. Very simple with a very clean fit. If you like you can install a dowel in the front of the hatch extending forward into the fuse former for added security. Do this before you remove the hatch from the fuse. Later a latch can be installed on the aft section of the hatch cover, or you may choose to use magnets to secure the hatch in place. Your call.
As I did with the wing. I deviated from the plans. I fully sheeted the fuselage. In fact, let me save some time here. All surfaces on this airframe are sheeted. All the surfaces were sheeted with 3/32 balsa. I probably added a pound of total weight to this model. Oops. The trade-off was looks and strength. For this plane I’m OK with the trade. The all up weight is approximately 11 lb 3 oz. Not bad for a plane with a 71-in wing span. One of the many advantages of building for electric power is less heavy plywood formers to handle the vibration of glow engines. The wing loading on this model is a little higher than I would have liked. But hey, that’s what flaps are for right?
Sorry, I don’t have any complete fuse pic’s after the sheeting was completed. I built this plane three years ago. I never knew a blog would be fourth coming. All the information being provided is from memory so please forgive me if not everything is in the proper order.
Below is the fuse with the canopy fabricated and the hatch installed.
The canopy is made of lite ply formers and was designed to be removable. A dowel is located under the front former and slides under the sheeting of the fuse. No rear retaining system is required. The fit is snug enough to keep the canopy in place. The canopy frame was painted black then covered with ultra light Monocote Transparent Blue covering.
Canopy test fitted in the fuse
A spring-loaded latch was installed in the hatch cover to secure the hatch in place during flight.
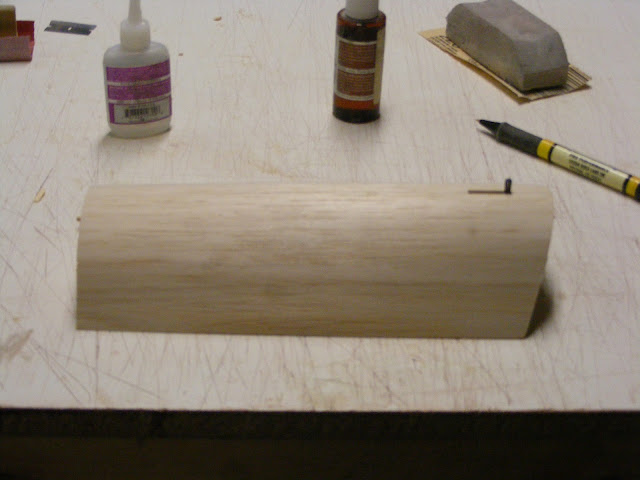
Hatch cover sheeted and ready for fit and sanding.
Hatch installed in the fuse.
Something else I need to share with you. I cut my teeth on ARF’s. I really like the way every thing is pre covered and ready for assembly. I have incorporated this methodology into every build. Every part is designed to be covered before assembly. This often requires a great deal of modifications to a set of plans. However. when the time comes to apply the covering you won’t be disappointed. It’s so much easier to cover each piece independently. Rather than cutting and fitting the covering on a fully assembled aircraft. I have done both and the former is so much easier than the latter.
In the next section we will cover the rear tail section.
End Part III


