
Kit Bashing is always fun and entertaining, for both Logan (my 12 year old son) and me. What is ‘kit-bashing? This is the question asked when my latest project was described to a modeler friend. Well, It’s part way between building from scratch and building a traditional kit. Using an existing kit as a basic starting point that you modify to create something unique.
Inspiration can come from a variety of sources, books, movies, magazines, TV shows, even cartoons. Recently our family attended the Disney movie “Planes”, which provided my inspiration. “SPOILER ALERT” as the story progresses the main character Dusty Crophopper (looks like an AT-502) but then undergoes a metamorphous after a crash at sea during a race, leaves him in need of serious repair. His wings are replaced with T-33 Shooting Star wings and retracts, a new exhaust system, propeller and many other parts. Only Disney would dream up this concept merging these many parts into a new aircraft. At the end of the film Dusty is on an aircraft carrier with a “Jolly Wrenches” paint scheme. This was the airplane I wanted to build.
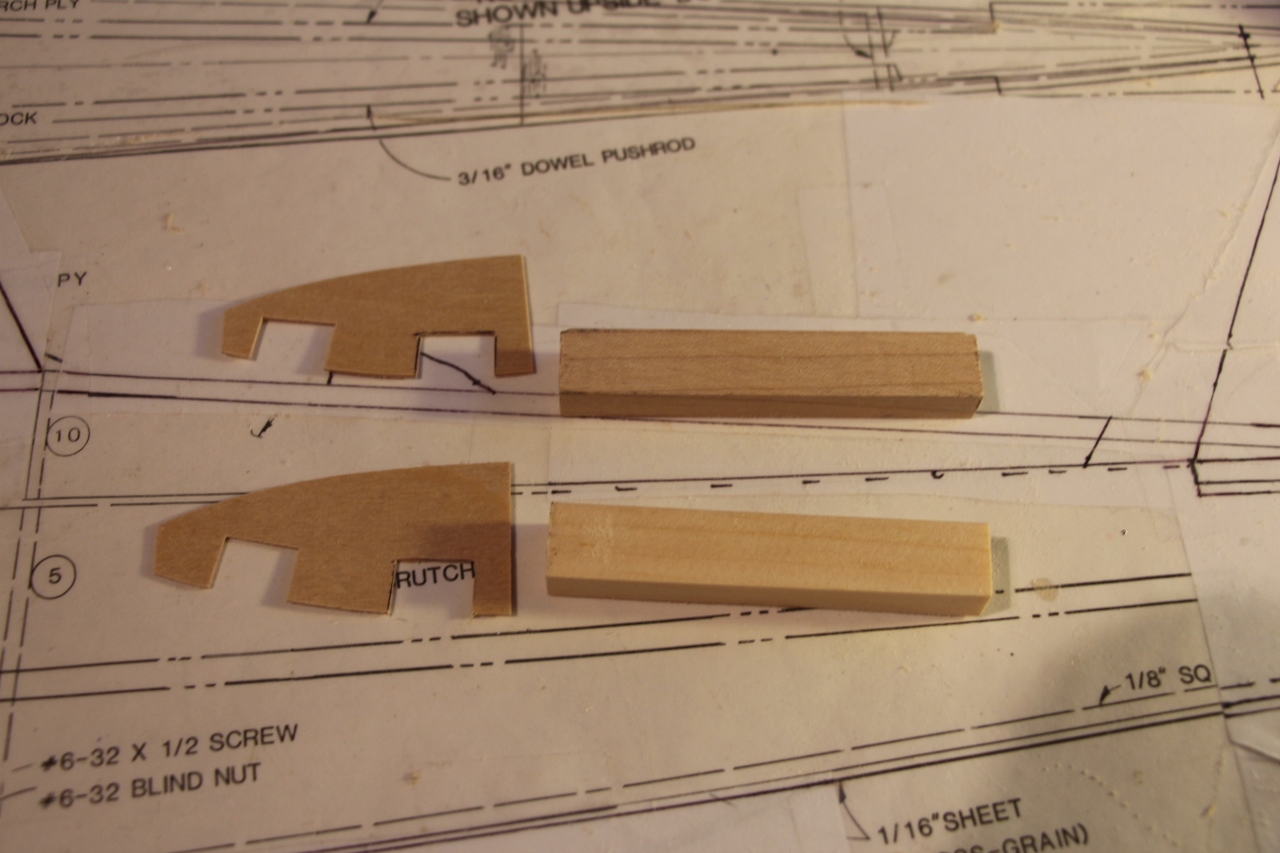
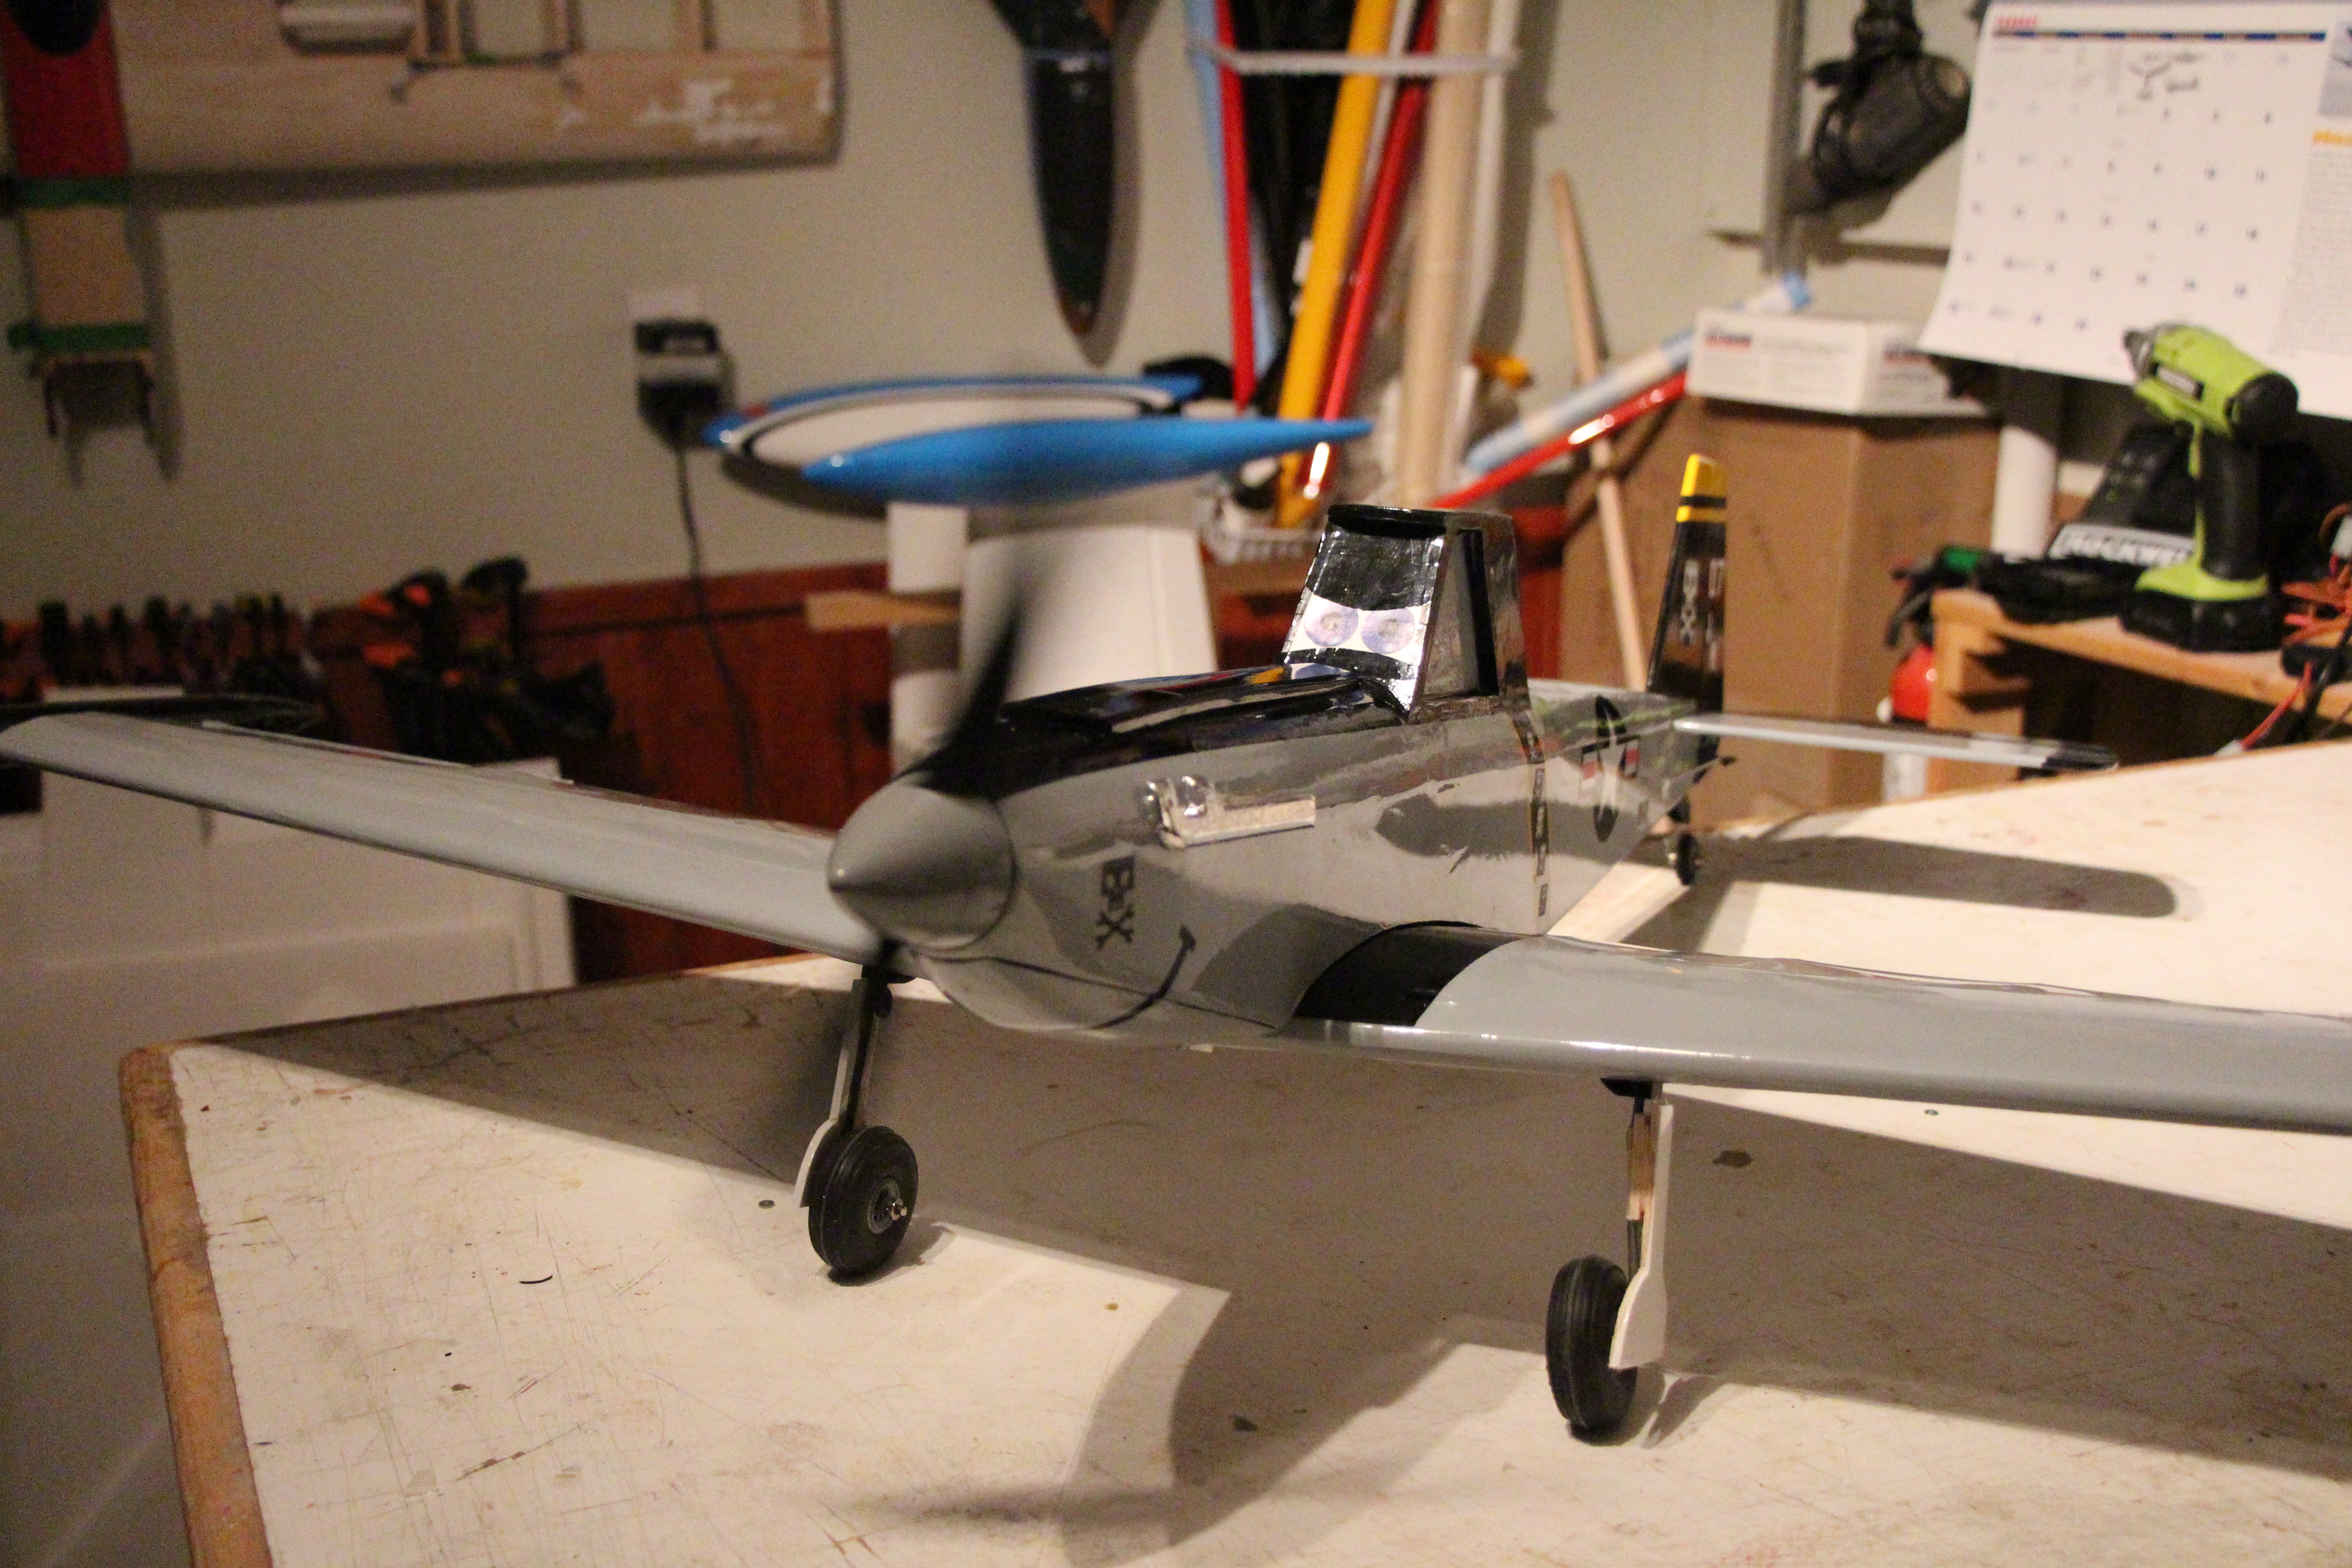
Hidden deep in my workshop was an old House of Balsa Mustang 20 kit which served nicely as my starting for my Naval version of Dusty. This sport scale model had about the right proportions to pass as Dusty and would need only a few simple changes. Most of this build followed the original instructions. I taped plain white paper over the sections of the plans to work out the changes for the fuselage. These were at the canopy, chin scoop and the rudder and tailwheel. I redrew the canopy to form the agricultural-style canopy of an Air-Tractor. The P-51Mustang chin scoop was completely eliminated. The fuselage was shortened by one inch and the rudder and vertical fin were moved forward.


I also lowered the elevator and horizontal stab 3/16 inch, however that is completely optional. It was more work with limited benefit. The original method of attaching stab & elevator is fine. The fuselage was then built following the construction instructions, a couple of the die-cut parts did need to be changed or not used. The plywood nose ring needed to be reshaped to be a 1 ¾-inch ring without an opening for chin scoop. The intake scoop under the wing on the aft fuselage was also not needed and I just sheeted the bottom of the fuselage up to the wing’s trailing edge. The chin block needed a lot of sanding to create the smooth taper to the nose ring. A sharp razor plane helps a lot with this.


The canopy area was enclosed using 3/16-inch balsa in the same way the fore and aft turtle decks are constructed. Using the outline for the new canopy sides are made from 3/16-inch balsa. Cut the canopy area on the fuselage to accommodate the ‘Dusty’ style canopy and glue in place. Use balsa sheet on the top and back. I did remove the extension that was forward of the vertical stab but the tail surfaces remain unchanged. The tail surfaces are glued in place after covering.


Wings and Retracts
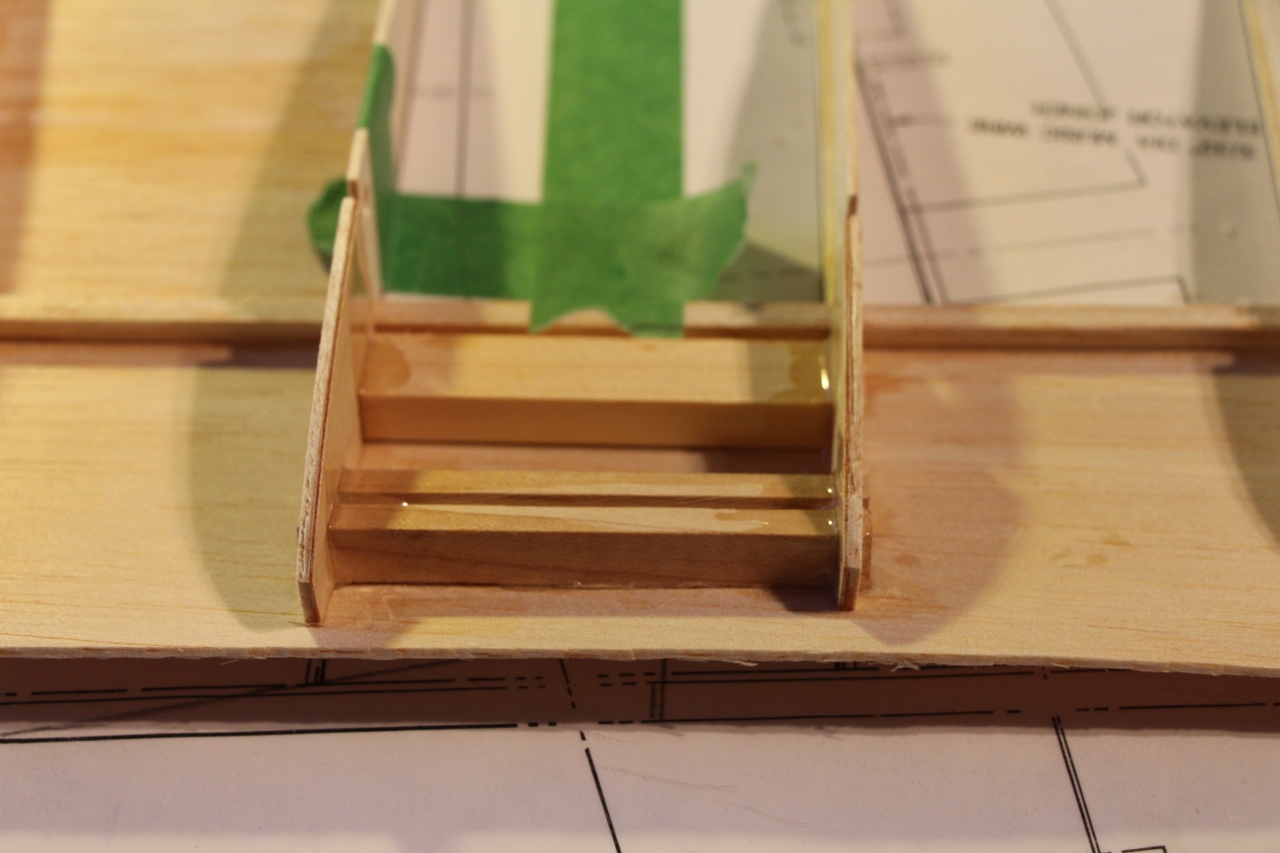
Next were the wings and for the most part, they were built using the kits instructions with the exception of the addition of the wingtip tanks and the retractable landing gear. Adding retracts really begins before starting the wing construction. The kit includes two hard wood blocks to mount the fixed gear. You will need to cut two more blocks the same size (the groove in block for wire gear isn’t needed). The ply doublers for the ribs need to be notched to accommodate a second hardwood block. The notch should be spaced forward of original block to accommodate the retract units, in my case this was ¾ inch. Repeat the process for all four ply landing gear doublers.


Finish the construction of the wing as described in the instruction manual, the wheel wells will be cut out later. When sheeting the wing take care not to glue the sheeting to the hardwood landing gear blocks. The gear doors are two small sheets of 1/16-inch balsa laminated together, using wax paper to protect the wing these are tapped to the wing in the area of gear doors while the glue cures. The laminated sheets will have a curve matching the wing (mark the left and right). Using the retract unit, strut and wheel carefully cut 1/16 sheeting to mount retract and the wheel well area. Proceed slowly trimming the area a little at a time until it fits well and has enough clearance to operate retracts. Using the laminated 1/16-inch balsa cut out gear doors to fit wheel well. I epoxied the gear doors directly to the landing gear wire using a little ply as a spacer to keep it flush with wing sheeting when retracted.

Tip Tanks
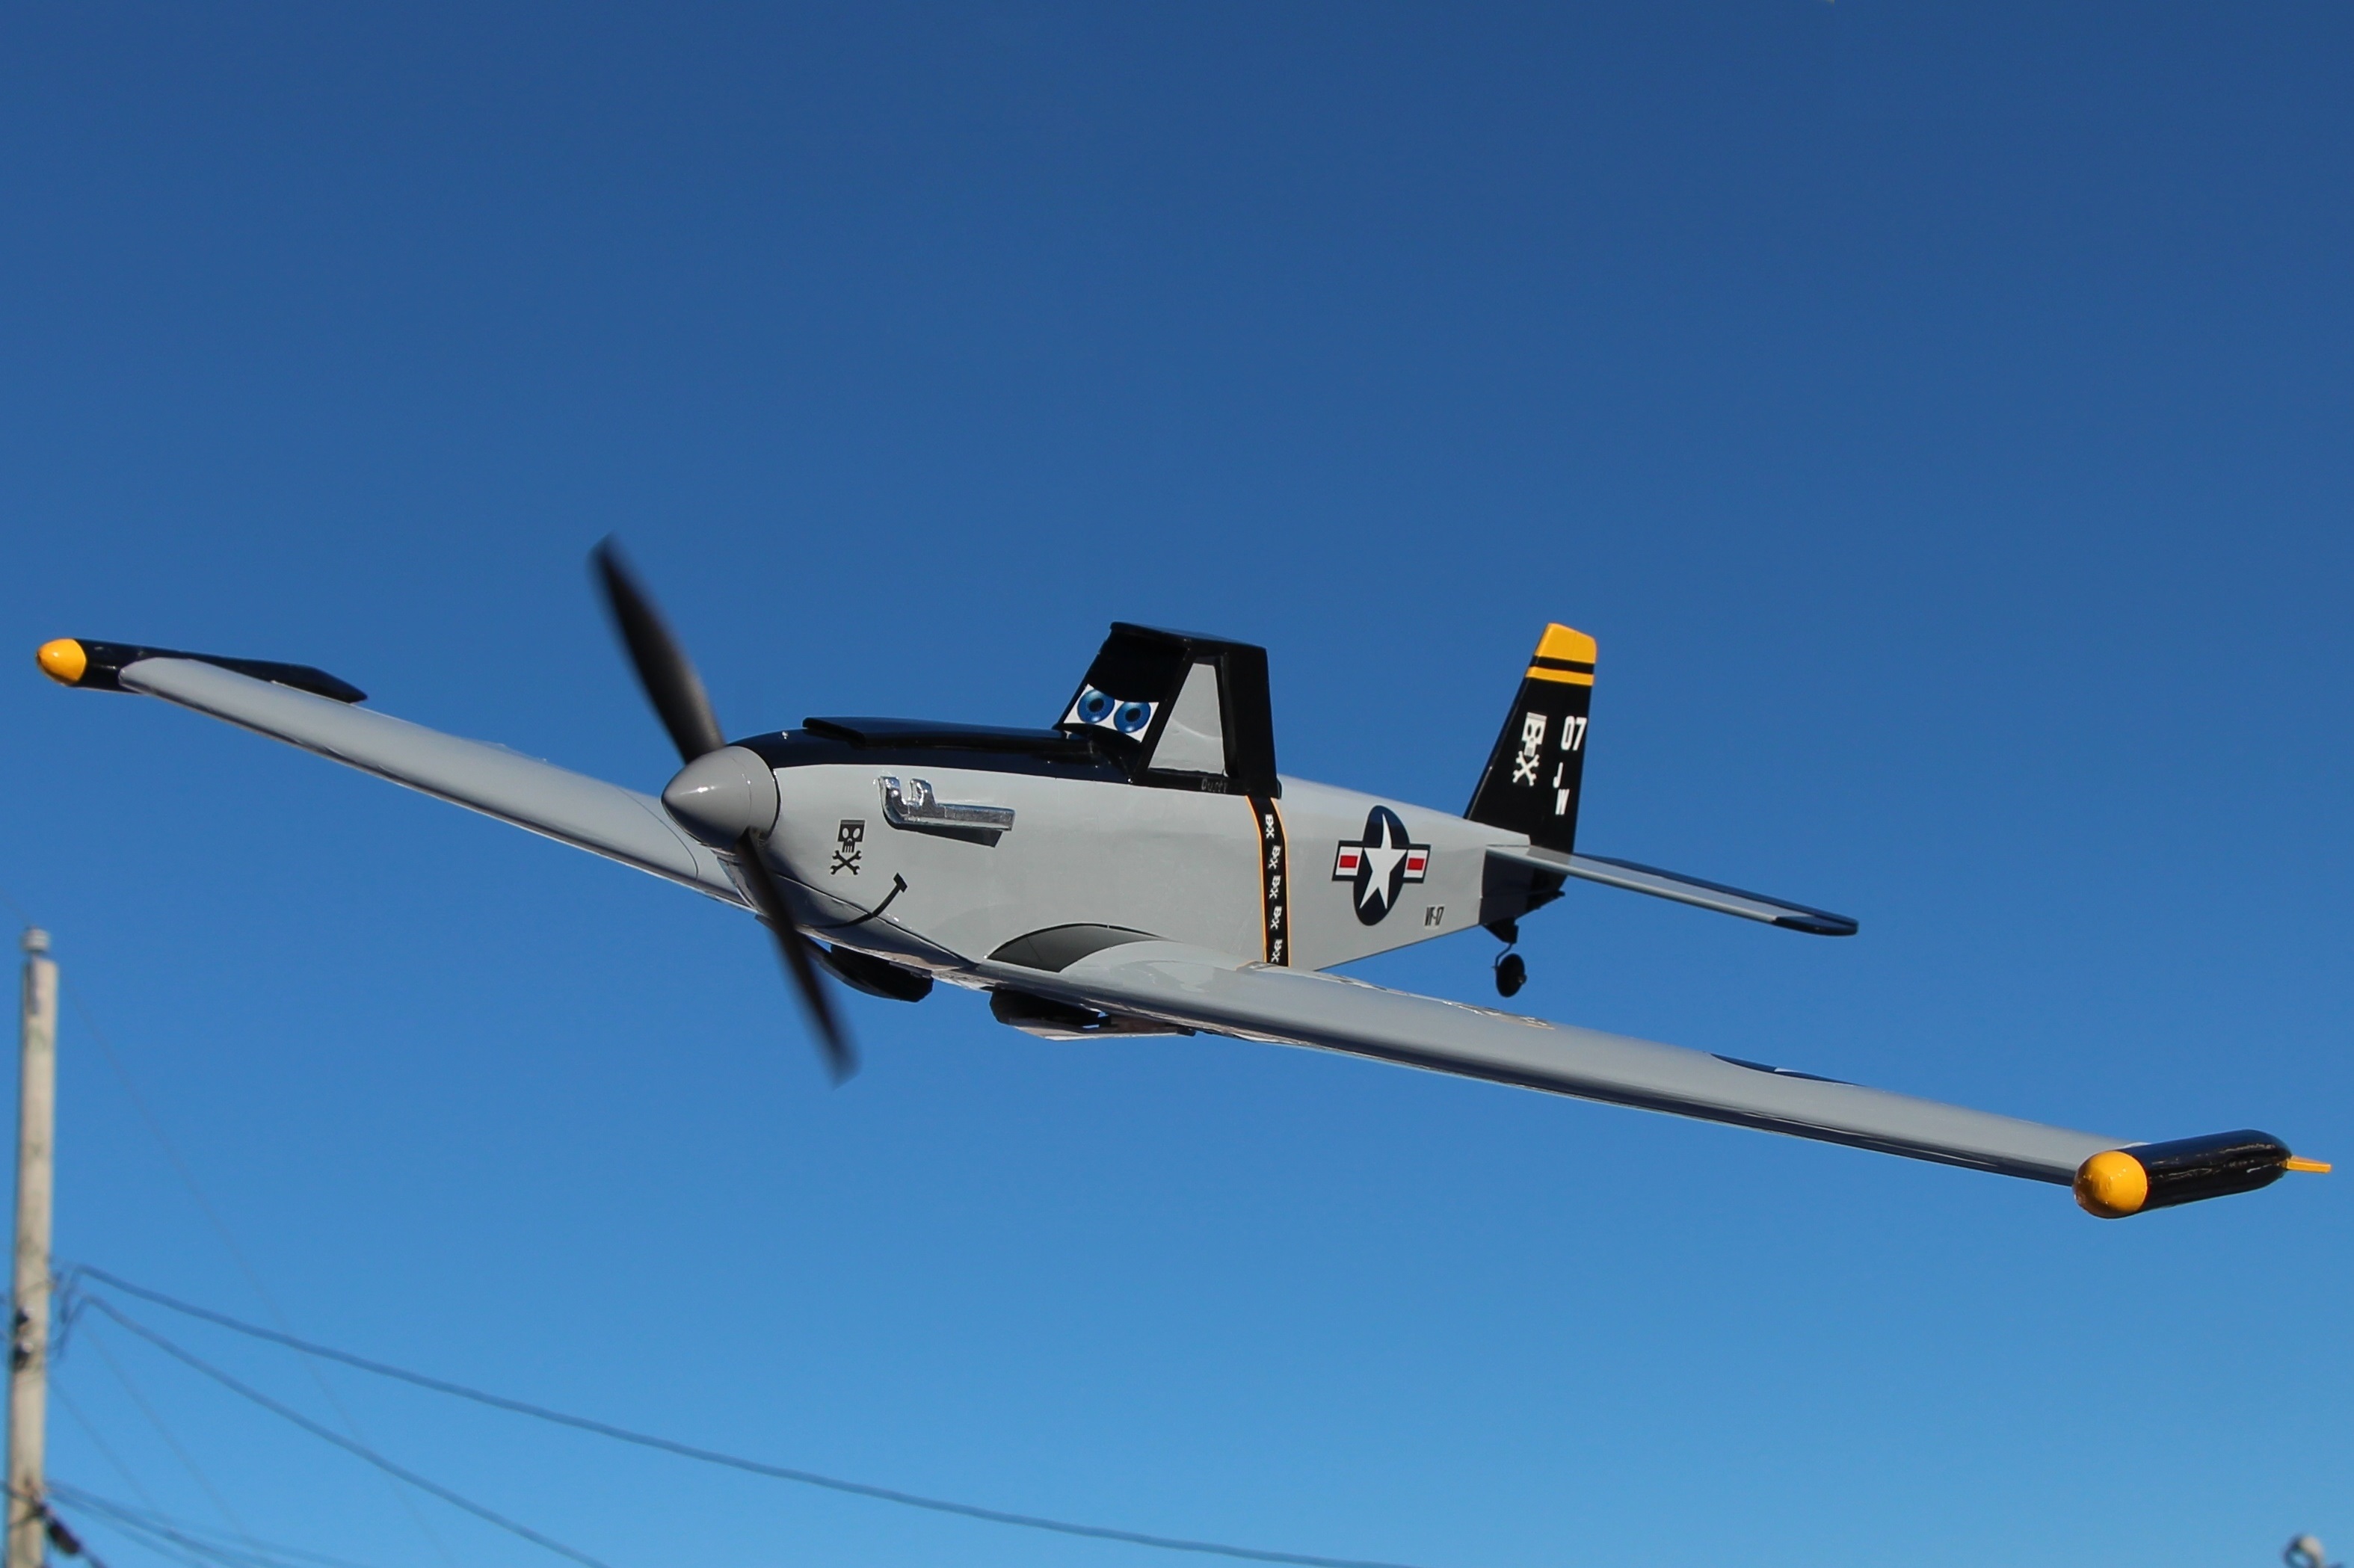
The tip tanks are a simple construct from balsa, starting as a box structure that is then sanded to shape. Using triangle stock and sheet balsa construct a box that is 1 x 1 x 8 with the ¼-inch triangle stock on the inside corners. Glue a 1 inch block to one end of the box for the tank nose. Another block is used at the tail end. Using your preferred method, sand and shape the tip tanks to shape and use scrap of 1/8-inch balsa to make T33-ish fins for the tip tank.

Covering and Finish
Scale guys will tell you that research and documentation is a huge part of any project. This was true for this project too. The Blu-Ray Disk for Planes, internet photos, die-cast models of Dusty all provided a wealth of information on how to detail Dusty. However, Logan was my consultant on this project, and there’s nothing like the honesty of kids to tell you that you’ve got the color or decal wrong.
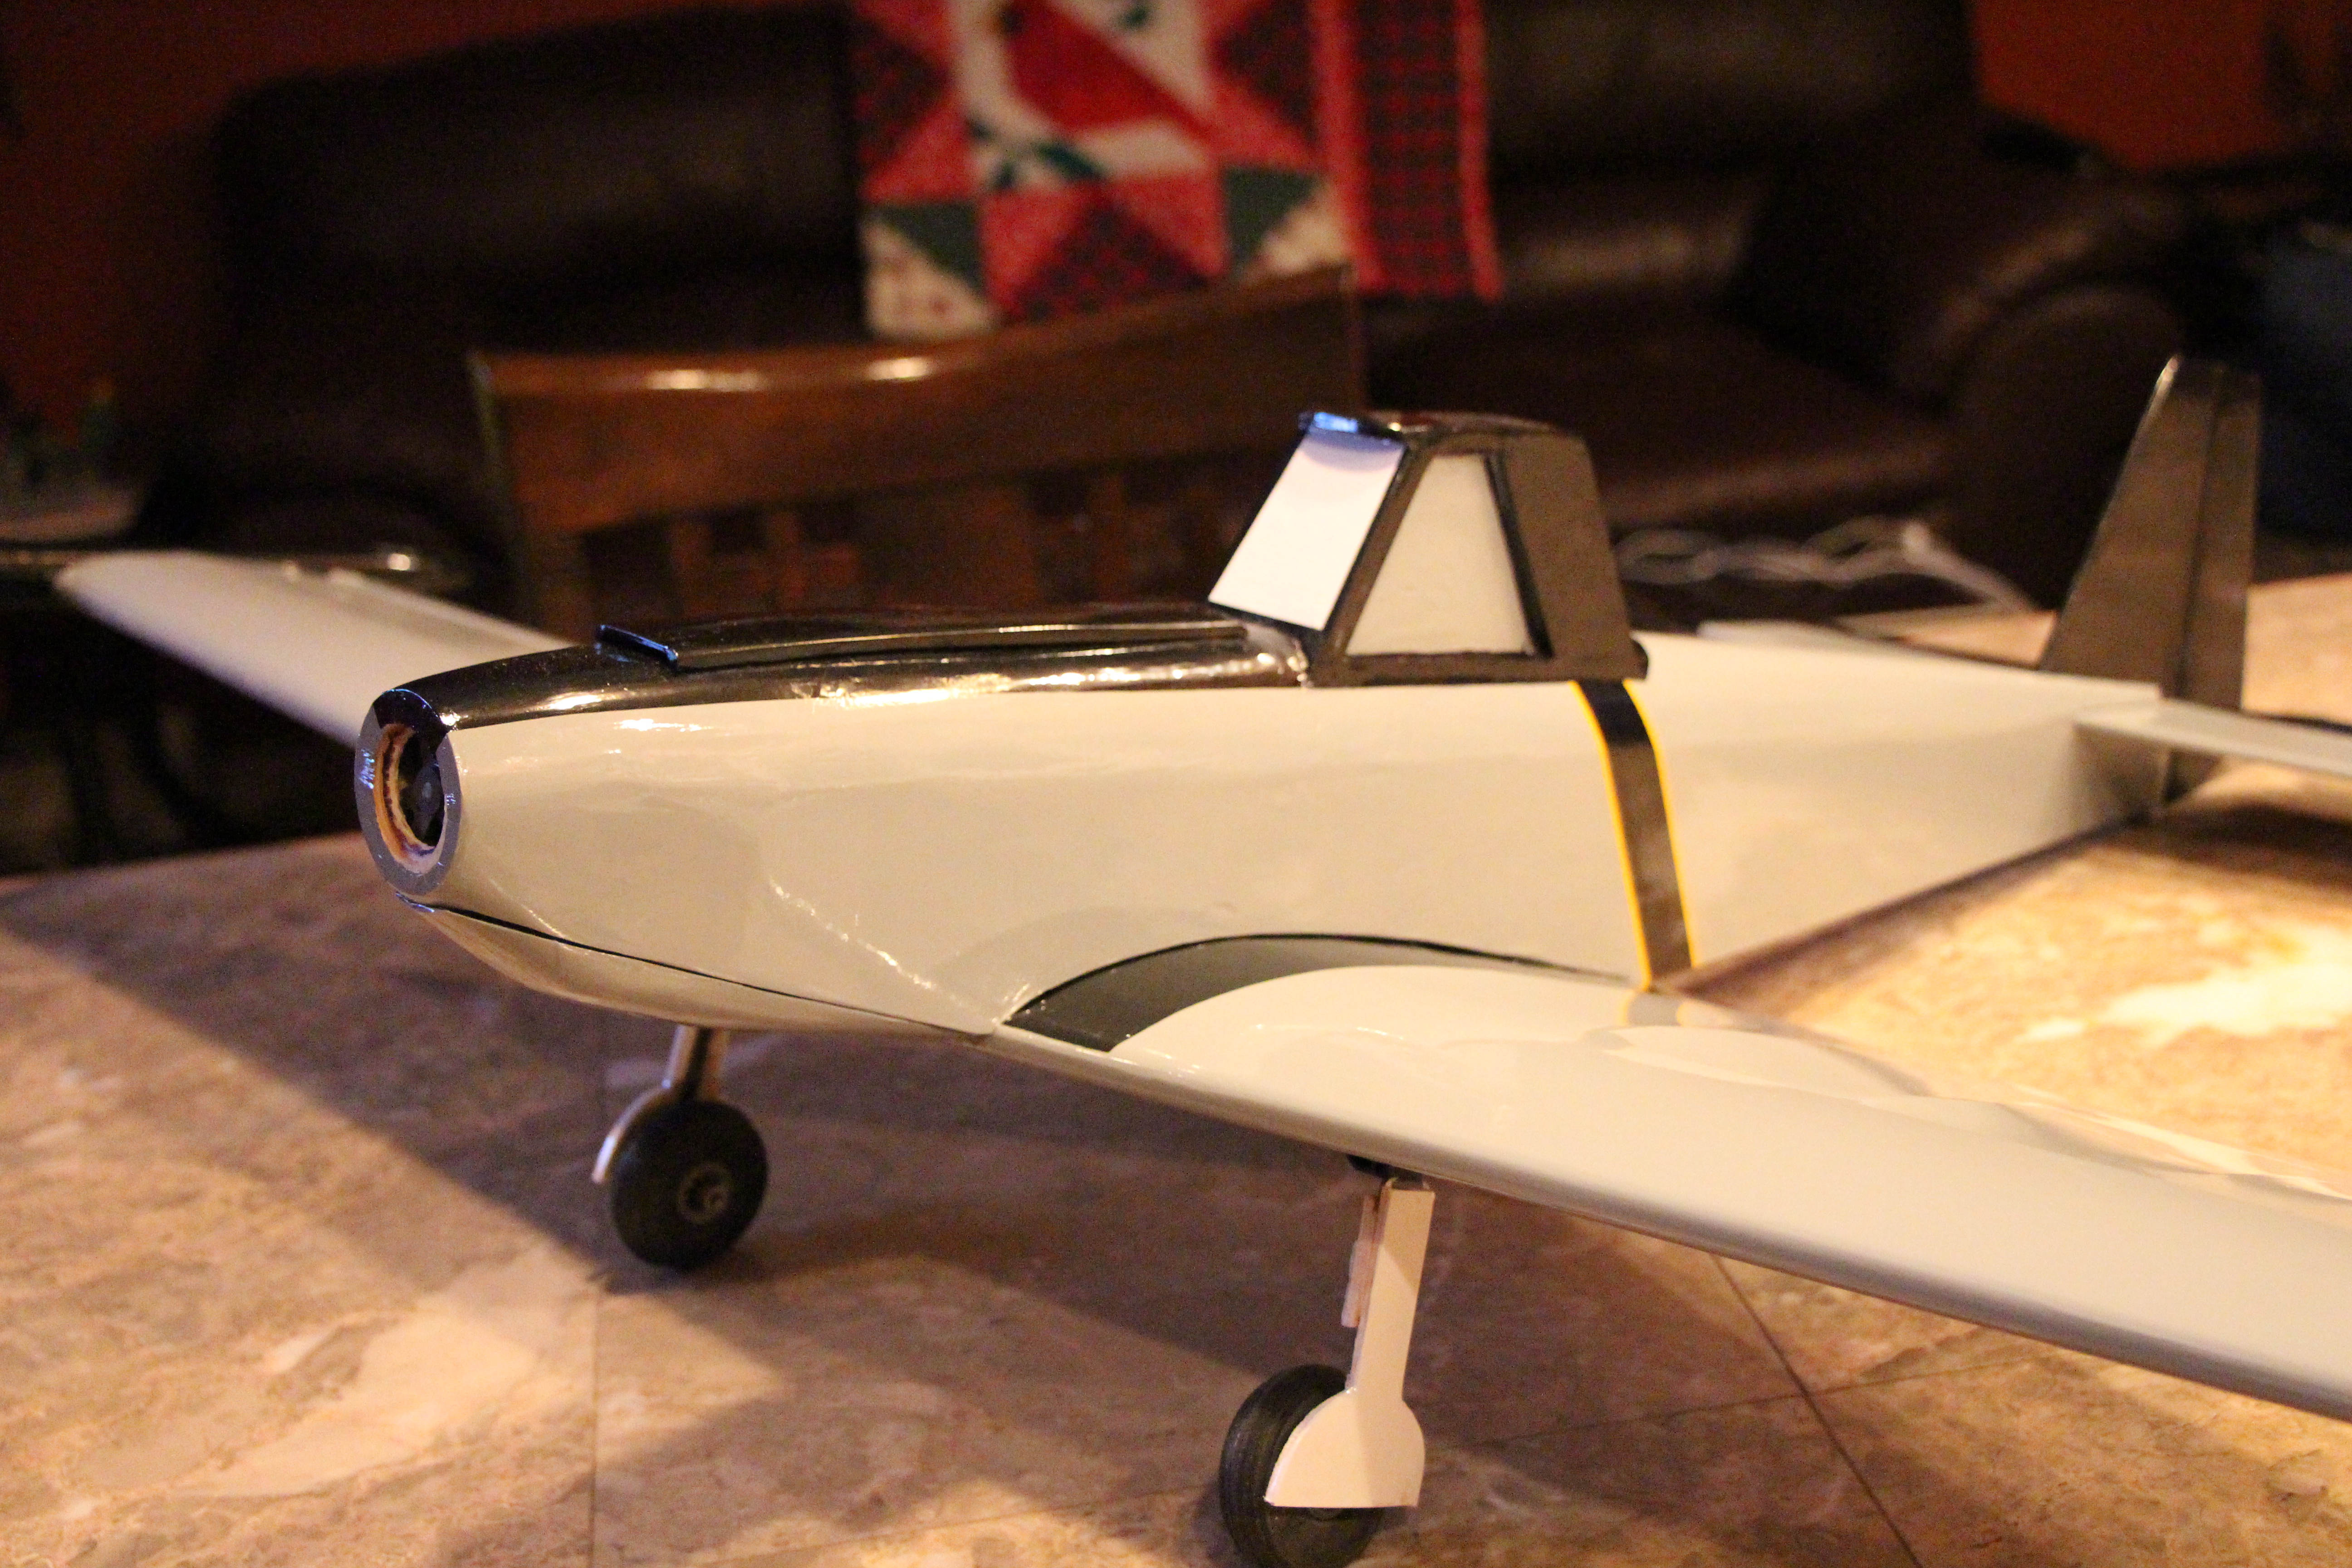
We watched the movie many times; often I heard “see Dad it’s shaped like that” etc. The basic MonoKote finish uses white, black, grey and just a little yellow. To make the Jolly Wrenches’ “Piston and Cross Wrench” logo, I first got the graphic online and printed it with an ink jet printer, using Avery 08665 Clear Full Sheet Labels. To protect my homemade decals I sprayed them with Krylon Acrylic Crystal Clear. The white logos were made by applying a black outlined logo to white vinyl. The numbers and letters on the tail were cut from white stick on vinyl. Dusty’s eyes were from a downloaded blue-eye clip-art printed and glued to the canopy.


Power System.
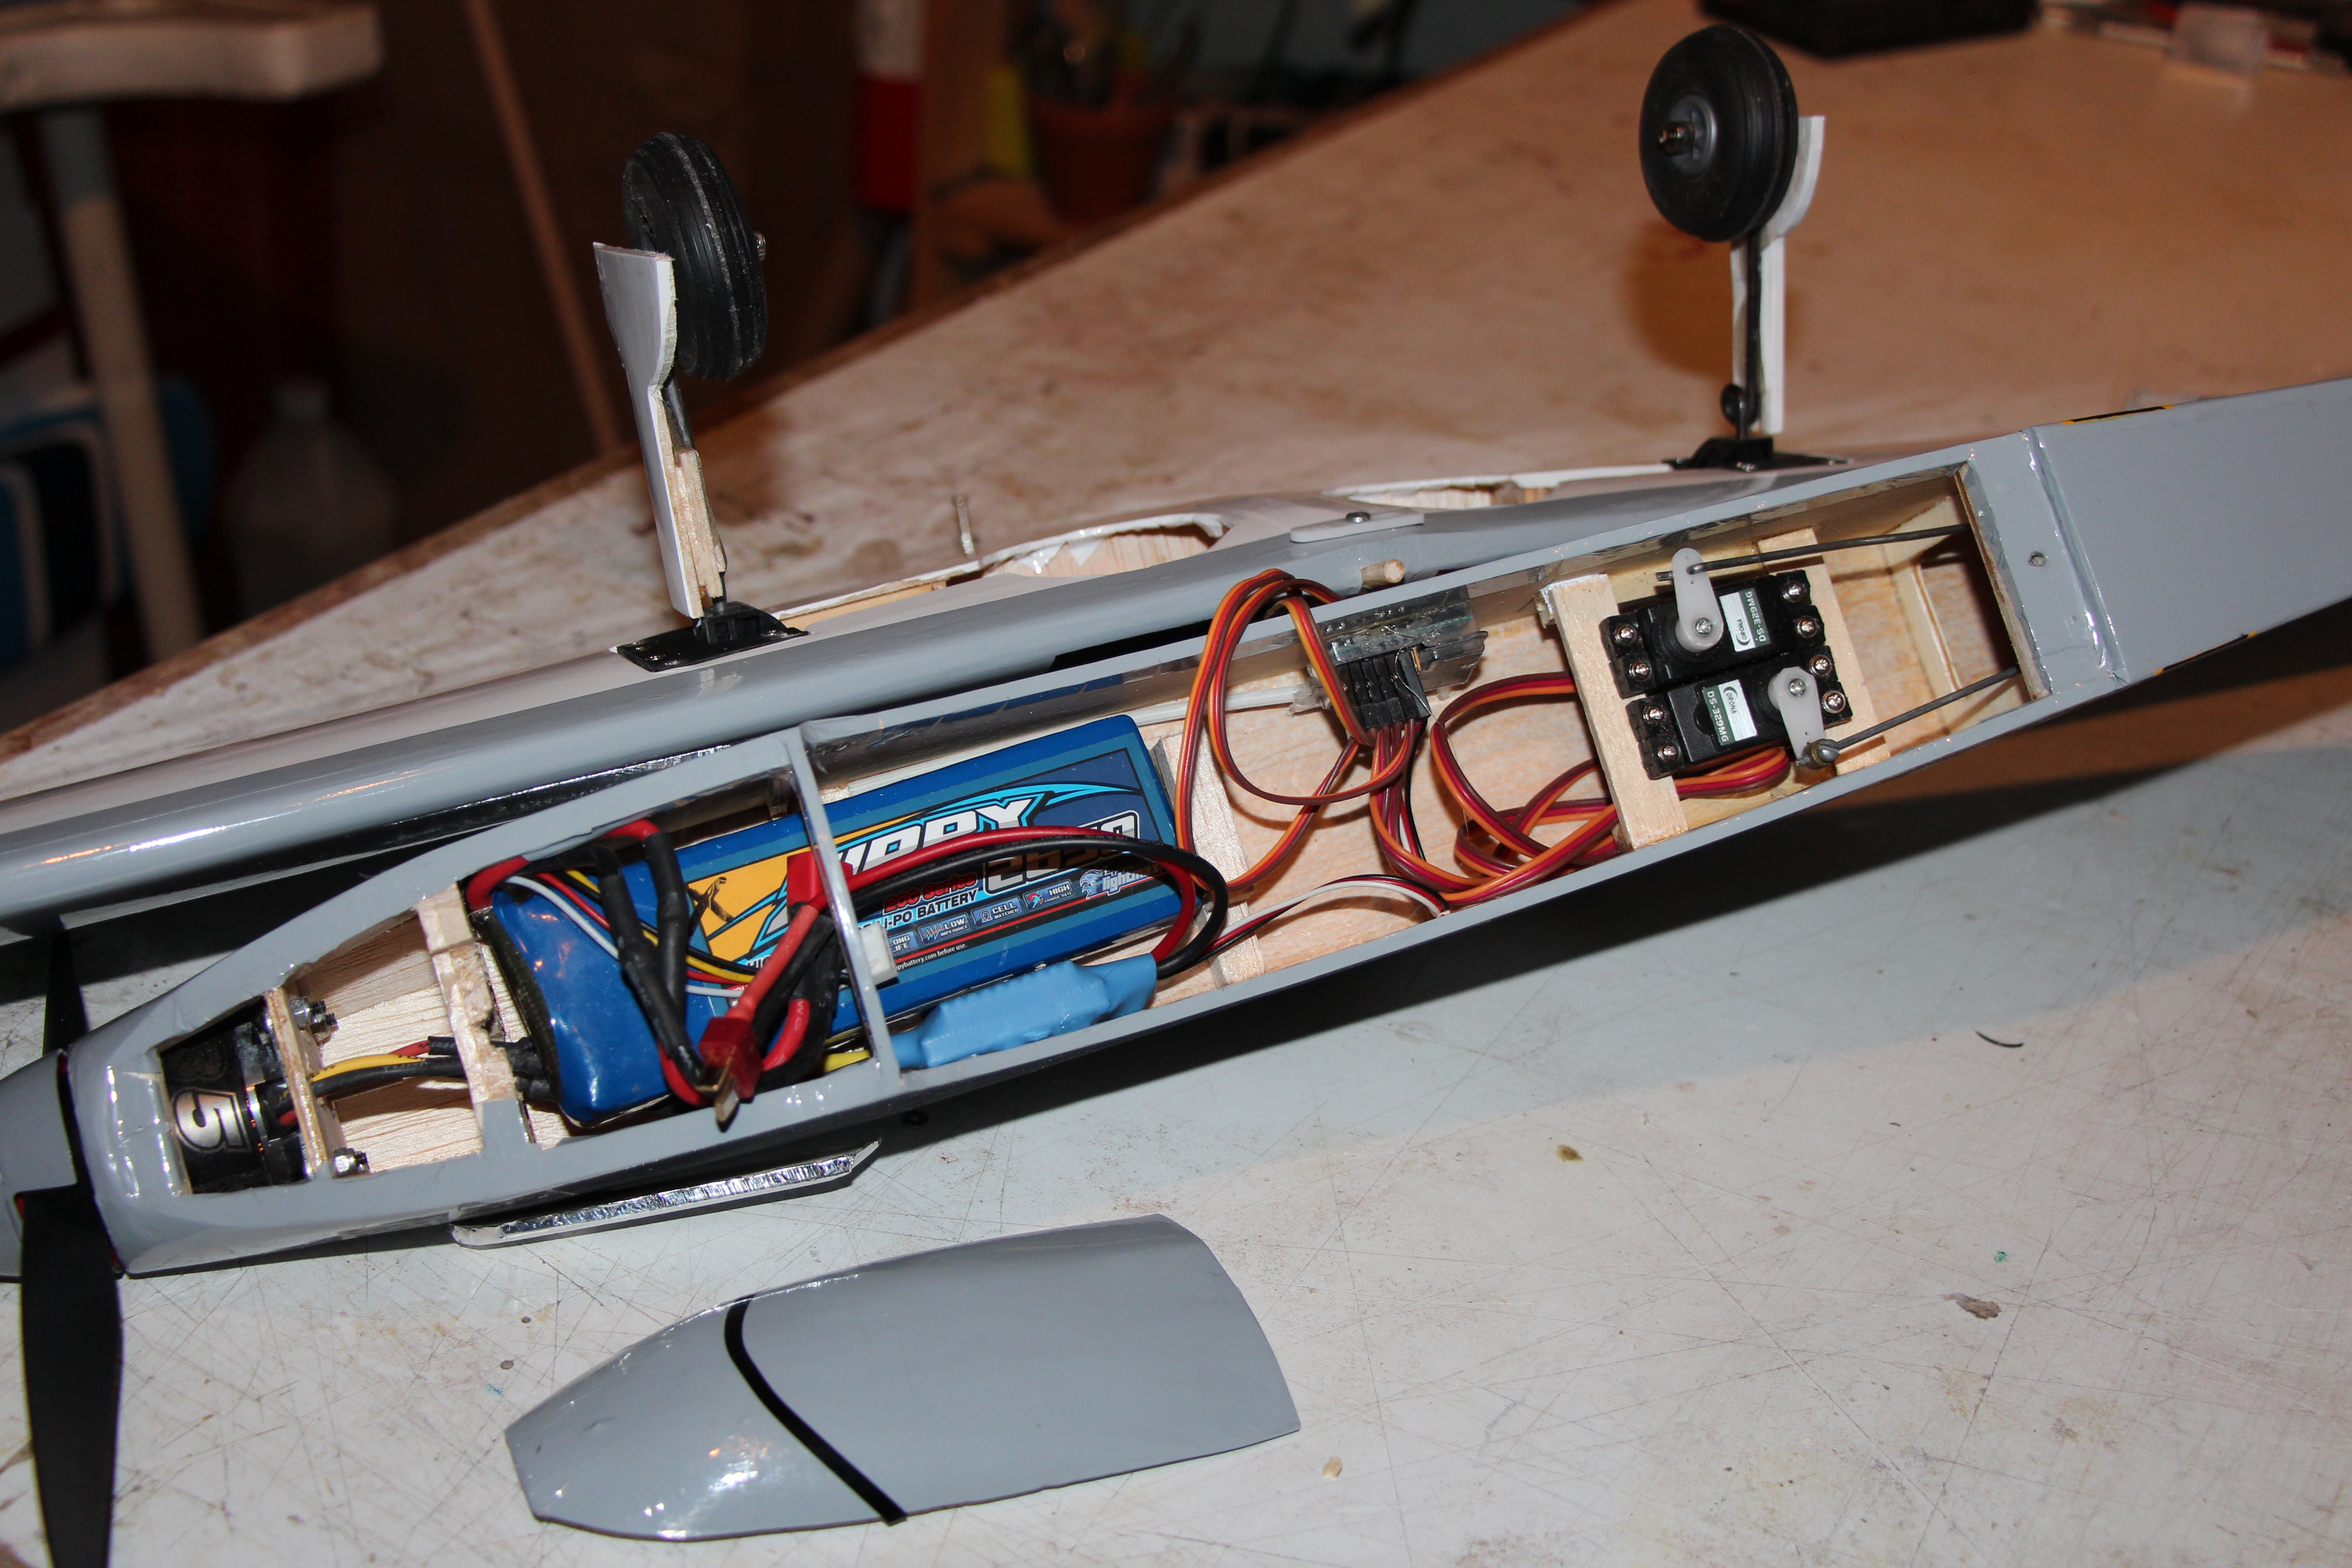
Dusty uses a brushless motor and to install it I added a firewall between the nose ring and the original plywood former. The original House of Balsa Mustang 20 was designed for a .20 glow motor. I have seen this plane fly on anything from a .15 to a .40 including piped OS .32 some of these versions were very, very fast with structural re-enforcement. That wasn’t my goal; this was to be an electric conversion. This was accomplished by adding a 1/8 Ply firewall to the nose to accommodate the brushless motor. The original fuel tank area forward of the wing was used for a 2200MaH 3S Lipo. The chin was made removable to allow for battery access. The completed weight of the plane was 2lb. 3oz and the rule I follow for electric conversions (sport models) is 100 to 125 watts/lb. I used a NTM 35-30 1100kv brushless motor and a 35amp brushless ESC. The finished model on a 9×6 electric APC prop using this combination makes 350 Watts, so I expect good performance.
Final Thoughts
This kit bash project was fun. The House of Balsa Mustang is an excellent choice custom kit-bashing. Dusty will be flown in the spring after the white stuff outside leaves. Pulling up the landing gear really makes Dusty look like he’s a winner. He is sure to be a hit at the flying field.


Really nice job Carl
Thanks Rogerio.
Cute! My second RC plane was a kit-bashed SIG 4-Star 60. I didn’t like the slab-sided and squared look of the original, so I did some modifications.
1: shortened the wings by 2 bays on each side, and then built out rounded wingtips extending 1/2 bay.
2: completely rebuilt the fin and rudder. Replaced solid rudder with built-up structure of deeper chord, with forward counterbalance and rounded top.
3: built out rounded tips on stabilizer, and rounded the elevators.
4: cut off the cheek pieces from the fuselage; built out sides of fuselage from trailing edge of wing forward to give it a more oval profile. Made fiberglass cowling to accept a SuperTigre G-75 mounted sideways with a Pitts-style muffler.
5: Cut down the canopy into a windscreen for an open cockpit.
She flew wonderfully until I had a “dumb-thumb” accident and piled her into the ground. There are some photos on my website
Felicitazioni Carl Layden! Disney should hire you and “Jolly Wrenches” for Planes 2
Thanks Barry,
I’ll be retirement eligible in 3 years maybe I can find a second career with Disney 🙂
Carl