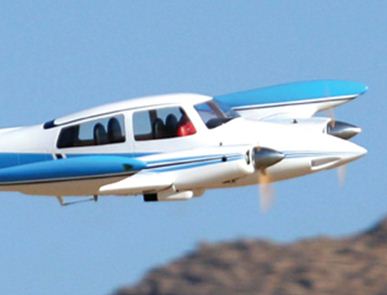
One of my favorite planes is the Top Flite Cessna 310. One thing that was missing from this nice scale plane was the great looking retracts that are available from Robart Manufacturing. I decided to install them and I was surprised just how simple it was. I began my endeavor by purchasing all the necessary equipment, which included a Robart tri gear retract set ($349.99), Robart 188VR standard air control kit ($37.99), Robart 190 air line quick disconnects ($9.49), and the Top Flite landing gear doors for the Cessna 310 ($44.99).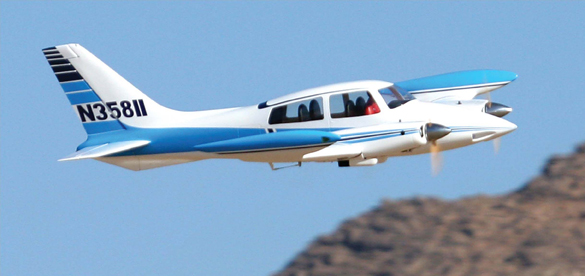
Once the air retracts are tucked up in the wheel wells, it gives a sleek look to the Cessna 310. This final scale detail really adds to the overall great look of this fine airplane.
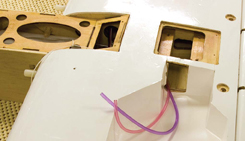
STEP 1 To begin, I removed the fixed landing gear and piped the air lines to the proper locations. The manual gives the correct length that the air hoses need to be cut to. The wheel wells are covered with MonoKote and this is easily trimmed with a hobby blade against the side of the wheel well walls. The cross piece between the mounting blocks and the wheel well should be removed before installing the retracts.
STEP 2 Before screwing in the air retracts, I used a Dremel tool to make a small groove in the mounting block. This is so the gear can fit between the mounting blocks. Following the instructions that came with the Robart retracts, I plugged in the air lines to the retract cylinder. I used two no. 8 washers on top of the mounts and under the mounting flange closest to the wheel well to allow the air retract to fully close without the axle hitting the bottom of the wheel well.

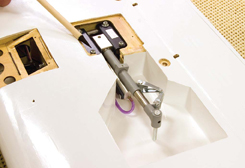
STEP 3 I bolted the gear door onto the landing gear leg using two bolts. One goes into the gear base and the other into a mounting bracket for the landing gear door cover that I slid onto the landing gear leg. The gear door ends up mounted firmly onto the landing gear. I screwed on the landing gear flange plate to cover the rest of the gear base. To finish the gear, I installed the wheels onto the gear axles.
STEP 4 The nose gear is just as easy to install as the main gear. The only additional step is to attach the steering cables to the steering control horns. This is a pull-pull system that hooks up to the rudder servo. Be sure to cross the lines so your steering won’t be backward.
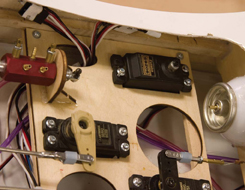
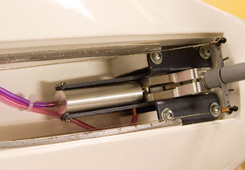
STEP 5 Here, all the key components for the air system are in place, the air control valve plate is glued to the servo tray and the air valve is bolted onto it. I installed the air tank when I first put the plane together because I was planning on adding retracts at a future date. I used a clear silicon seal to hold the tank in place. The retract servo is just above the air control valve and in line with it.
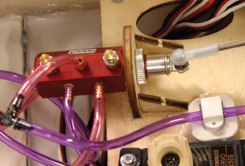
STEP 6 Here is a closeup of the air speed control valve. This valve allows you to control how fast air retracts go up and come down. I set them up so that the air retracts come down fast but go up slow. Notice the wire on the T-connector; I had air leaks on all of the T-connectors. I found that .02 wire wrapped once around the T still slightly leaked air but when it is wrapped around twice, most of the air leaks are gone or at least significantly reduced.
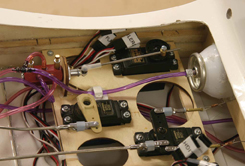
STEP 7 Here is the air system all hooked up and ready to go. I put the air fill valve out the side of the fuselage so it is easy to fill with the plane on the ground.
One of the great features of the Cessna 310 is the impressive designing that went into this plane, and the option to add retracts is a perfect example of this. Instructions for the retract installation are included in the manual and the fixed gear has the same bolt pattern as the Robart retracts. This makes it easy to install retracts in the same location as the fixed gear. –By John Reid
|


Wonderful article, thanks so much.