

Many full-scale airplanes and helicopters feature bubble windows to allow the crew greater visibility. Replicating these windows can be tricky for scale modelers, as it’s inconvenient to make a vacuum-forming plug for each uniquely shaped window frame. In full-scale aircraft manufacturing, these bubble windows are almost always free-blown from sheet plastic clamped in a frame. This makes the tooling minimal, with the added benefit that the depth of the bubble can be adjusted for each installation — shallower for reduced drag and deeper for greater visibility.
When I was finishing up my scratch-built Kaman HH-43 Huskie, I decided to copy the full-scale guys and blow my own bubble windows. It turned out to be remarkably easy, and I’ll be using this technique again in the future.
The best scratch-building techniques use stuff you have on hand. The key to this project was my air compressor and the regulator I installed for painting models. Everything else is basic shop tools, and no particular skill is required. So, let’s blow some bubbles!
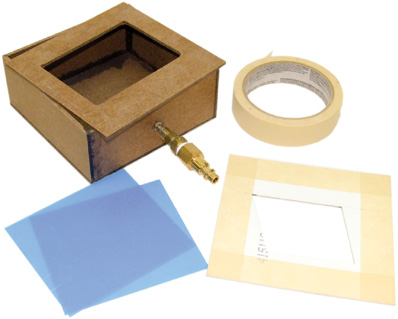
1: Here’s the simple setup for blowing bubble windows. The main fixture is a simple air box made from ⅛-inch-thick fiber-board. For larger windows, thicker stock or plywood may be required, but this works fine for windows in the 4×4-inch range.
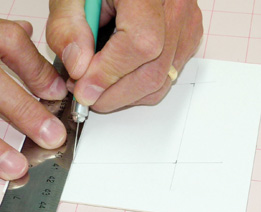
2: Starting with a blank of artist’s matboard, cut an opening the size of the finished window. Matboard holds up to heat, and you’re only going to use it a few times anyway. Apply masking tape around the perimeter of the matboard to protect it from subsequent tape layers.
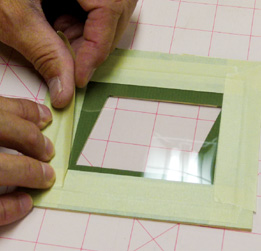
3: Clear PETG sheet is taped to the underside of the matboard frame. This way, the matboard shields the window flanges and the masking tape from the heat.
4: The matboard fame is laid on the pressure box and a fiberboard support plate is taped over it. This support plate reinforces the matboard against the increased air pressure during the forming operation.
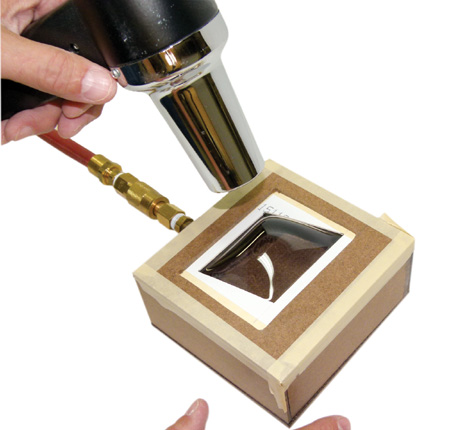
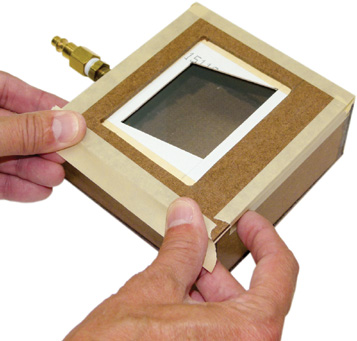
5: The plastic is heated to its forming temperature as the air pressure is dialed up. Heating can be done with a toaster oven, but for small parts I found that a heat gun worked well and allowed me to direct heat where needed. As the plastic softens, the air pressure is adjusted to control the bubble. Once the desired depth is reached, leave the air pressure on until the part fully cools.

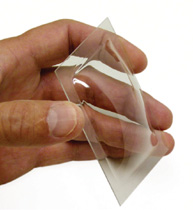
6: Remove the formed window from the pressure box and trim the flanges. For matching left and right windows, simply flip the matboard frame to make a mirror-image part.
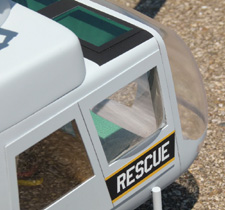
7: The completed window perfectly copies the original aircraft, and the whole operation only took an evening to complete.


Nice job Jim …