
Work always get in the way of fun time so it takes a little longer than normal when I work on a project during the work week. I have broken this Technique into three parts and here is the rest of the painting and finishing portion. Part 3 will deal with attaching and securing the finished dummy rotary engine to the Sopwith Camel and reattaching the engine cowling.
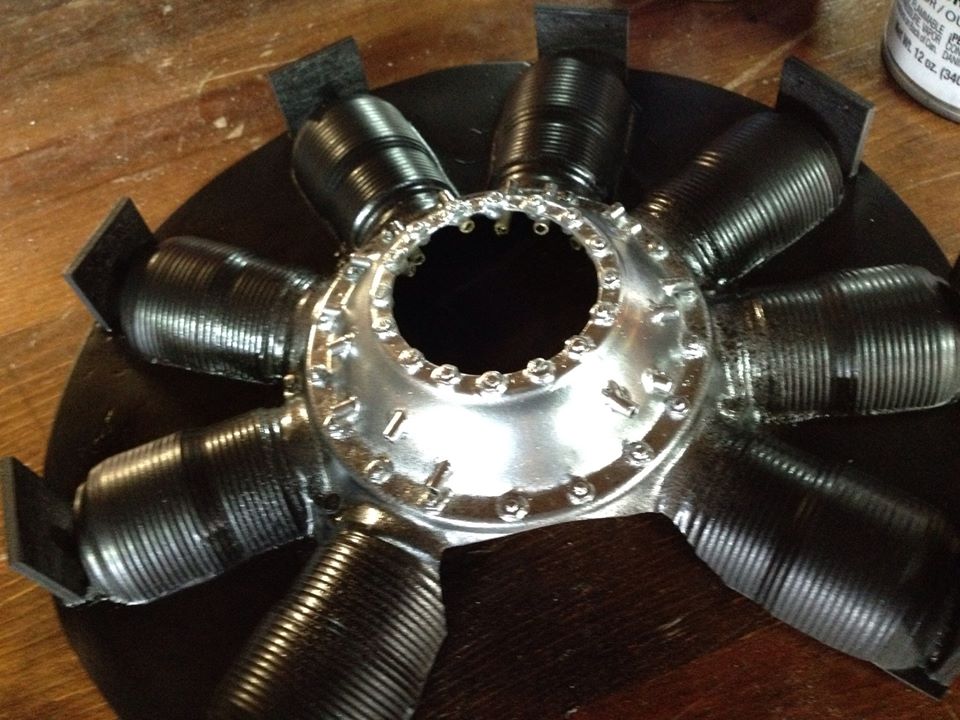
So here is where we left off, and for any sport model, this would be great and you simply add the pushrods and call it a day. But for the Sopwith Camel, I want a more “Used” appearance.
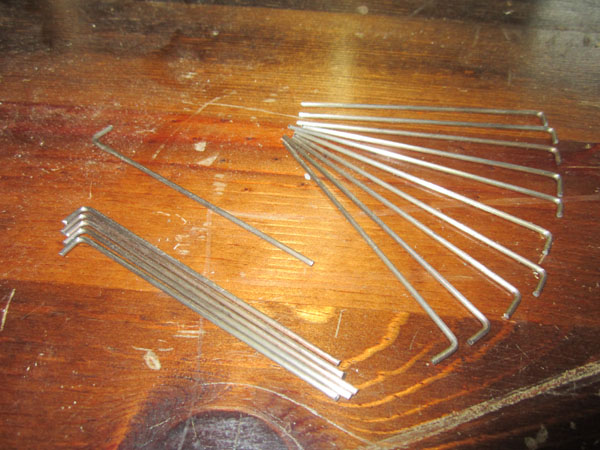
Here above, we have the 16 pushrod wires for the rotary engine. I used 1/16 inch welding wire and sanded them smooth and clean. They has a natural metal finish so no painting is required. I also bent one end 90 degrees. The length is about 1/4 inch.

Before installing the pushrods, I took some 320 grit sandpaper and glued it to some wood to form sanding sticks. A wide one for the top of the cylinder and a narrow one for the base. As you can see, by carefully sanding away the black paint, you expose the underlying silver and gray colors. This adds depth and kills some of the shine of the black paint.
As with everything else about scale modeling and weathering, it takes a subtle touch. Don’t get heavy handed as you will only make the silver lines (tops of the cooling fins), wider.
After sanding the fins, I go around the engine case and apply a very thin layer of watered down acrylic black to all the details. When dry, this black will being out the surface details.
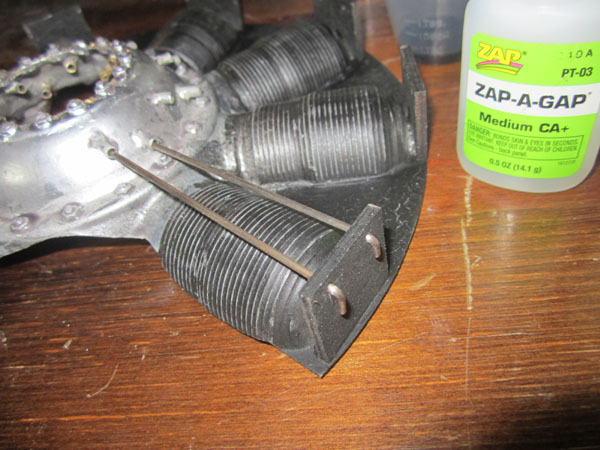
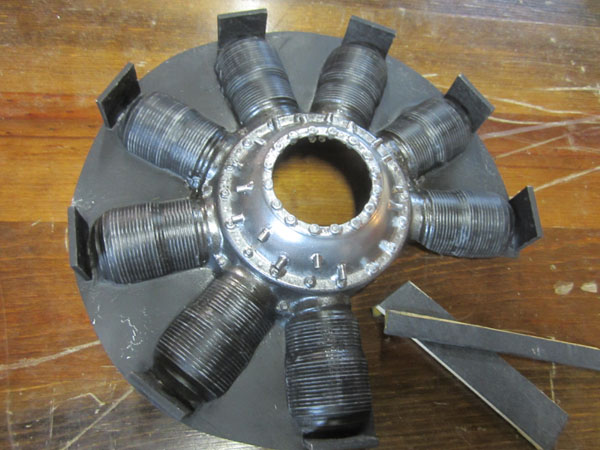
Here you see two of the pushrod wires inserted into the wood guide plate and inserted into the brass bushing tubes at the crankcase. A little ZAP will hold them in place. These top plates will be covered over by the lip of the engine cowling and not seen.
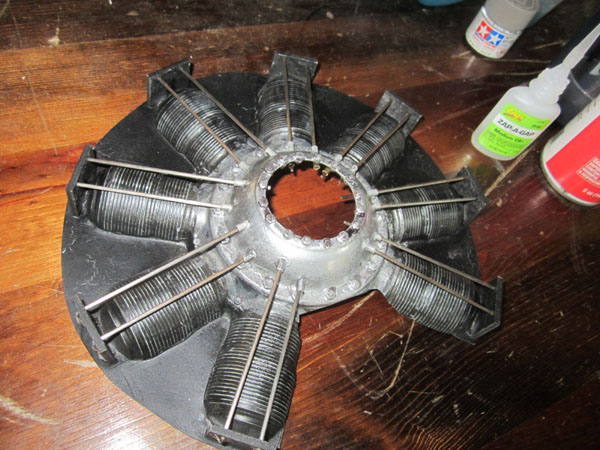
Here all the pushrods are in place. They are glued at the top bent ends as well as inside the bushing tubes from the inside of the engine molding.
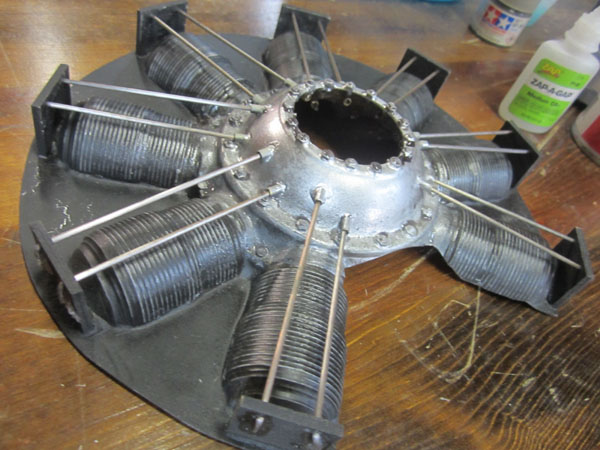
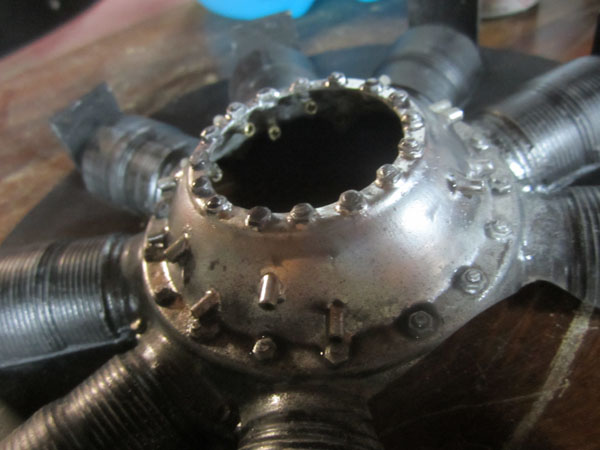
Next I mist a very light coat of light gray over the chrome silver base color of the crankcase and let dry. I also use a thin brush and add a gray wash to flat areas and in corners where the real full-size engine would gather dust and oil residue.
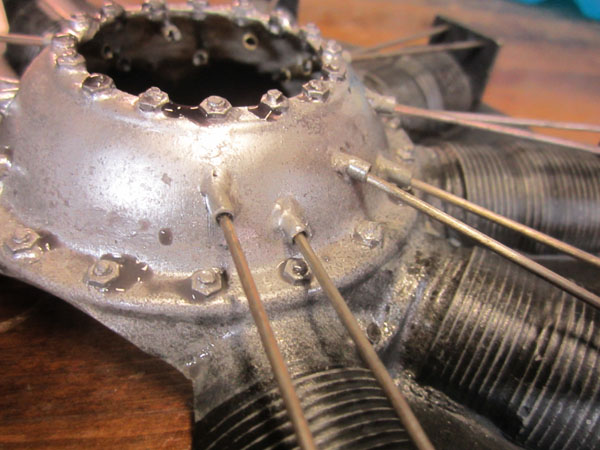
Here you see the gray and black wash still puddled around some of the nuts and screws around the engine and the base of the cylinders. Now let it dry. You can speed the process with a heat gun, but I find that letting the washes evaporate naturally produces the best looking staining.
See Part 3 here:


Another fantastic and informative piece. Always enjoy your work.
Mick Reeves makes some excellent and reasonably priced kits for these WW1 dummy engines. I have both a 1/4 and 1/3 scale one. Looks very realistic when completed.