

Text and photos by Jerry Smith
I can remember when kit building was the way of life. If you wanted an RC airplane, you had to build it. In those days, kits were a pile of wood, a set of plans and maybe a pre-bent landing gear, if you were lucky. Sometimes the ribs and bulkheads were printed on a sheet of wood and you had to cut them out with a sharp razor. If that wasn’t the case, you had to transfer the parts drawn on the plans to a sheet of wood and then cut them out. This took a considerable amount of time depending on how well they were drawn and how accurately you cut them out, which made them directly proportional to the fit. Things were not very exact in those days, and any gaps in joints were filled with glue; most of the time with white glue! There were no instruction manuals and all of the information necessary to build the airplane was shown on the plans. Die-cutting the parts then came along and the parts fit was considerably improved. That is, if you didn’t get a kit made with worn-out dies. The balsa wood was not handpicked and the firmer wood did well under the die, but the softer wood was smashed before the die cut it. In those days, we called this “die crunching,” not die-cutting. To this day, there are manufacturers that still use this method of cutting parts on sheets of wood. The skills required to build an airplane were numerous and not every builder had all of them. Sometimes, the airplane didn’t look exactly like what was pictured on the box. During that time it was also popular to build your own radio gear; Heathkit, Ace RC and Royal Electronics were some who sold kits to the builders. I remember building a Royal Electronics kit (Sid Gates), a 4-channel x-mitter, receiver and servos, a plain radio with manual trims and nothing else, not even servo reversing. I had more fun with that radio. Of course, with today’s miniaturizing of equipment and proprietary rights, it would be impossible and undesirable for this to happen again. In those days of building that was what we had and what we did. But all of this was soon to change in our hobby.
In the mid 1990s, we began to see kit building with laser-cut parts. This method of cutting improved the parts fit so much that you could literally lock the parts together, apply the glue and it was done. This improved accuracy did a great deal to speed up the building process and provided a truer airframe with a faster, easier build. Things began to get even better when they improved the laser cutters.
ARFs Everywhere
As more and better ARFs in every size began to appear on the dealer shelves, kit building became less popular and turned most modelers into assemblers and fliers, rather than builders. Many of the builders began to justify building as opposed to buying an ARF and the ARF won hands down. Not only with materials and time, but also with their building skills as they couldn’t match what was now being produced in the way of an airplane. Most of the ARFs today show excellent craftsmanship, fly extremely well and are precision engineered. But all this is about to change. Have you noticed that the price of ARFs has gone up? That’s because the labor cost in the Far East has risen and in the future it may be cheaper to build your own airplane. We may see more kit-built airplanes on the market, that is, if the prices of the ARFs keep going up. One company refused to import ARFs and that is Balsa USA. They still turn out kits with die-cut parts. No ARFs there. Maybe they saw this coming and decided to stay in the kit market. Or, it could be if no one else sold model kits, they would have a bigger market from the builders that refused to buy ARFs. There is no question that ARFs really impacted our ever-changing hobby.
Time to Build Your Own
I must admit that as a builder, I have put a few ARFs together. But I still favor
building for the enjoyment and knowledge of having done it all myself. Admittedly, I’m a retired and younger builders may lead a busier lives and find it hard to make room for the building part of the hobby. With these modern laser-cut kits, the building process with innovative beginner-friendly features and thoughtful design has shown promise to bring in more beginner builders.
As an example of a good building experience, let’s take a look at one of the modern day laser-cut kits. The one I chose is by Stevens AeroModel, a 47-inch Shaft S480 with a pilot skill level of intermediate and a builder skill level of beginner. This is an airplane with positive stability, true simplicity and is a very quick build. I leisurely built the complete airframe in a little over a day! The parts literally lock together and fit so well that most of the assembly can be done off the plans. All the parts are laser-cut and the only cutting needed is to cut the wing-leading edge piece to length. The assembly manual is exceptionally well done with no ambiguous words and good, clear pictures that really talk to you. So, follow along with the pictures and captions below to see how this StevensAero electric Shaft 480 is assembled and get a better idea of what to expect in this new age of building. I found it fun to build and an easy airplane to fly.
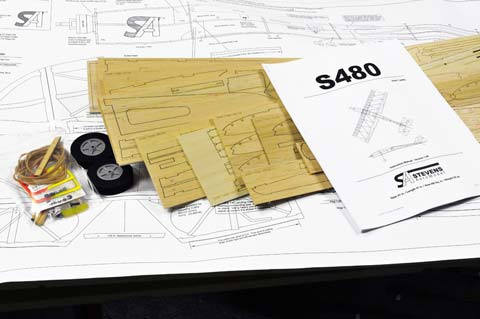
The kit features Tab and Notch with Trus-Loc Construction and includes a full hardware compliment loaded with high-quality Du-Bro hardware, wheels, full-size plan sheet, pre-bent landing gear and a detailed, step-by-step photo illustrated instruction manual. The kit even includes an excerpt on primary aerobatics from the RC Pilot Guide written by Scott Stoops.
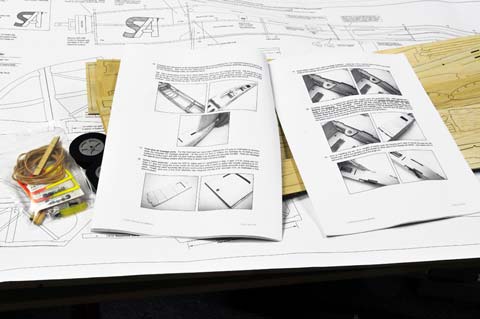
Although many builders don’t look at the assembly manual, that is, until they get into trouble, it is a good idea to familiarize yourself with the building features in the kit. Your build will move along much faster. The manual provides good photos with clear instructions and will keep you from getting into trouble. For further information, the manual can be seen on Bill Stevens’ website www.stevensaero.com .
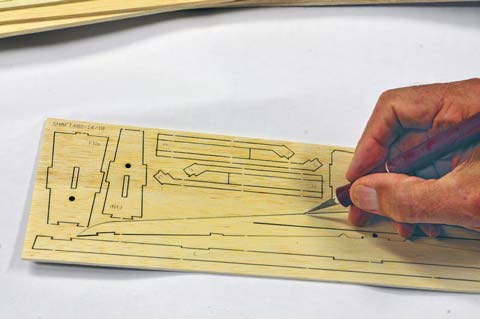
When removing the laser-cut parts from the sheet, it’s a good idea to cut the lands that hold them in place. This will prevent you from damaging them. On the larger parts it’s possible to bend the sheet slightly and pop the part out. Due to the wood density, in some cases the laser doesn’t quite make it through. In this case, be sure to use the knife to help the part out of the sheet.
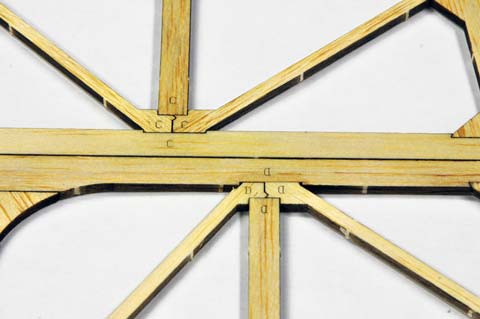

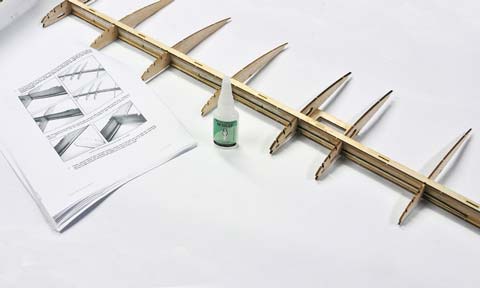
Start with the tail feathers, as the manual suggests. The kit features their proprietary Trus-Loc system. Plain sticks have been replaced by precisely laser- cut stick components that are keyed to fit in only one direction. The knuckles of the truss are identified with an alphanumeric used to match an adjoining truss components; A–A and B-B etc. Under no circumstances should you need to cut or reshape a part. It is best not to remove any more parts than are required to build, so none will be lost.
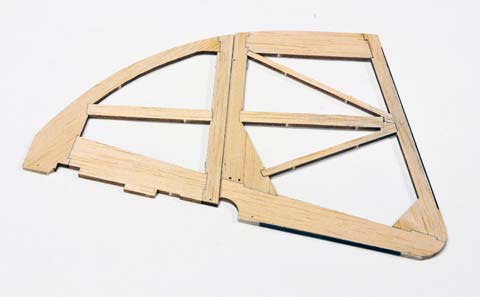
Note the carbon-fiber strips on the trailing edge and bottom of the rudder and the trailing edge and inside end of the elevator, also the strip inset in the stab leading edge. Once the pieces are locked together, place them on a flat surface over wax paper and glue the joints with thin CA—done! You should be able to do this easily in two hours time.
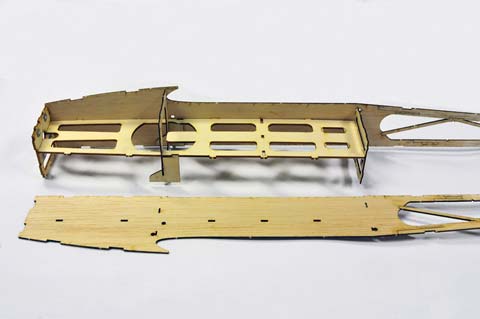
After putting together the sides of the fuselage, a crutch is assembled with bulkheads on both ends and one in the middle. The sides are assembled to the crutch with tab and notch construction. This method promotes a true and positive way of buildi
ng a fuselage. You can’t get it wrong!
Adding the top and bottom completes the front of the fuselage. Note how they interlock with the sides with the tab and notch construction. This firms up the front of the fuselage and makes it square and locks it in place.
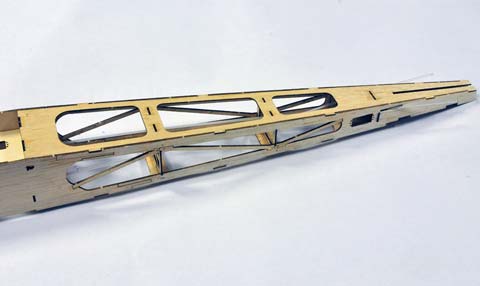
The top and bottom back of the fuselage are assembled with bulkheads, which pulls together the sides. Tack glue it together with thin CA and when completely assembled, finish gluing each joint. Slots in the rear bottom of the fuselage key the fin in place and make it perfectly square with the wing.
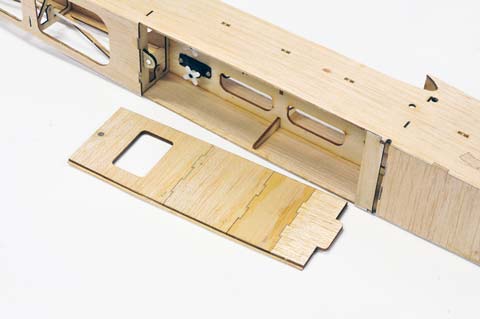
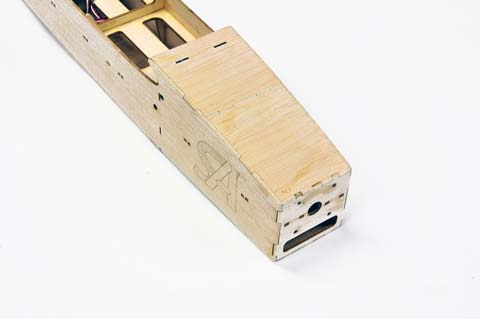
The hatch on the bottom is made up of five pieces with the bottom piece grain running the opposite direction for added strength. An air vent hole is provided to exhaust the cooling air over the controller and battery. It is held in place with a tab in front and a magnet in the rear. There is plenty of room for the battery and electronics here. The battery can be shifted fore and aft to affect the CG. The ESC is stored in the nose section. To complete the fuselage, and you can build it completely off the plans, should take about four hours.
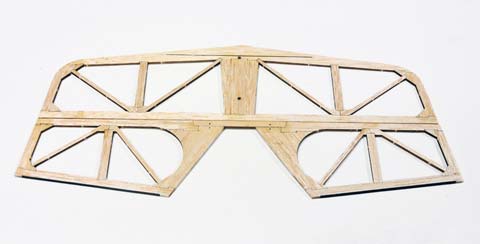
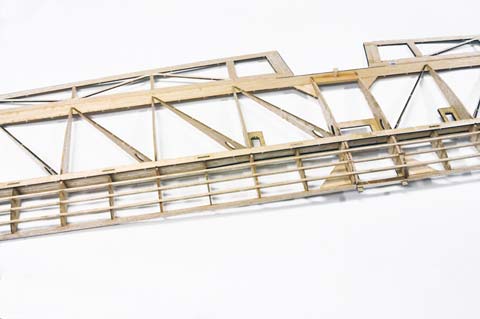
The wing construction begins with building the main spar. The shear web is keyed into the lower spar, then the ribs are installed in slots in the shear web, which automatically spaces them. The upper spar is then keyed on to the shear web basically making a built-up I-beam. I-beams provide the most strength, with the lightest weight and most efficient use of the material. I used Mercury CA 100XF to glue this part of the wing assembly together—perfect!
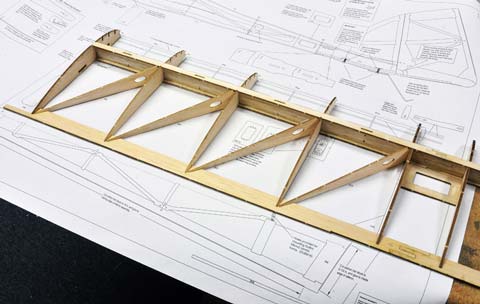
The notched trailing edge is assembled and I tack glued it in a few places to hold it, then the diagonal ribs were set in place. These were not glued in yet. Note the wing does not match the plans when laid over them. This is because the paper is unstable and subject to temperature and humidity conditions. Laser cutting eliminates this inaccuracy.
The sub ribs, leading edge and turbulators are added to complete the wing, stretching from tip to tip along the leading edge. There are three of them. You might ask, “What are turbulators?” The turbulators assist with tripping the airflow along the airfoil and create a turbulent layer of air at the airfoil to the air mass boundary layer. This tripped or turbulated airflow is believed to assist with keeping the laminar airflow over the airfoil attached longer, which reduces drag and improves the airfoil efficiency. They also keep the covering from sagging between the ribs along the leading edge on top.
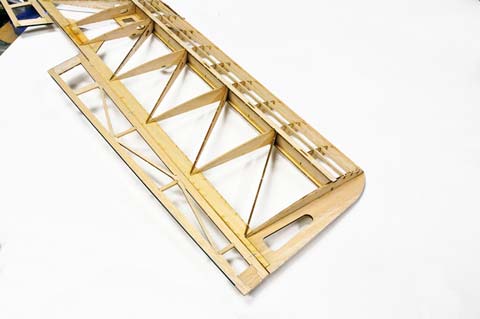
Here’s the finished wing with ailerons. Pin down the wing on a flat surface and bond all the joints to ensure straightness. Let it cure well. The ailerons can be built while you are waiting on the wing to cure. The wing is held to the fuselage with rubber bands, which are forgiving in case of a mishap. I made a modification here and bolted mine in place. Building the wing will take you the most time. I spent five hours in construction.
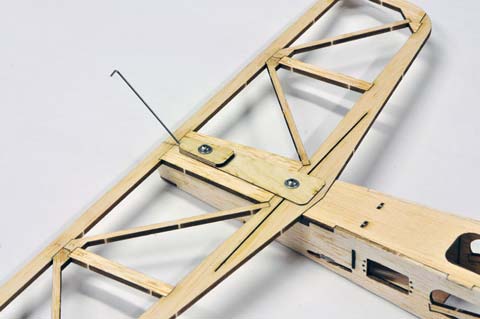
The horizontal stab is held in place with a unique bracket that doubles for the tail skid as well. The stab can be removed for transportation when desired. This is an excellent feature on the part of the designer and makes for easy assembly.
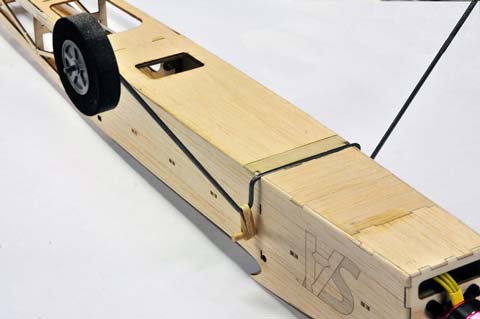
The landing gear is shock mounted with rubber bands, which will save it from being bent on a hard landing. It will also make it easy to remove in case it does get bent. This design has it covered both ways.
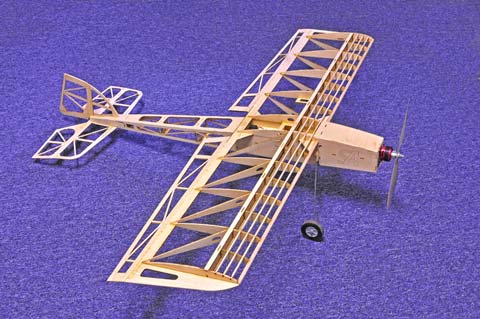
The finished Shaft airframe assembled. What a thing of beauty—now you can say, “I did it myself!”
As an expert builder, I wanted to see how quickly I could put the shaft together. I really didn’t push myself with a deadline, but just let it happen. Why rush the project? If this is your first building project, you want to enjoy it. Take your time and savor all your modern kit has to offer and don’t set a deadline for yourself. You’ll be amazed at how precisely the laser-cut parts fit and how quickly things go together. Hopefully, I have piqued your interest with this article and you will try building a model for yourself. I didn’t go into covering and finishing because that is a phase of building that requires another skill. If you want to know more about covering and finishing, get online and search “covering model airplanes.” There is a wealth of information there and you can learn more about how to go about it.
StevensAero has many other laser-cut model kits and there are many others for you to choose from on the market. I chose this one for its modern, forward- thinking approach to building and as a good example of what to expect when building as a beginner. If your interest lies in smaller electric RC models, try building your own. When finished and trimmed out with your graphics and ready to fly, I guarantee that you’ll have a great sense of accomplishment!


