–How to install the onboard LED lighting system
By Keith “Sparky” Sparks


More photos below
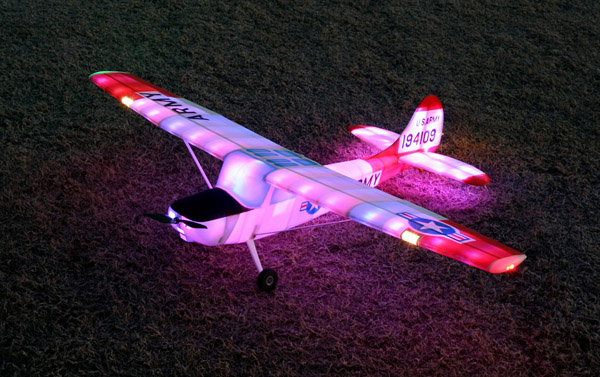
Flying model planes at night was not very practical at most flying fields until the quiet powered electric models became popular. These smaller models have created a new market for ready to install lighting equipment. However, with a little parts gathering and some simple wiring an affordable system can be made.
The most basic system is simply attaching marker lights to the wing tips and tail; this is also the most challenging configuration to fly. Models made with clear or translucent skin can be lit from within allowing the pilot to see the whole model. Apply this to a model with stable flight qualities like some of the old free flight designs and you will have a model that’s fun to fly at night.
Lamps
Light emitting diodes (LEDs) are the most efficient lighting source allowing us to use smaller batteries to operate them. Replacement light bulbs for flashlights are another useful source of light possessing qualities of their own. For instance, LEDs emit light in a concentrated beam making light bulbs the best choice for wing tip lighting. Sanding the sides of an LED does help to scatter the light though.
While I was lighting the Glowdog the wiring and switching remained simple and only looks complex. I installed marker lights, landing lights, and three colors of interior lighting for a total of 165 lights. To help keep the model light I used 26 gauge magnet wire available at radio shack for the main power buss and 30 gauge to the individual LEDs.
Wiring
I found that the wire connections did not require stripping the coating off the magnet wire. Selecting a soldering iron with 40 watts of power provided enough heat to simply burn the coating off and make the connection at the same time. On foam constructed models a playing card is needed as a heat shield.
Routing the wiring through the model is very easy; cutting the wire at an angle gives it a sharp enough point to push it through soft balsa and the thickest sheets of Depron. For light ply panels a needle will be needed to make holes for the wires to pass though.
If control surfaces are lighted, the wires that pass through the hinge line cannot be single strand wire (magnet wire) A multi stranded wire will be needed for flexibility.
When multi colored LEDs are used wiring mistakes are easy to make so neatness counts. Wires can be held in position with dabs of adhesive. While the adhesive dries, tape, pins or a twisted wire can be used as a fork To hold the wires. 
Neatness counts when securing the wiring to prevent failures and wiring problems. Here are several ways to manage the wires while the adhesive sets up.
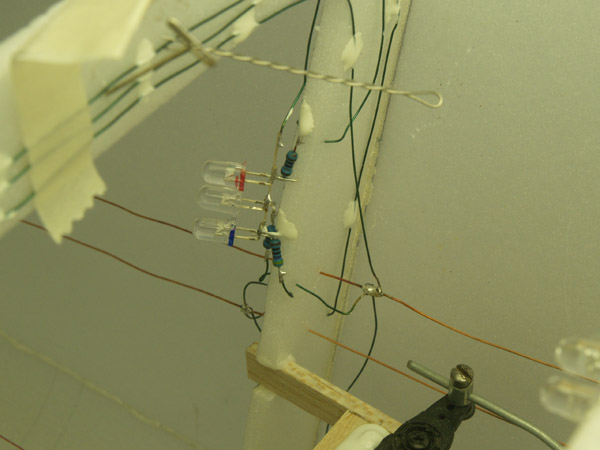
Aiming the LEDs before the wing is closed up will ensure an even light pattern in each wing bay. Note that the solder joints are away from the ribs to avoid damaging the ribs.
LEDs
I used a fixture to assemble my LED arrays; this was necessary to keep the polarity correct 
On multiple LED arrays a building fixture is a must to ensure each array is wired the same. Using aluminum will help keep the lamps cool during assembly.
Finished arrays can be stored by sticking them in a foam rubber block until they are needed. Note that the base of the lamps have been marked to identify their color.
(the long lead is positive) and to use the proper resistors. Since LEDs are integrated circuits care should be taken to not overheat the leads while soldering. A soldering iron with 20 watts of power is suggested and a solder joint shouldn’t take loner than three seconds to complete. Burning off the wire coating mentioned earlier should be done prior to a solder joint being attempted to LEDs.
Flash light replacement light bulbs produce a bright white light perfect for landing lights. Mini Mag light krypton bulbs will give you the most bang for the buck. They are very small and operate on only two AA cells.

Replacement flash light bulbs produce a better white light than LEDs. And tend to scatter light be
tter. A focused beam of light is harder to see on the ground unless you are in-front of the model
Switching
Having the ability to switch the lights off and on can be done remotely through the auxiliary functions on your radio. A simple mechanical method is to use a small servo to operate a micro switch for one system or a slider switch taken from an RC dune buggy can control multiple lighting features.
Electronic switching units like a DC elertonic speed control can be used if your lighting system has the proper operating voltage.
To power your lighting system you can either tap into the models power supply with a BEC (be sure to provide adequate air flow)

Mounting the BEC in plenty of air flow will help prevent lighting problems. Note the use of the wire keeps; tidy wiring also will prevent problems and unwanted wire shadows on the model.
Or you can provide power from an auxiliary battery, the cell count will depend on your system. The Glowdog uses a BEC for the interior and two separate a alkaline packs for the running lights and landing lights. Running more than one power supply will give you the lighting back-up needed to fly safely at night.
Http://led.linearl.org/led.wiz