
Continuing our scale upgrade project, this takes up where the first part ended. I used G-10 fiberglass sheet material to replace the old and worn out folded clear plastic setup on a Ziroli Stearman PT-17. So here were are starting with the formed and folded blank shown below set in place on my Stearman restoration project.


(Above.) First step is to use a fine tip pencil and scribe (draw) the guidelines on the blank using your finger tip to draw the lines parrallel with the outer edges.

(Above.) For the curved lower edges, use the same fingertip technique to draw your guidelines. The important thing is to make them parrallel with the outer edges and even in width.

(Above.) So you can now see what will become the solid frame areas that will support the seperate clear windshield panes. Make sure it is exactly how you want it before going further.

(Above.) A very important part is to drill or grind in these corner holes in the frame before cutting the waste areas away. Just like with the full-size aircraft parts made from aluminum, the radius corners prevent cracks from forming due to vibration. Plus, they give you a safety buffer so you don’t accidently cut into the solid frame areas.

(Above.) Nows the part where your steady hands and patience pays off. When you cut out the frames start at the center and work outward toward each corner of the cut line. Don’t cut right up against the guideline but try to keep it close. Work slowly… and do one line at a time, one frame at a time.


(Above.) So here it is with one panel removed (left,) and with all the panels cut away. PHEW!!! Ok, now take a break and get ready to cut out the second blank.


(Above.) Now to even up all the cut lines and make the frames look really neat and clean, use a metal sanding bar and fine (320-grit) sandpaper and smooth out the cut lines.
(Below.) For the curves bottom edges, use to corner of the sanding bar or just fold up a piece of loose sandpaper and do it by hand. Fine “lady’s” emory boards work just as well. Again make all the edges smooth and clean.


(Above.) Here’s the final cutout frame set in place on the fuselage. Before priming and painting, check to make sure none of the seams have broken. If the glue has cracked, add some more thin ZAP CA and hit with some kicker.


(Above.) Before shooting on the primer and paint, use 320-grit sandpaper and go over all the surfaces and remove the gloss from the G-10 material. Be sure to de-grease the frames with some denatured alcohol, (rubbing alcohol from the bathroom will do too,) and clean off any dust with finishing tack cloth. Also, if you mix and match different brands of finishing products, be sure to shoot some test coats on some scraps of G-10 sheet as I have done here (above right.)


(Above.) In a dust free working area like your garage, shoot on two or three mist coats primer on the frames and let dry. This is all that’s needed as the G-10 material is very smooth and the finish won’t need to be sanded to produce a nice slick paint job. Do not prime the bottom of the base strip as this will be glued to the fuselage.

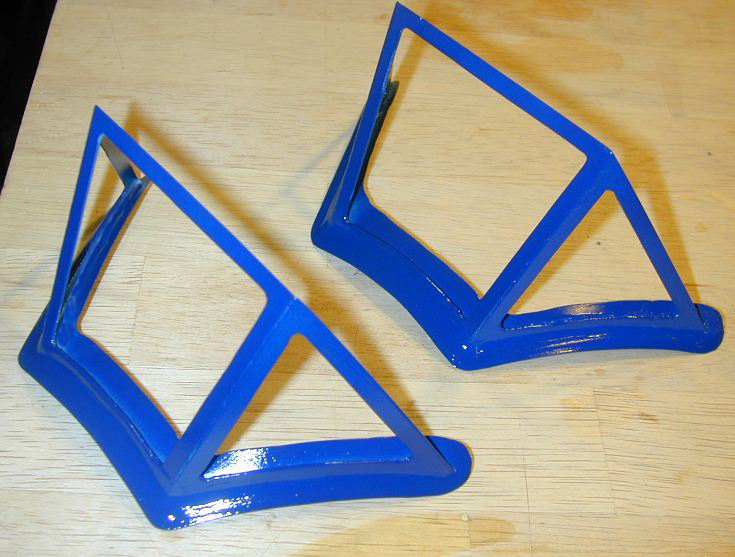
(Above.) With 3 or 4 mist coats of color apply your paint and set aside in a warm, clean and dust free area until the paint is fully dried. Start spraying the paint on the inner surfaces and then apply to the outer sides to get a complete coverage. For this project, I used Hangar 9 gray primer and for the color coat I used the new Krylon “Indoor-Outdoor” spray paint intended for metal and plastic surfaces. (The blue over the gray primer was a better match to the fuselage than the blue over white primer.) Both these products are fuel proof and the Blue paint is compatible with gasoline fuel mixes.
Part 3 is where we will install the clear panes and attach the finished windshields to the Stearman. Check it out here: https://www.modelairplanenews.com/blog/2011/07/11/making-3-panel-windshields-part-3/


