
I’ve always liked Republic’s big P-47 Thunderbolt and I’m certain I’m not alone. A longtime favorite of warbird enthusiasts, the Jug has its own remarkable place in the history of aerial warfare. In service about the same time as the equally well-known P-51 Mustang, Supermarine Spitfire, and Messerschmitt Bf 109, it had very little in common with the others. Sure, they were all considered “fighters,” all very capable and some better than others in specific areas. One thing the Jug did not share with any of its contemporaries was size. Its airframe was massive with a big, round R-2800 engine to match plus eight—that’s right, eight!—.50-caliber machine guns packing a firepower punch none of the others could match. So, why does this giant of an airplane get the reverence it does from those who flew it, respect from those who flew against it, and the admiration of those who have studied it? The biggest reason has to be its amazing ruggedness in combat that provided safe passage home for those who would have been lost in less “substantial” airplanes. It will remain a favorite and a legend for generations to come.
The Project
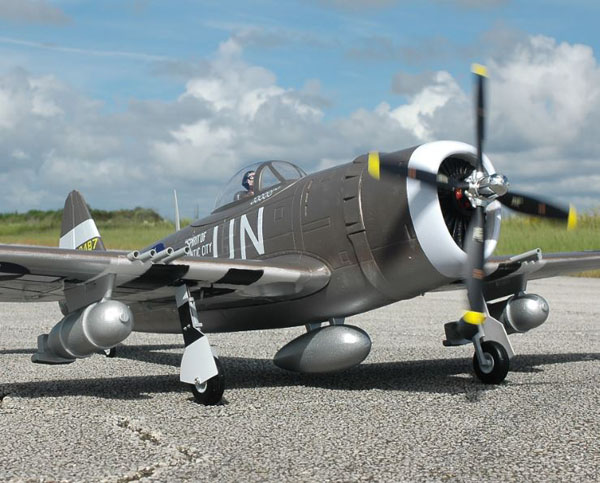
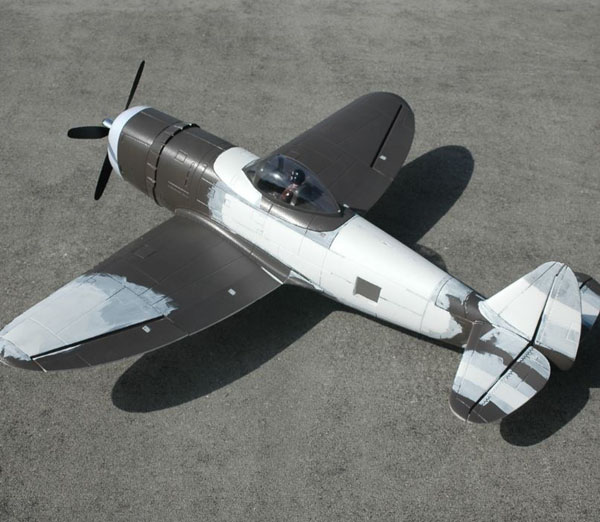
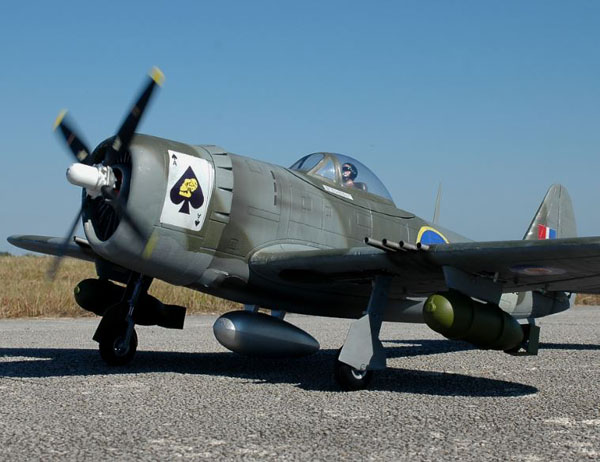
The “BEFORE” shot!
This Airfield P-47 (Nitroplanes.com) is one of the latest foam ARF warbirds and it reflects two big differences from “first generation” foam models. It’s larger, by a good bit, than others and it’s molded of EPO (Expanded Poly Olefin) foam. Nearly all of the foam ARFs use this material under various names and it is a big leap forward, especially in the “finishing” and appearance department. Almost gone is the EPS (Expanded Poly Styrene) model that looks like it’s covered in alligator skin; it has been replaced by the smooth, close cell foam surface that offers a number of refinishing opportunities from simple repaint to the application of lightweight fiberglass cloth with epoxy-based resin.
For this exercise, I chose to experiment with a number of tools and materials that I thought might work on EPO foam but had not yet used. Since we’ve already presented a number of these “makeover” articles, I carried the theme over to this project, which is probably the most extensive thus far. Since the stated objective of the “makeover” series is to provide the method of making your mass-produced ARF model distinctive, different, and uniquely yours when compared to others that left the factory, I hope this provides the motivation to get started on your own project. As with previous presentations, the fun starts with researching, finding, or dreaming up that special paint scheme that caught your eye, saw in a movie, observed at the local airport, or just thought “what if?” They’re all allowed here; remember, there are no rules, only your creativity and willingness to do it, governing your project.
My P-47 came out of the box nicely finished with an attractive OD over gray scheme, complete with black and white invasion stripes and pre-applied vinyl, self adhesive markings. This is one of those cases where I would have preferred that applying the “stickers” was one of the few tasks left remaining for the ARF “builder.”
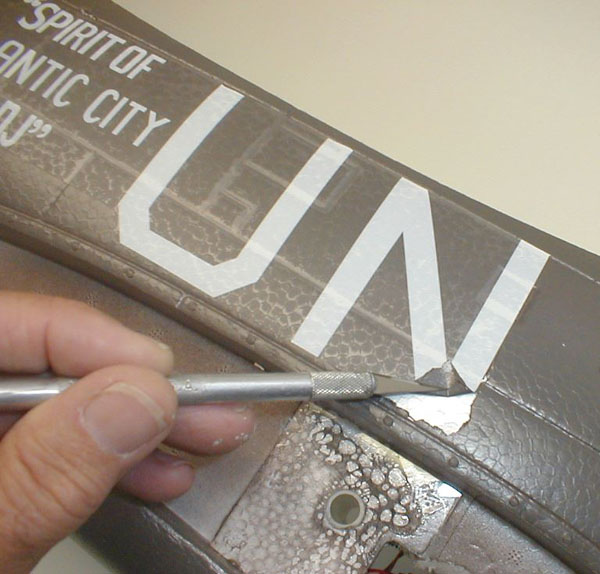
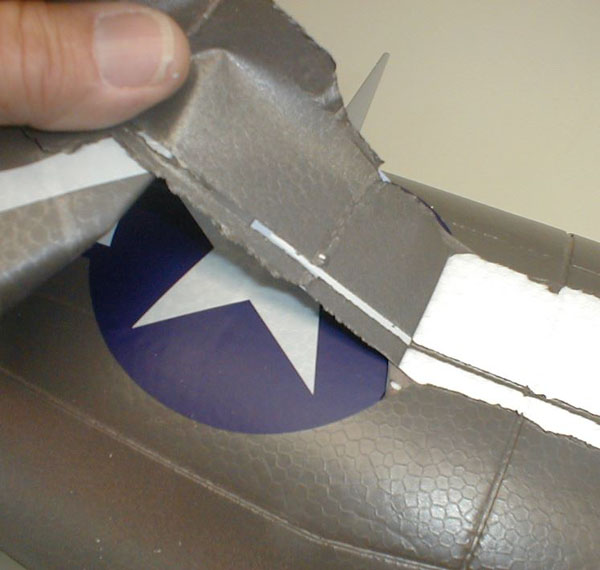
First dilemma: remove or paint over them? Painting over them would be easiest but also likely the least attractive with edges and dissimilar surfaces to deal with. Okay, off they come! Oops … never expected that much paint to come with them! Just have to deal with it. After removing all the markings, it was pretty obvious that something more than just laying some new paint over the top of everything would be required, so while I thought about possible solutions, I worked on some other areas that I thought might further improve the appearance of my Jug.

Accoutrements
I decided that many of those neat little “shutters” and openings on the full-scale Jug could be created easily enough. After referring to a number of pictures and drawings, I used printer’s litho plate, which is a very thin metal, to make the parts. It is a great material for modeling and, when you can find it, it’s usually free because it’s a disposable commodity that is used only once and discarded. Check with a local commercial printing shop. They’ll probably give you a modeling lifetime’s worth! I cut the parts with multiple passes with a hobby knife – a sharp scissor will work but will give a slightly curled edge to the metal which should be straightened. I then cut openings into the foam fuselage to accept the litho parts that included intercooler and oil cooler shutter, waste gate panels, and tailwheel doors that were fit and epoxied into place.
Back to the refinish.
With all that partially painted and unfinished foam exposed, it was evident that something would be needed to level the playing field before adding color. Foam does not take well to solvent-based material, so the field was narrowed to water-based acrylic or latex materials. A quick trip to my local home improvement supply store and a brief discussion with a sales associate and I had my answer.
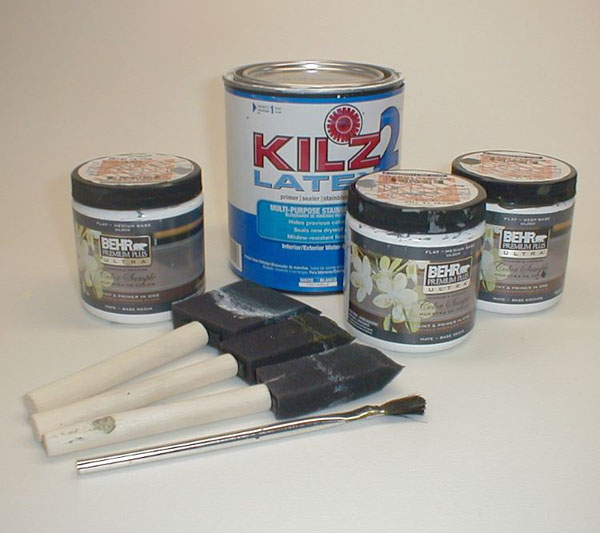
I explained that I was painting a molded foam cooler but I wanted a smoother surface than the raw foam (I didn’t want to go through the discussion that would have come from the mention that it was a model airplane I was refinishing!). He fixed me up with a quart of latex white primer and I headed home but not before noticing that they had the ability to custom mix paint, in sample sizes, to any color desired.
Preparation
I wiped the entire model down with alcohol to remove any oil or contaminants from both the remaining painted and virgin foam surfaces and then applied a coat of the primer, allowing it to dry overnight.

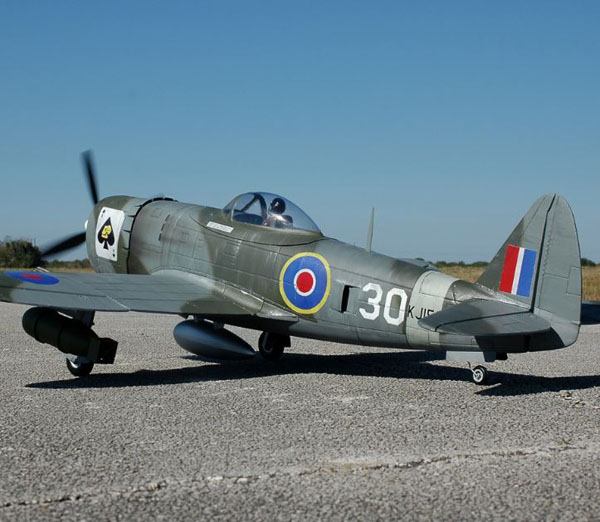
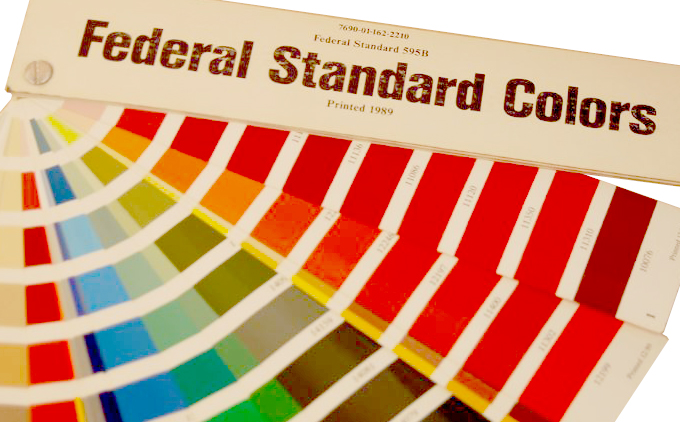
Now, about that custom-mixed paint service. Since the British RAF color scheme I had chosen for my Jug has “FS” (Federal Standard) color equivalents identified, I took my color chip book with me to see just how well they could match my chips. Well, they didn’t need to match the chips at all, they already had FS formulas in their database. Fifteen minutes later, I left the store with three perfectly matched colors, in latex, in sample size (7.5 oz.), for less than 10 bucks! Man, this scale stuff is pretty easy!
I laid out the camouflage pattern with a soft pencil directly on the model and applied the lightest color, in this case, to the undersides, first. This was followed by the next lightest (gray) and finally, the darkest (green) in the camo pattern on the upper surfaces. Each of the colors was applied with a foam “brush” and allowed to dry before applying the next. The foam brush eliminates streaking and conventional brush marks. The paint pigmentation is dense enough that one coat should provide adequate coverage. If not, apply a second coat before starting the next color. If you want to “soften” the color separation edges, use the appropriate color, thinned with water, and apply it along the edge with a small artist’s brush. You can also use an airbrush for this, but I have not been completely satisfied with putting thinned latex through an airbrush.
Markings
I made the decals by creating the artwork in a graphics program and outputting them on decal paper to my inkjet printer. Following the instructions accompanying the paper, I sprayed two coats of clear Valspar over the entire sheet and let it dry completely. After trimming close to the image edges, the decal is treated as a typical water slide. Soak it in water until it releases from the backing paper, position it on the model, blot the excess water, and allow to dry overnight.

With all the markings in place, I started the “dirtying up” and “weathering” process which is the same as I’ve explained in previous “makeovers.” For those of you who missed them, I use an airbrush with the appropriate color to simulated exhaust and gun gasses, referring to pictures for flow direction and density.
Chipped panels were simulated with the application of silver paint applied with a fine artist brush while panel wear is replicated using a craft material called “Rub ’n Buff” which, when correctly used, can impart a very realistic looking worn patina to the model. It does take a bit of experimentation to get exactly the desired effect, but it is a lot of fun and certainly worth the effort.
Final touches
Since the P-47 was finished with water-based paint, as a final step, I treated it to an overall gray “wash” applied in a direction of flight path to the wings and tail group and vertically (top to bottom) on the fuselage. This wash is a mix of gray pigment and water to a ratio of about 5% pigment to 95% water. In fact, you can probably start with the mix that’s in the container you used to clean your brushes and foam applicators. It can be applied with a sponge or paper towel, always working in the proper direction.
Practice on a scrap surface first, then move to the bottom of the wing; when you’re comfortable, go for the gusto and finish the upper surfaces. Man, that’s some impressive model you’ve created!
Details
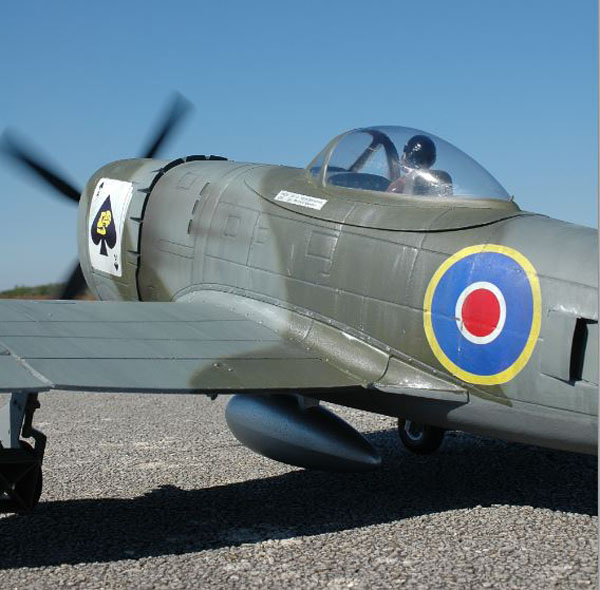
After! In addition to the obvious paint scheme differences, comparing the “Before” and “After” photos shows the other changes made like the weathering and exhaust staining. I even reworked the bombs to include more realistic fins. Subtle changes have a big visual impact!
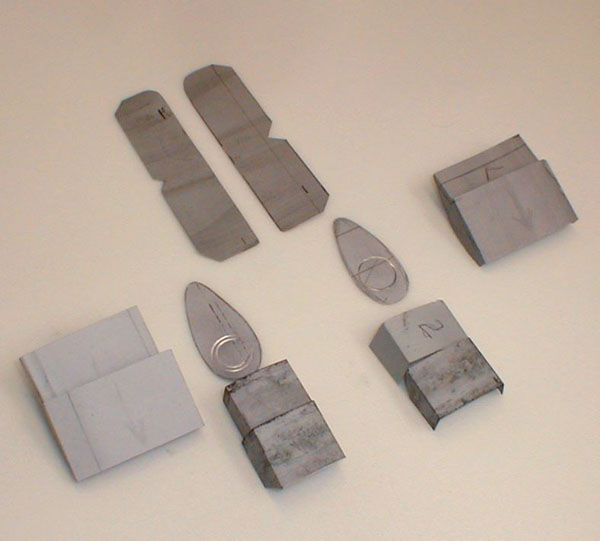
These are the dress-up parts I made from printers litho plate. They include tailwheel doors, oil cooler and intercooler shutters and waste gate panels. Great, cheap material has many applications on scale models.
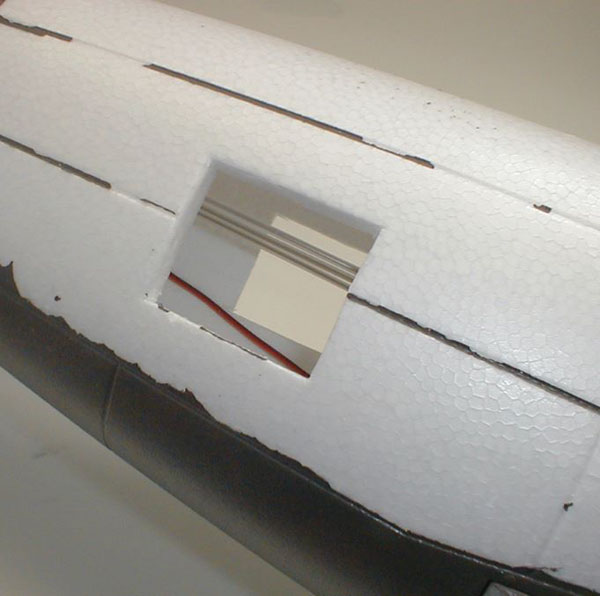
Fuselage side with intercooler panels removed from foam. This would be a great time to install a pushrod conduit stiffener to make controls more positive by eliminating flex.
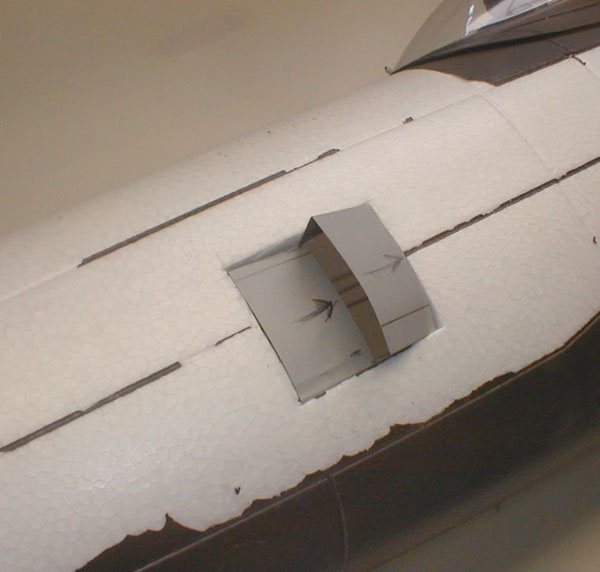
Aluminum litho plate intercooler shutters are epoxied in place after ensuring proper fit. A side benefit is increased cooling for interior parts like battery and ESC by creating an air exit.
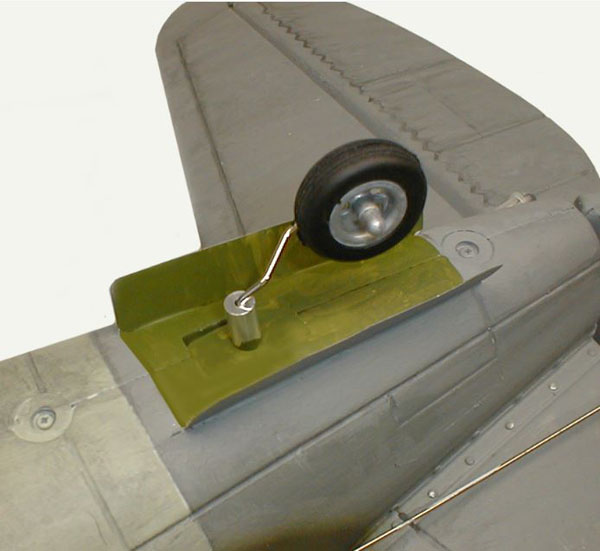
Adding simple gear doors as well as some dark paint in the area around the tailwheel also adds realism. The final product, resplendent in RAF markings, is an example of just how different you can make your model look with just some effort and experimentation. Pick a scheme and go for it!
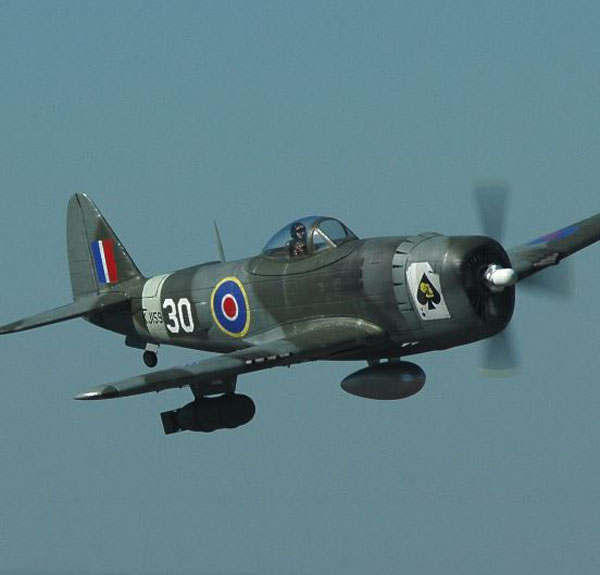
The final product, resplendent in RAF markings, is an example of just how different you can make your model look with just some effort and experimentation. Pick a scheme and go for it!


Great job I did the same to my spitfire top flite giant scale but put American stars and bars on mine
Nice one rich. Good to see a jug in a different colour scheme. Just starting a similar ‘redo’ of a 30cc seagull spitfire
Nice redo!
My only comment is, you missed a great opportunity to promote our hobby when you were at the paint store. I always talk up the hobby to try to bring more interest to it. You never know, you might gain a friend and give someone a new life long passion!