
As my opening blog, I would like to take a brief moment to introduce myself as well as talk about a recent event that I am preparing for. It is my goal to provide insight in either a flight or building tip. Anyhow, let’s begin!
First off, I have been flying remote-control aircraft for the past 21 years, and I am 26 years of age. I have a business management degree from the University of Massachusetts, Boston, and have been writing for both Model Aviation, Model Airplane News, and Backyard Flyer (now Electric Flight) for the past few years. I started aerobatic competition at the age of 11, and competed at the international level at the age of 15. I have competed in many different world-class competitions, and have won the Extreme Flight Championships twice and the Electric Tournament of Champions once, with many other top-three and finalist rankings. Lastly, I have actually completed two instructional aerobatic DVDs with Air Age Media, and am currently employed as an SUAS operator for Aurora Flight Sciences. Now, onto the blog!
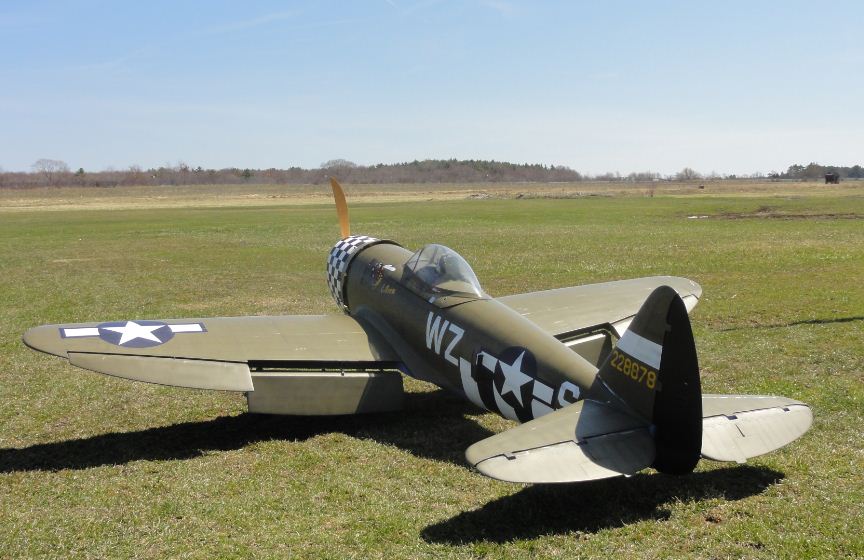
At the moment, I am preparing for the 2011 Top Gun competition. For this competition, I chose to use a Ziroli/ Robart P-47. This airplane has a 92” wingspan and weights in at about 37 lbs. As a general overview of the aircraft, it is powered by an Evolution 80cc engine, has JR servos throughout (JR 8611 servos on all control surfaces except for the flaps, where I am using JR 8711 servos), Robart retracts, and uses three JR 2700 mAh NiMH batteries to power the receiver and the engine’s ignition. I am using a PowerSafe 9-channel receiver that uses a soft switch. Power to the servos is routed in such a manner that even if the switch fails, the servos will still see power. Also, since two batteries are plugged directly into the receiver, even if one battery fails, power will still be supplied to the receiver.
When building a rather large airplane, it is always important to think in terms of redundancy. As you just saw, I used two batteries to power my receiver. Also, I opted to use a soft switch in the event of a switch failure as the switch will remain in the “on” position. When I performed the first flight on my P-47, I kept the first flight to a maximum flight time of about eight minutes. After this flight, I landed and checked the level of fuel that remained within the fuel tank, and checked the battery voltage. Monitoring battery voltage is a must as failure to do so can result in a loss of a specific airframe!
All in all, I recommend performing a short first flight on any airframe. Like we mentioned, check battery voltage and fuel consumption. However, also check all bolts throughout the airframe, prop bolts, and various glue joints. Make this a part of your routine after each flight, or at a minimum, each flight session. Doing so will greatly improve the lifespan of your aircraft.
Anyhow, that’s it for now! Stay tuned and we’ll further our discussion on test flying your aircraft! Until next time, safe landings!


