
I have been working with the 2-420 CNC Desktop system from Stepcraft, and I have found it to be a very flexible and adaptable addition to my workshop. The review of the Stepcraft CNC will be in the upcoming September 2017 issue of MAN and it highlights the assembly of the kit-built machine, as well as some of its basic operations. Just about anything you can think of for the RC hobby, from machining metal, wood and plastic, to cutting out vinyl markings and even laser cutting, can be accomplished with the 2-420.
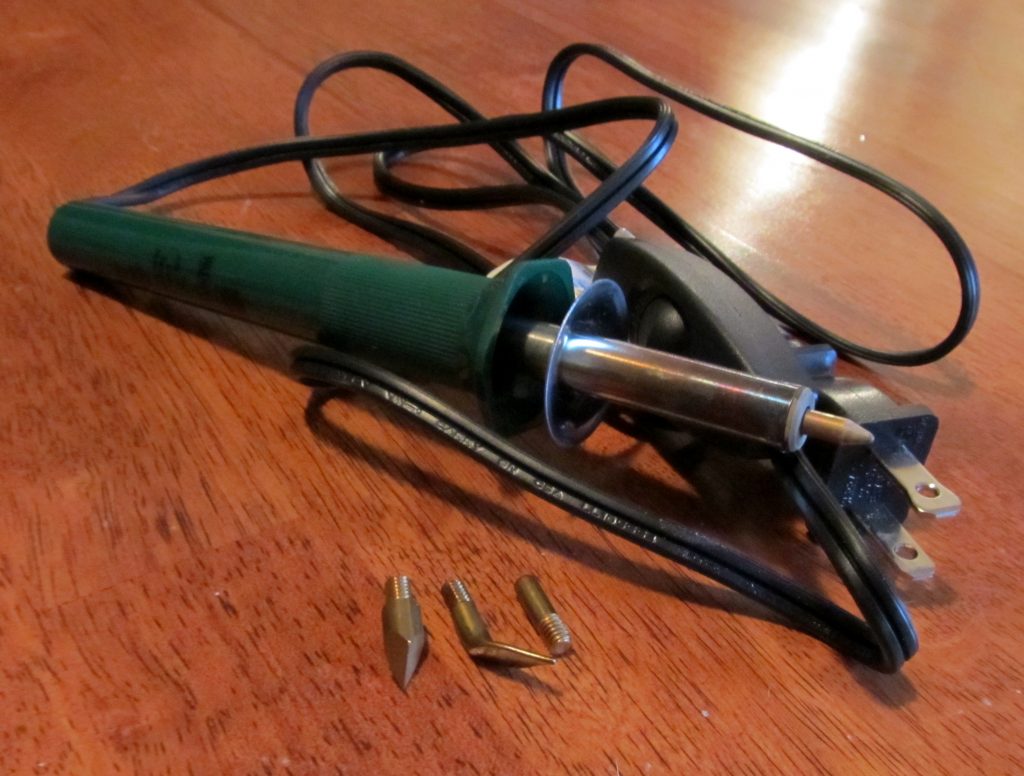 For a less intimidating introduction to the desktop system, Stepcraft also has a spring-loaded adaptor that is designed to hold a common hobby craft wood burning pen. With the system setup with this accessory, you can precisely duplicate any pattern or lettering simply by programming it with the required G-code.
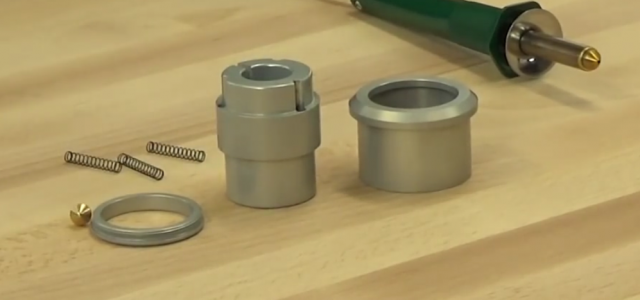
The Adaptor consists of the main body an outer ring and a locking ring that screws into place. Three springs and a spare burning tip are also included. The inside surface of the main body is tapered to accept the handle of the wood burner and it has a slot machined on its side.
 The power cord for the wood burner slides through the slot then the rest of the adaptor is assembled. The main body is inserted into the outer ring then the three springs are inserted into the three recesses in the main body. Once they are in place, the springs are held in place with the locking ring which threads into place. Once the wood burner pen is inserted into the adaptor the entire assembly is inserted into the stock tool holder bracket that’s attached to the system’s Z-axis track.
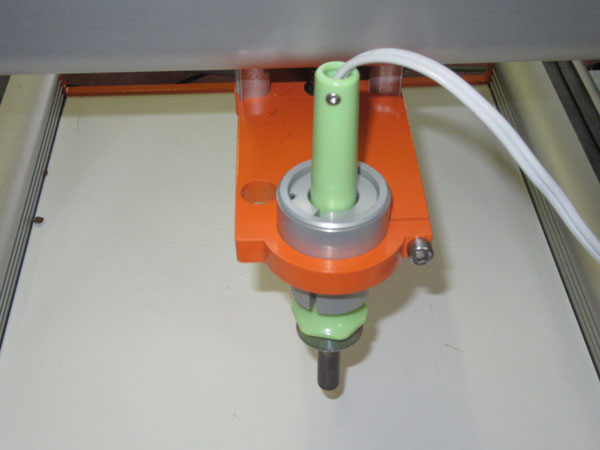
The adaptor is held in place by tightening the cap screw in the bracket. But you must tighten it only enough to hold the adaptor in place. If you tighten it too much, the springs that apply down pressure will not function properly, if you don’t tighten the screw enough, the adaptor will slip out of the bracket. So take your time and get the screw tightened just enough to hold it in place and with the springs working properly.
Programming
As with all operations of the Stepcraft CNC desktop system you have to us a program to produce the required G-code to run the CNC. I use VCarve Pro and for the wood burner, you set up the system just like you are going to cut out vinyl markings. Basically this requires you to start a new job and set the work shape. I used a 4×4 inch space and set the zero point for the tool in the center of the workspace.
Once this is done, you set the tool path information. Since the tool path begins at the top of the work material, tou can set its thickness to any number and I set it at 0.02 in. And since the wood burner is spring loaded, I set the tool depth at 1/8 inch. This will make the Z-axis apply downward pressure as the wood burning pen moves along the tool paths.
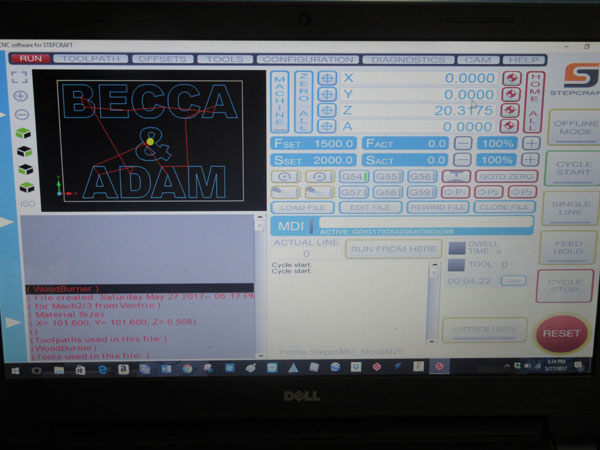
Here (Above) is the UCCNC drive program dashboard for the job I selected. Basically as a test I simply typed in “Becca & Adam” in the VCarve Pro program and exported the G-code. The tool path preview is show on the screen at the upper left. The next thing to do is to Home All the axis (shown in red at the upper right) so the system knows where the tool is located. Next you clamp your work piece onto the work space, and manually move the tool center to the desired position. Next the Z-axis is lowered until the tip of the wood burner pen is just touching to the top of the work material. I use a piece of paper as a gauge to set the proper tool start position. Once this has been done you Zero All the axis for the given job by using the blue callout buttons on the dashboard. Now turn on the wood burner and let it come up to temperature.
When it is hot hit the Cycle Start button and watch it work.
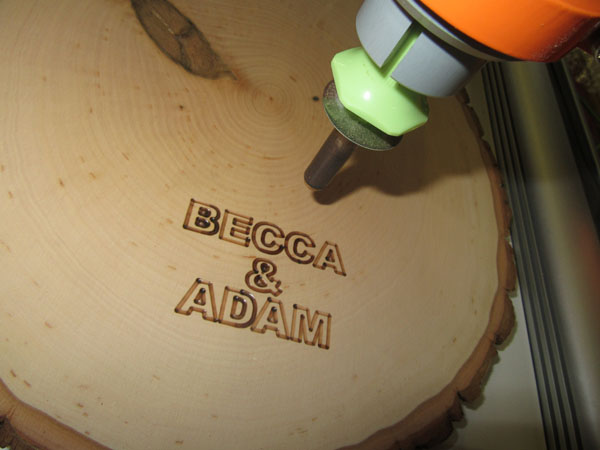
It takes a little experimenting to get the tool feed and speed setting correct and this depend in the material you are using and the brand and wattage rating of your wood burner. As you can see above the system reproduced the letters I wanted exactly as I wanted. Beside lettering, you can also scan any type of line art you like and import it as a .BMP file and use the VCarve Pro (or similar program to trace the image) and produce the needed vector lines.
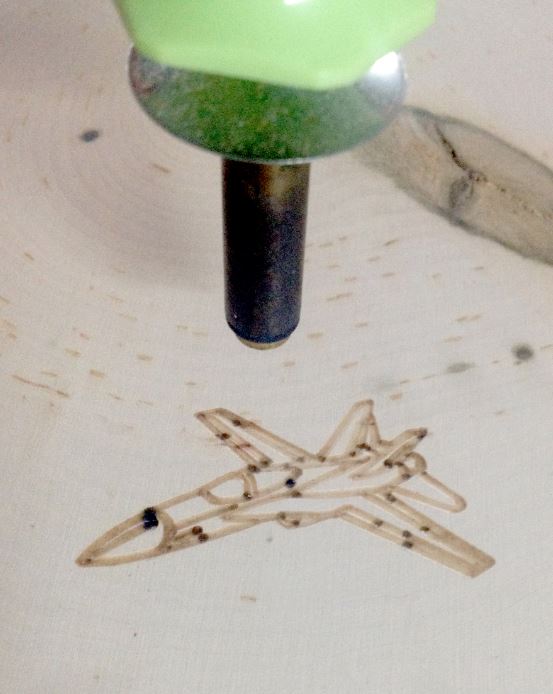
Here is another wood burning job, this time using a bit of clip art I downloaded from the internet. I ran it using a feed of 20mm/sec. so it is a little light. I would do it again at 10mm/sec. The material was bass wood plaque blank from Michaels Craft Store, excellent for making hobby awards and craft items.
After running several test jobs I have found the Stepcraft 2-420 CNC desktop system really easy to use and as I have said before, you are limited only by your imagination.


