
If you want to become the best aerobatic pilot possible, you need to master key maneuvers by taking small steps. First, make sure you’re proficient in performing maneuvers like inverted flight, vertical and horizontal rolls, inside and outside loops and the stall turn. You can then perform these moves in sequence to create a show-stopping routine. Let’s talk about a precision stunt called the “figure M,” which incorporates two stall turns with a little twist.
Before you attempt your first “figure M,” it’s important that you’re able to perform vertical rolls, the stall turn and an outside loop. This maneuver combines elements of all three of these maneuvers, and pilot proficiency is a must for success.
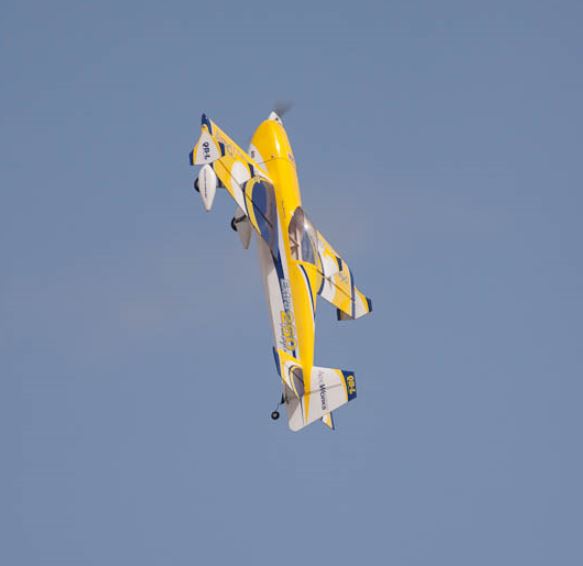
For the most part, precision aerobatic airplanes, which are often referred to as “pattern” or “F3A-style” airplanes, are used to perform a maneuver like the figure M. We have all heard the expression that you need the right tool for the right job. Similarly, not only do you need an aerobatic model to perform this maneuver, but you also need the proper mechanical and programming setup for your aircraft.
To simplify this, I always recommend the use of a flight mode (all dual or triple rates for all control surfaces are on one switch). In the low rate condition of this flight mode, start with low rate aileron and elevator values of about 20 degrees of deflection on the aileron control surface with 35% expo and 12 degrees of elevator deflection with 35% exponential. You should then use maximum deflection on the rudder with about 65% expo.
AN OVERVIEW
We’ll perform this maneuver with 3/4 rolls in the same direction to the left on all vertical segments. When performing any precision maneuver, flying smoothly is essential, and all roll rates should be the same throughout this stunt.
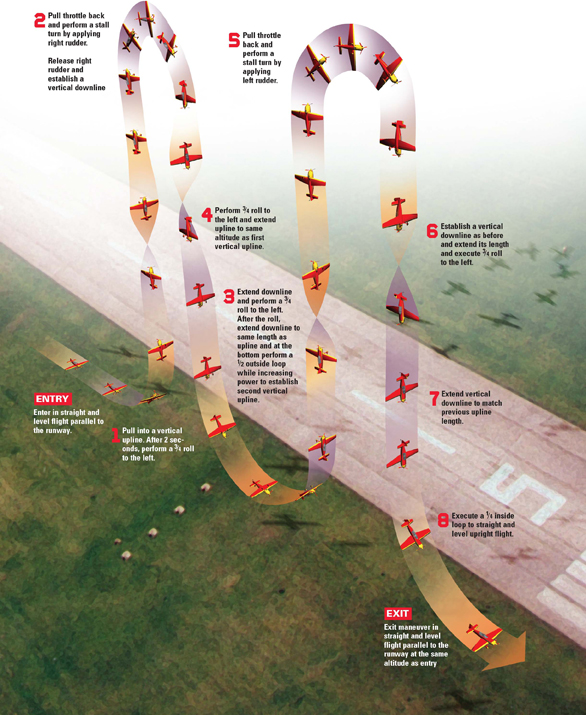
As a side note, the figure M is a “centered” maneuver and the model should be inverted and 50% complete with a 1/2 outside loop right when the model approaches the pilot’s center. Now, let’s break this maneuver into four steps:
- Establish a flight path that’s parallel to the runway and add full power. Then, before the model comes to the aerobatic center (where you’re standing), pull to a vertical up-line. Show a brief line segment (about two seconds long) and perform a 3/4 roll to the left. Then, show another line segment that’s equal to the first line segment. Pull the throttle back and perform a stall turn by applying full-rudder deflection. Release rudder input after the model pivots 180 degrees to establish a vertical down-line.
- Perform another line segment that is equal in length to the previous two and then perform a 3/4 roll to the left. After the roll, show another line segment of equal length and perform a 1/2 outside loop while increasing power to establish a vertical up line. As I mentioned earlier, the model should be inverted and the maneuver 50% complete as the airplane is directly in front of you.
- After the 1/2 loop has been performed and the model is tracking on a vertical up line, show another line segment of equal length. Then, perform another 3/4 roll to the left. After the roll, show another line segment of equal length and gradually pull the throttle back to perform another stall turn. Right before the model stops traveling up, apply full rudder deflection and let the model pivot 180 degrees to another vertical down line. Usually, the model will pivot more easily in one direction (mostly into the wind). Pivot the model so it will perform a stall turn and not “flop” over the top. In competition aerobatics, if a stall turn isn’t done throughout this maneuver and the model “flops” over the top, a final score of a zero is given to the pilot!
- After the vertical down line is established, perform another line segment of equal length, another 3/4 roll to the left, the final line segment that is still equal in length to the previous line segments. Lastly, perform a 1/4 loop to a horizontal upright exit while increasing power so that the model remains at a constant flight speed. When complete, make a 180-degree turn and give this maneuver another try! Remember, practice makes perfect, especially after complex maneuvers like this one.
In closing, you’ve now learned the fundamentals in performing the figure M with 3/4 rolls. Aside from knowing how to perform a given aerobatic move, spend the time to properly set up your aircraft to ensure success. For example, if your airplane is a bit sensitive when pushing on the 1/2 outside loop, try decreasing the elevator throw on that dual or triple-rate setting and/or try adding a touch more exponential. As time goes on, you’ll learn that behind every great aerobatic pilot is a well-trimmed and set-up aircraft. Until next time, patience is a virtue. Safe flying and always remember to have fun!


Lovely dscription