

Soon to be published in our upcoming February 2016 issue of MAN, here’s a sneak peak of Balsa USA giant scale Fokker Triplane kit review, by editor, Gerry Yarrish.
Video Courtesy of Ron Prestin
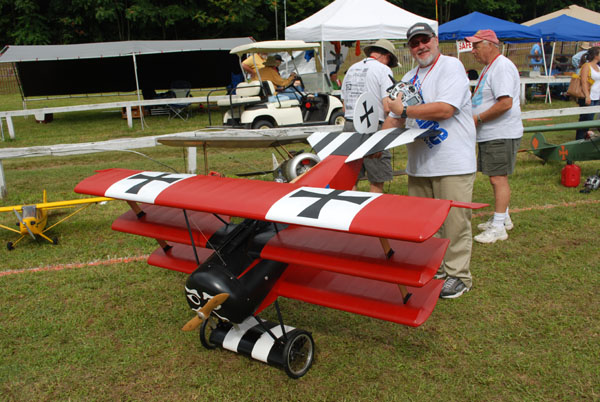
One of my all-time favorite airplanes is the Fokker triplane. First seeing action in 1917, the Fokker Dr.1 (tridecker), was a demanding aircraft to fly. But because of its superior climbing and turning performance, it soon became a favorite of many WW 1 German fighter pilots, including the Manfred Von Richtoven, the famous Red Baron. Though one of the most recognized aircraft to come out of the Great War, only 320 were produced, and it had very little effect on the outcome of the war.
I’ve built several RC triplanes and my latest, the Balsa USA 1/3-scale version, is one of the best performers I have ever flown. The 33% triplane is very impressive and is also very pilot-friendly. Even when the wind start to kick up, it can easily handle gusty conditions.
Unique Features
To get me in the mood, I like to start most projects by first assembling the tail surfaces, then I move on to the larger parts. The rudder has a laminated outline formed from balsa strips that you soak in hot water, then wrap around an included form. I protect the form with clear food wrap and use Titebond wood glue to laminate the strips together. After the glue dries, pin the outline over the plans and added the horizontal and diagonal balsa ribs. The vertical member supports a length of music wire which acts as the pivot hinge and joins the rudder to the fuselage. The horizontal stabilizer and the elevators are also assembled flat over the plans. The elevators tips are also formed with laminated balsa strips.
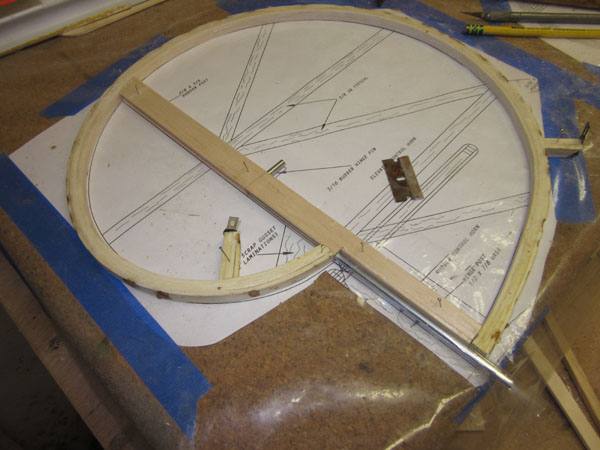
(Above) Rudder assembly on the building board
The fuselage is a simple box structure with lite-ply doublers at the forward sides and top and long square balsa longerons, verticals and diagonals forming the aft fuselage. The sides are assembled flat over the plans. To ensure they are the same size, the sides are built one on top of the other with wax paper inserted between them to prevent gluing the sides together. Once you have the two sides build, you assemble them vertically, (up-side down), and add the cross pieces using the fuselage top view as a guide.
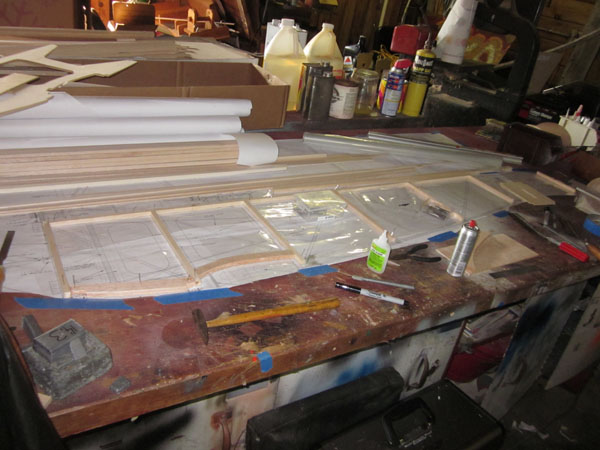
(Above) Fuselage side
(Above) aft turtledeck sheeting being applied.
Placement of the plywood firewall requires having your engine available. I chose the Zenoah GT80 twin-cylinder engine and it fits nicely without having to cut into the forward vertical members. For additional strength, wide balsa tri-stock is used to support the firewall all around.

(Above) Zenoah GT80 being fitted into place.
The Wings
Before tackling the wings, you have to form the six curved and laminated wingtips. The plans show using blocks glued to an assembly board, but I found that cutting a 3/4-inch pine board to shape and then clamping the layers of balsa to it was much quicker and easier to do.
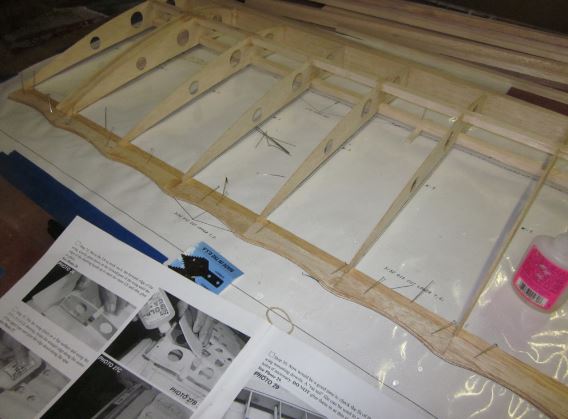
(Above) All the wings have the same basic construction.
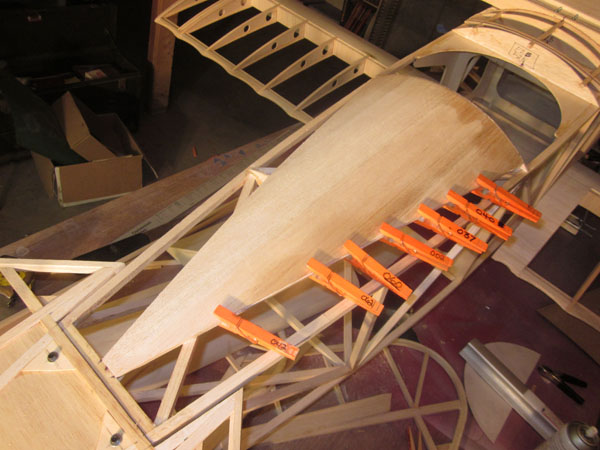
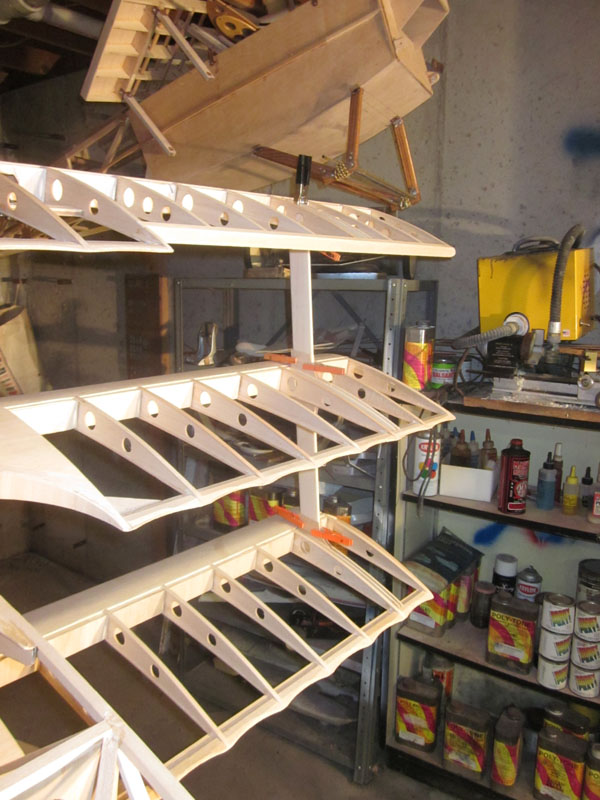
All three of the wings are built flat on the building board and have no dihedral. They are all roughly the same incorporating sheeted leading edges with D-tube construction. The trailing edge is formed with wide bottom sheeting and a narrower top strip glued in place then sanded to blend into the ribs. Each wing has two main spars with vertical-grain balsa sheer webbing and under cambered ribs. All the ribs have capstrips.
I started with the bottom wing as it is the smallest and relatively simple. The center of the wing is notched to fit into place on the wing saddle area. It has two rear facing alignment dowels that fit into holes in the aft former at the wing saddle. Two 1/4-20 nylon bolts are used at the front to hold the wing in place. The middle wing is basically the same as the bottom one with the exception of the center section cutout at the trailing edge. Also, grooved hardwood blocks, in the center of the wing panel, support and anchor the bottom of the cabane struts. The wing is held in place on top of the fuselage with two front alignment dowels and two nylon bolts in the back similar to the bottom wing.
(Above) The center over the wing as well as the fuselage sides, are covered with thin plywood sheeting. It goes from the cockpit forward over the top of the firewall and the cowling attachment formers.
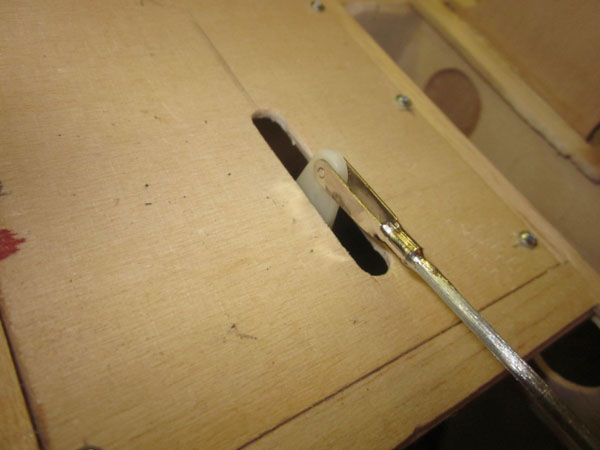
(Above) The servo installation method is left up to the builder so I made flush servo hatches with the output arms protruding downward through 1/4-inch-wide slots. I glued the frames between the ribs and screwed the hatch covers in place.
The ailerons are top hinged with giant-scale Du-bro flat hinges. I used Robart Ball-Link control horns on all the control surfaces. I use ZAP glue for most of the construction.
Struts
To make the cabane struts, the plans show an alignment jig to support the top wing. Using the jig you install the music wire strut pieces and solder the wing attachment straps in place. Take your time here. After the cabanes are soldered together, clean away any solder residue. Remove the jib then place the top wing on top of the cabanes and drill through the attachment holes and into the wing. Install the blink nuts and screw the wing in place.
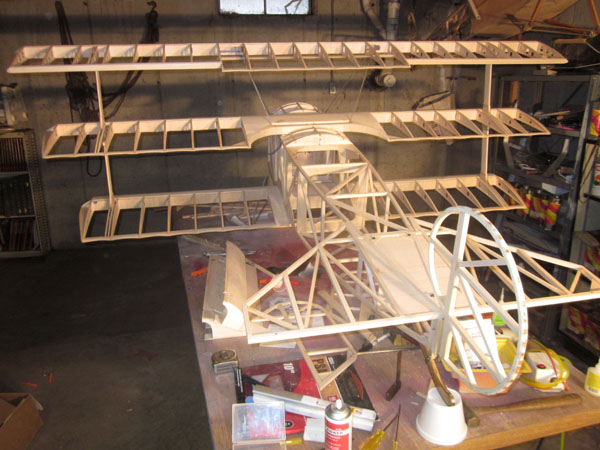
(Above) The triplane slowly starts to take place.
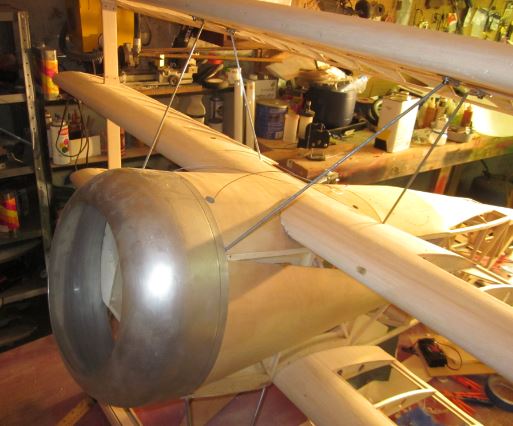
(Above) The outer interplane struts are made of 1/4-inch bass wood. Each is one piece and goes through all three wings, being secured with several 4-40 cap-head machine screws and blind nuts.
Finish and Final Assembly
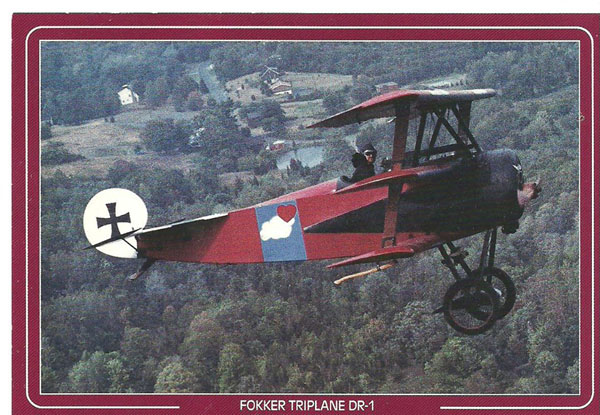
I used Stits Lite fabric and Poly Tone paint to cover and finish the triplane. The fabric is glued to the structures with Poly Tak and the cloth is shrunk tight with a covering iron. I used a HVLP (high volume, low pressure) spray gun to apply the paint which dries very quickly. Poly Tone is gasoline fuel proof without needing a clear coat.
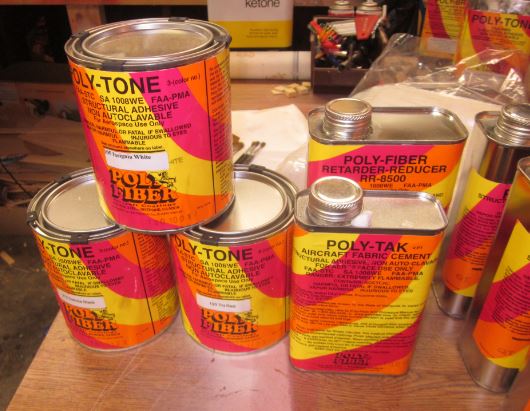
(Above) I used Poly Tone paint and Scale Stits covering material to finish the model
I used my Spectrum DX18 transmitter with two 9-channel AR9020 receivers, (one in the top wing and one in the fuselage), controlling six Protek RC 330T servos. Everything is powered with dual 2-cell 6.6V A123 2300mAh battery packs from Hangtimes Hobbies. For control linkage I used Du-Bro 4-40 threaded pushrod wires, Sullivan steel clevises and Dave Brown carbon fiber pushrods for the elevators.

(Above) I used ProTek R/C servos throughout.
For rudder control I used 0.032-inch braded steel pull-pull cables. I also installed an E-flite payload release unit for a bomb drop and a Sullivan Skywriter smoke pump with twin Slimline smoke mufflers.

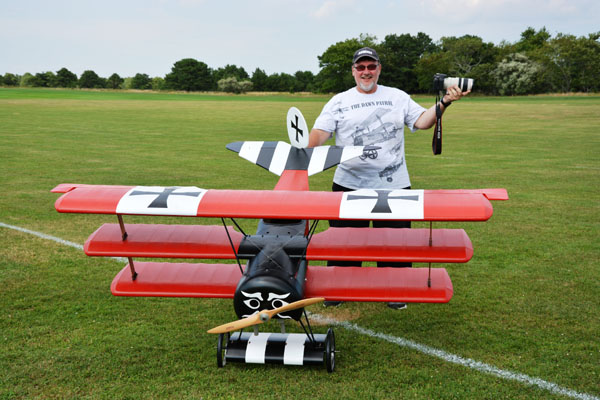
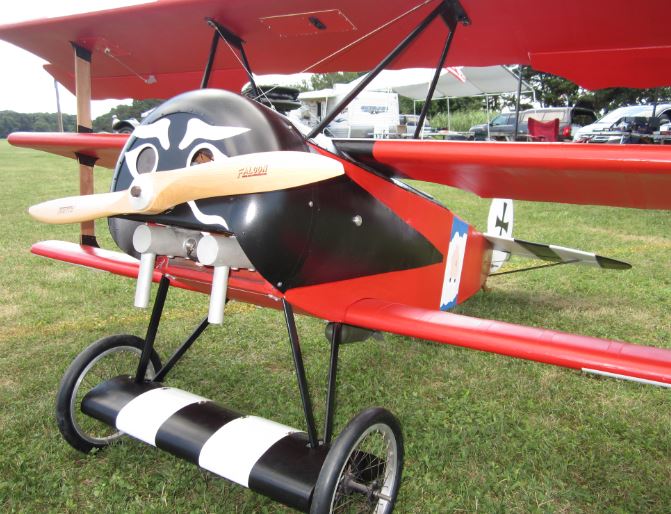
(Above) Mini Me at the controls. The Machine guns are made from laser cut wood and cardboard.
The aluminum engine cowling, machine guns and the 9-inch spoked wheels are all made using Arizona Model Aircrafters kits.
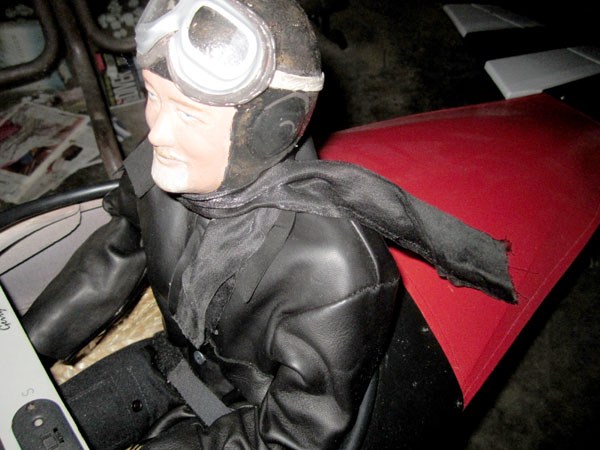
The pilot figure started as a bust from Signature Pilots which I modified with polymer clay. The black leather clothing is from Perfect Pilots in the UK.
Bottom Line
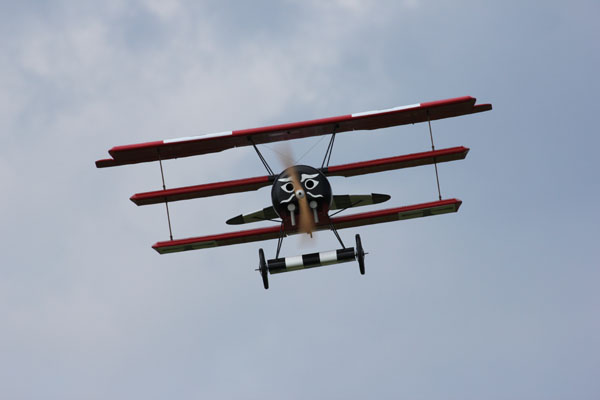
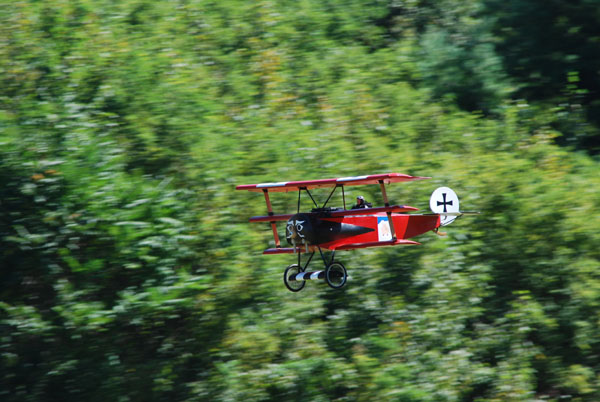
(Above) Another successful flight at the WW1 Jamboree, Old Rhinebeck Aerodrome.
It took about 500 hours over a 10 month period to build, cover, paint and fit out the big triplane. Construction is typical for all Balsa USA kits.
Though it is not a beginner’s project, there’s nothing tricky about it. If you want to impress, the 1/3-scale Fokker Triplane is the plane for you!
In the Air

Always have a friend help secure your model while starting the engine. For easy access, I installed the choke linkage so it exits the model between the two machine guns. Once the GT80 was running, I let it warm up a bit before advancing the throttle. On the ground, the triplane has very little tendency to nose over but with its fixed tailskid, some down elevator is needed to help move the tail around in turns.
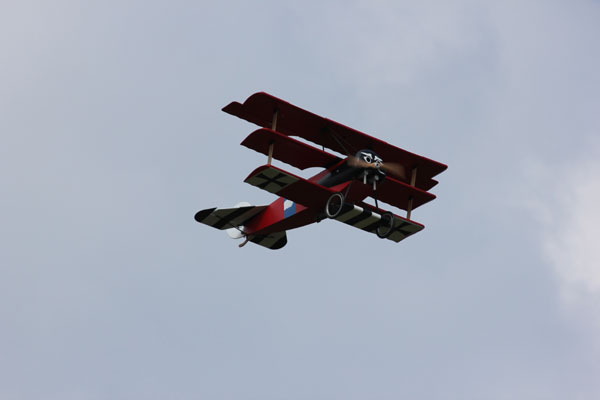
Stability: With no dihedral, the big triplane is neutrally stable and is very easy to fly. I use high rate settings for ailerons to increase roll rate, and low rates on the elevator and rudder.
Tracking: With its free-flying rudder, (no vertical fin), the does model tracks well, though there is a very slight left and right wiggle similar to the full-size airplane. In the turns this is not an issue. Rudder response is very positive.
Aerobatics: Aggressive maneuvers are what the full-size triplane was designed for. The Red Baron often said “the Dr.1 can climb like a monkey and turn like the devil!” The GT80 provides all the power you’ll need. Loops are easily done from level flight and turn-around maneuvers like wing-overs, half Cuban-8s, split-8s and Immelmann turns are all easily accomplished. Be aware of your throttle setting though. The Triplane can really pick up speed on the way down.
Stall and Glide Performance: Don’t try to stretch approaches without adding power. Those three wings, and the smaller sub-wing between the wheels produce both a lot of lift and a lot of drag. With the throttle pulled back, the stall break is very obvious and getting into and out of spins is pretty easy with rudder and throttle inputs.
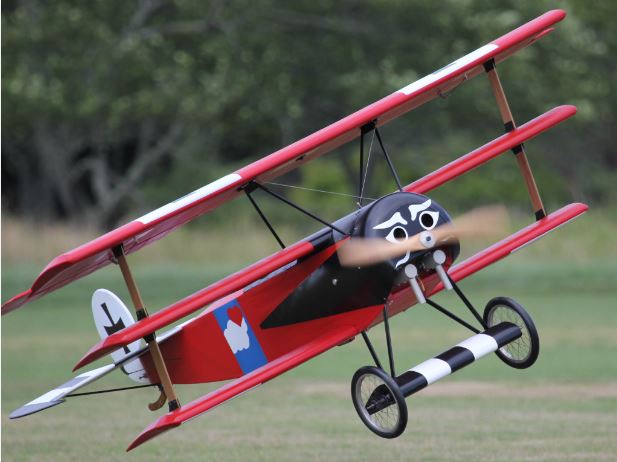
For landing use about 1/3 power and let the model come in with the nose slightly down. Then, when over the end of the runway, slowly bring the throttle to just above idle while holding in up elevator. Wheel landings are the only way to go. 3-pointers usually end with a sudden bounce or two.
Pilot’s Debriefing
Inspired by Cole Palen of the Old Rhinebeck Aerodrome, I try to fly my triplane with purpose. I trim the model for straight and level at just above half throttle. This way the model easily climbs by advancing the throttle and it starts to descend by reducing the power. The model is not a demanding flier. Dropping bombs and then making low-level, high speed passes and aerobatic moves with smoke on, just seems natural.
Specifications
Plane: 1/3-scale Fokker Dr.1 triplane
Mfg./Dist.: Balsa USA (Balsausa.com)
Wingspan: 94 in.
Wing Area: 3,260 sq. in.
Weight: 35 lbs
Wing Loading: 24.74oz./sq. ft.
Length: 74.5 in.
Time to Build: 500 hrs./10 months
Price: $549.95
Gear Used
Radio: Spektrum DX18 with two 9-channel AR9020 receivers (Horizonhobby.com)
Servos: Six Protek RC 330T (amainhobbies.com)
Engine: Zenoah GT80 (Horizonhobby.com)
Propeller: Falcon 26×8 (falconpropellers.com)
Batteries: NoBS A123 2300mAh (hangtimes.com)
Fuel/Smoke Tanks: Sullivan 24oz. (sullivanproducts.com)
Smoke Mufflers: Slimline twin set (chiefaircraft.com)
Smoke Pump: Sullivan Sky Writer (Sullivanproducts.com)
Bomb Drop: E-flite Payload Release unit (Horizonhobby.com)
Wheels, Cowl: Arizona Model Aircrafters (arizonamodels.com)
Covering, Paint: F&M Enterprises (stits.com)
Sidebar—The Bloody Black Baron’s Triplane
Next to the infamous Manfred Von Richtoven, (the Red Baron,) one of the most widely-known and beloved characters to ever fly a Fokker triplane, was Cole Palen A.K.A. “The Bloody Black Baron of Rhinebeck”. The very heartbeat of the Old Rhinebeck Aerodrome (ORA) in Rhinebeck, NY, Cole flew his replica Fokker Dr.1 triplane to thrill audiences for decades. Cole’s triplane was a real workhorse and saw plenty of wear and tear. It had been repaired and recovered numerous times and so, there were a few versions of the Black Baron’s first triplane. I chose to model Cole’s 1967 era version which is most readily identified by its fuselage markings, overall red paint job and two uncovered spoked wheels.
One of the earliest additions to the ORA museum, Cole’s reproduction triplane was powered with a Le Rhone 9J 110hp rotary engine. It was completely built by Cole and was used in his weekend airshows as early as 1967. With FAA registration N3221, it was flown until the late 1980s. Cole flew two other radial-powered triplanes for nearly 20 years, but his first can still be seen in the museum. His second radial-powered triplane, (now with a Le Rhône engine installed and an all red paint scheme), can be seen at the New England Air Museum in Windsor Locks, CT.
A Special Thank You
While building and painting the Balsa USA Fokker Triplane, my talented daughter Rebecca “RJ” Yarrish helped by painting the scale markings on the model.
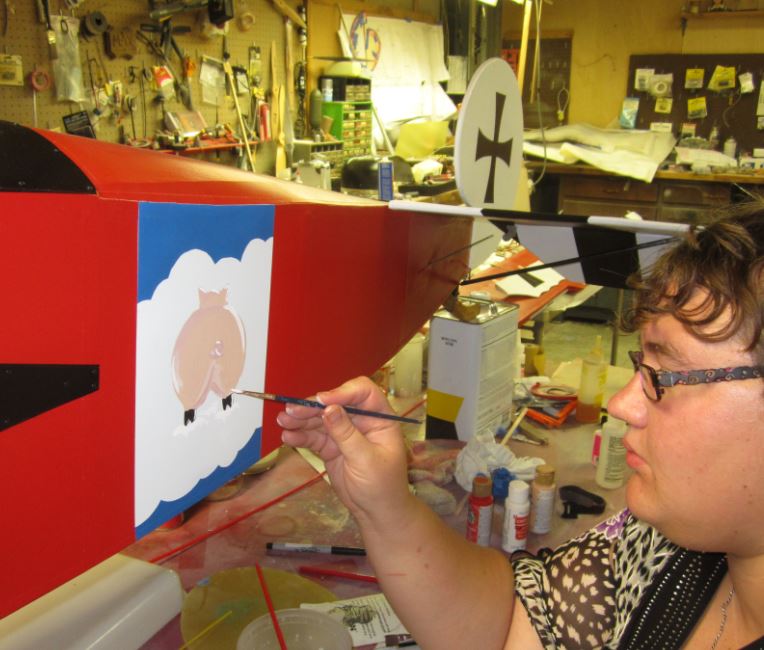
(Above) Rebecca adding the finishing touches to the Balsa USA Fokker Triplane.
When we showed off the model, the guys at the Old Rhinebeck Aerodrome were very impressed and the Maintenance Director Ken Kassen asked if Rebecca could finish painting the full size Triplane at the ORA. Wow! She was both honored and afraid at the same time. It all worked out great and the new Triplane at the Old Rhinebeck Aerodrome now has the perfect flying Pig on its side, just like the original Cole Palen artwork.
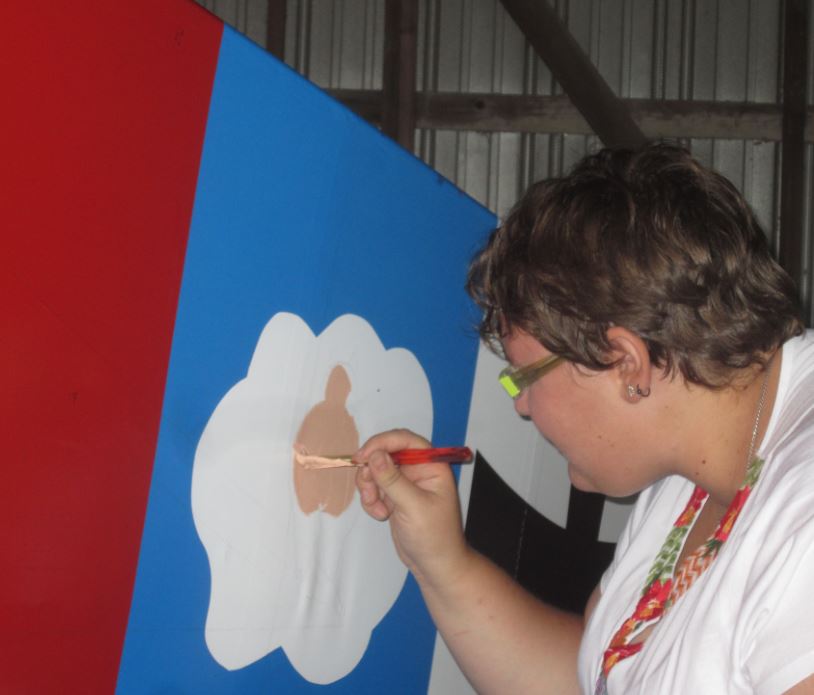
(Above) An nervous Rebecca starts the job.

(Above) Three Fokkers in the Fokker Hangar.
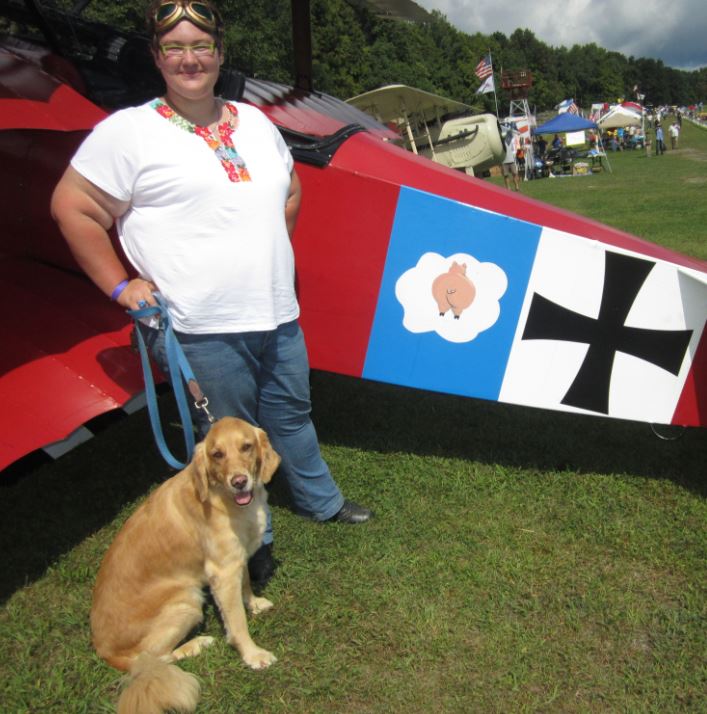
My daughter Rebecca and our always present Golden Retriever “Piper” show off Becca’s artwork on the full-size Rhinebeck Triplane!


Would you know where I Where can i may purchase one off these kitsets from, such a lively piece of work. A kitset without the ply covering which would be awesome. Kind regards Greg Cameron