
MAN readers are a clever bunch; you’re always coming up with easier, more efficient ways to build and set up airplanes. Here are 7 workshop tips that we think you’ll enjoy using. Have a tip of your own you’d like to share? Send us an email at MAN@airage.com.
Simple Pushrod Guide
You may not always want to install a servo to operate the choke on a gasoline engine; in fact, many times you may rather have a manual choke. The issue becomes controlling the push/pullrod’s location so you can operate it when the cowl is installed on the plane. The answer is probably in your parts box: an old nylon control horn. By enlarging the hole, you can use the motor mount bolt to secure the control horn to the motor mount, and then use one of the control horn base holes as a guide for the pushrod. Since it is made of nylon, there is almost no friction and no RF noise to bother the ignition of the engine or receiver. It’s very simple to make, install, and works very well.
Cheap Sanding Files
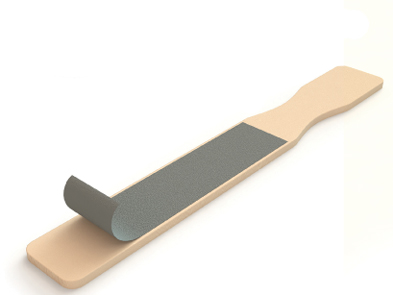
Next time you get paint at the hardware store, be sure to get some extra paint stirrers. Glue strips of sandpaper of various grades to each side of the sticks; 3M 77 spray adhesive works great for this. You can also use sticky-back sandpaper. Now you have created a collection of useful sandpaper files! I find it’s also helpful to mark the sandpaper grit on the handle of the stick for easy reference.
After the Delivery
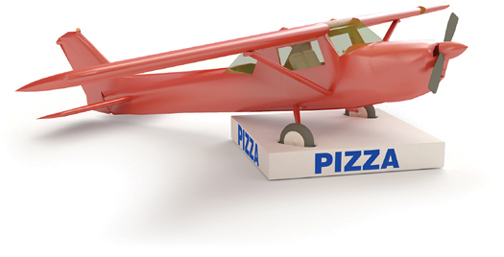
Don’t throw away those pizza boxes — they make great wheel chocks when transporting your favorite fuselage. Just cut holes to fit the tires —the plane size is only limited to the span of the pizza box. If you have carpet, such has the back of a car or a van, use some hook-and-loop fastener to keep the box and plane fuselage in one spot.
.
Parting Trick
The protective backing on some covering films can be difficult to separate at first. A strip of masking tape applied to each side of the covering creates a handle on which to pull the sheets apart. Once you try it, you will never go back to separating them with your fingernails.
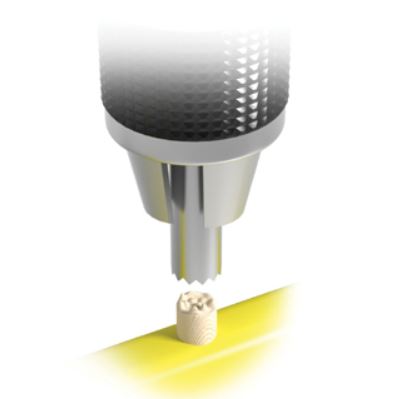
Replace broken dowels and screws


By using a hollowed-out drill bit, you can remove a broken dowel such as one used in the leading edge of the wing. First, find a piece of metal tube that can slide over the broken dowel. File cutting teeth in one end of the tube and then insert the other end in your drill. Use this to “core out” the broken stub. Use this same method to remove broken-off screws. Now just glue in a larger dowel and adjust the mating size hole or sand the dowel flush with the surrounding area and re-dill for the same size dowel you removed.
Little screws, big trouble
Tiny screws are the worst. You can use a pair of tweezers, but the screws are hard to handle and will often drop and fall off the bench onto the floor. Solve this by placing the screws into the holes and put a piece of clear tape over them. This will hold them there while you place the hubcap down onto the tire. Now you can easily start the screw by poking the screwdriver through the tape and turning them. This works very well and will work on any little screws that need to be put into a pre-drilled hole.
Transparent labels
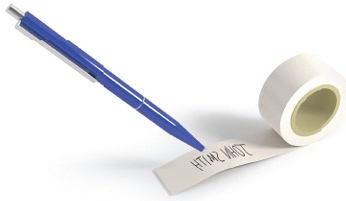
You never know when your model might get away from you, and per AMA rules, you need to have an address label inside the plane. You also want a label near your charging jack with the size and type of flight battery you have installed. If you don’t have a label maker, here is a simple way to make a transparent label. Using a ballpoint pen, write on the adhesive side of the tape. The trick is to write backward, which is not as hard as you think. When you attach the label to the model, every word will read correctly and be protected from the elements.


It’s all good
I can use all of these ideas — each one solves an issue I have had in the past. Thanks!