
Continuing his “from the workshop” sneak peek, MAN contributor Jerry Smith presents his second installment for the model builder community! Now that we have the tail feathers completed, let’s start building the fuselage. The fuselage is really sturdy built entirely of 3mm ply. The laser cut parts permit easy assembly and fast building. Follow the instructions along with my comments and this large roomy, sturdy fuselage will go together with outstanding engineering by Alien Aircraft.
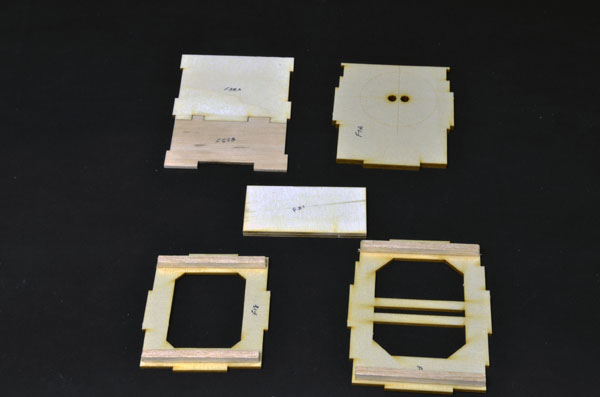
Before starting to assemble the fuselage there is some preparatory work to do. Parts have to be laminated and bulkheads reinforced so you can use them when the time comes.

The two sides are assembled with parts and doublers laminated to accept other parts. The doublers can be laminated with white glue or CA. I chose Mercury M300 CA for faster building time. Note there are a right and left side as marked. The reason for this is that right hand thrust is built in for the motor. Pay attention here.
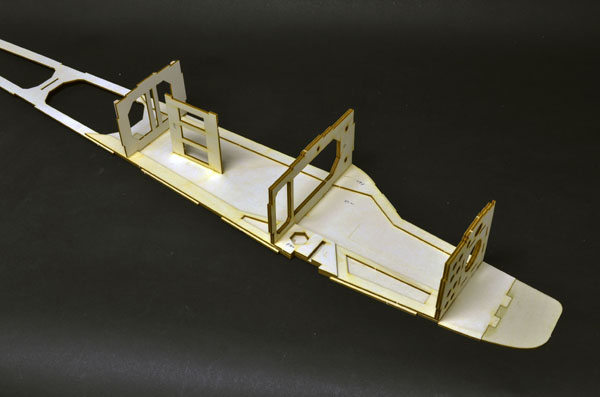
Three bulkheads plus the servo tray are installed on the left side. Make sure these are perpendicular to the side. The firewall shown mounted is for the electric version.
The right side is joined to the bulkheads with tab and notch to assure perfect alignment. This is where laser cutting really shines with perfection.
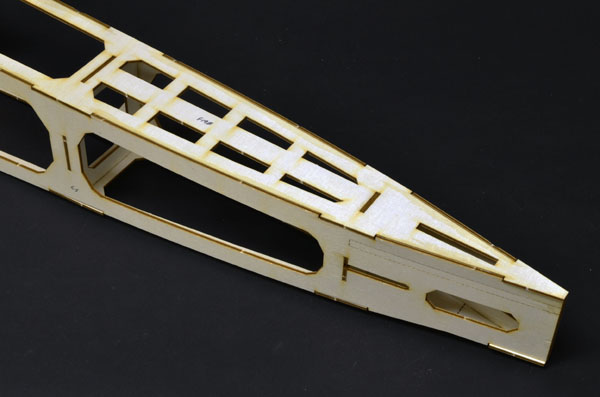
The top back piece is installed. Notice the lightening holes to keep the tail end light. Elevator slot is left in place to keep tail post in one piece during build.
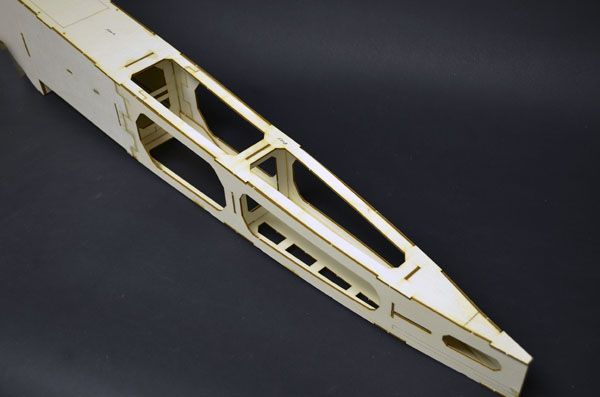
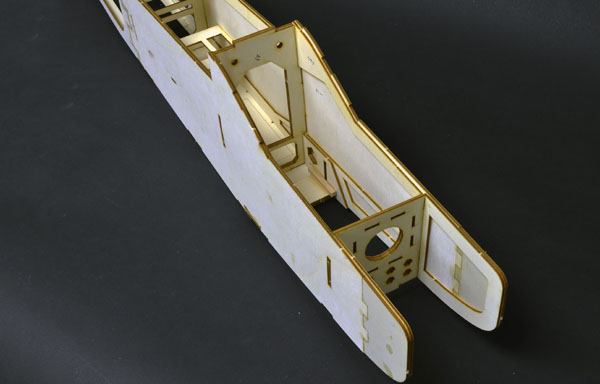
Bottom piece is glued in place squaring up the fuselage. This part extends all the way to the landing gear mount. Interlocking tab and slot make for perfect alignment with outstanding engineering by Alien.
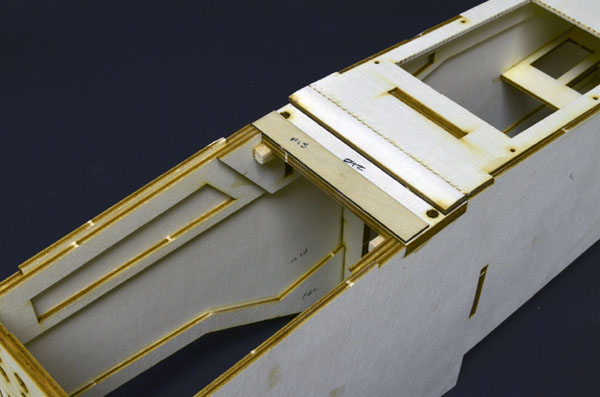
Landing gear mount joined with bottom piece. 1/4” sq. reinforcement pieces are epoxied to the bottom side of the mount for additional strength.
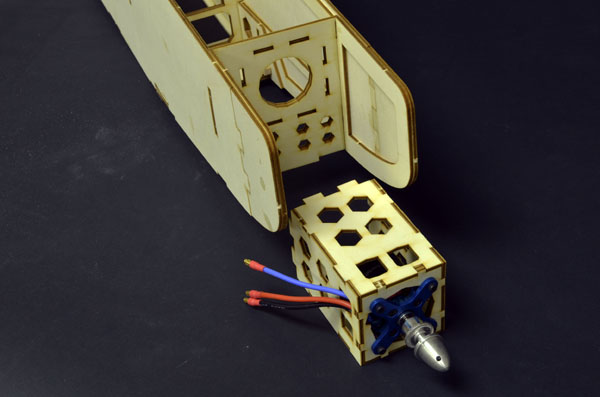
Electric conversion fire wall and motor installed mount ready to install.
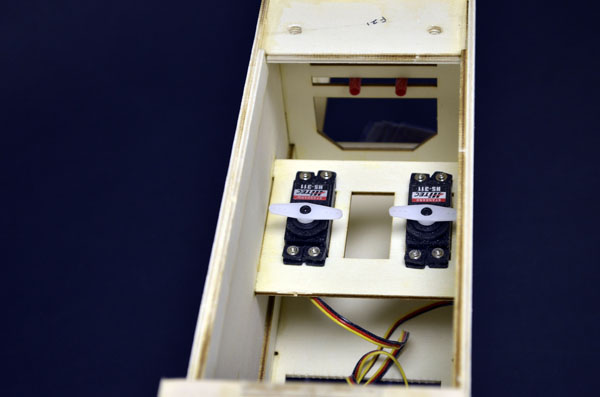
Servos mounted with pushrod casing temporarily mounted. I used Hitec HS311 servos for this purposed as recommended in the manual.
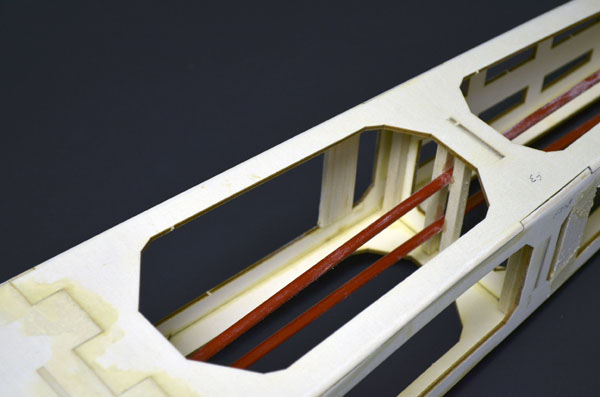
I supported the pushrod casing mid fuselage to eliminate flexing providing a stronger push/pull to the control surfaces.
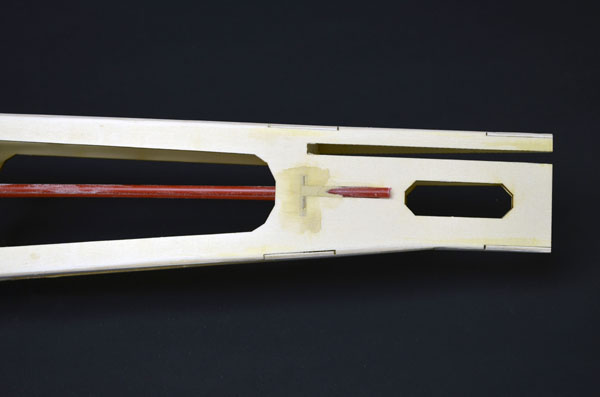
Pushrod casings terminate in provided slots at rear of fuselage. I applied a little filler to fair them in. Notice the flat spot provided for the tail wheel bracket.
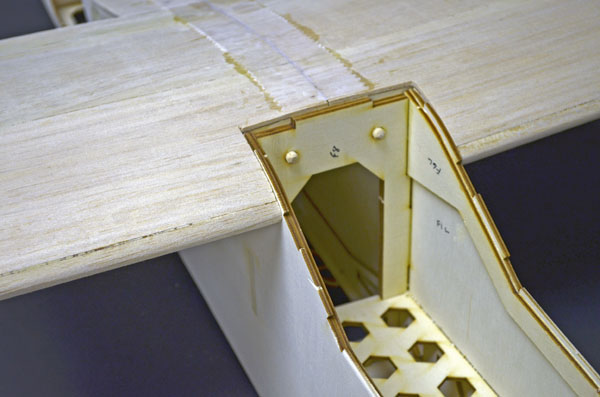
Before finishing the fuselage it is necessary to install the wing hold down dowels. Once the wing is mounted, match drill the holes with a ¼” drill. Good thinking by Alien on this one. Very hard to do if not by match drilling.

Once the holes are drilled in the wing for dowel pins the fuselage can be finished. There is plenty of room for the 4 cell 5,000 mil battery to be shifted fore and aft to achieve CG.
Stay tuned for more detailed building tips and techniques coming soon.
To check out Part 1, go to: https://www.modelairplanenews.com/blog/2013/12/17/alien-aircraft-funmaster-72-workshop-build-along-part-1/


Basically the same construction as the SIG LT-40 and 4-Star kits. Very easy for a beginner to learn building, and easy for an experienced builder who wants to kit-bash.