
Even the most basic computer helicopter radio will allow you to adjust the pitch curve of the rotor blades once you have determined the high and low pitch end points. However, measuring these high and low end points requires the use of a pitch gauge. To put it another way, the pitch gauge enables you set the pitch, or angle of attack, of the rotor blades to whatever position or range you desire. And this pitch must be set correctly, and within certain limits, if the helicopter is to fly as designed and to your personal desires.
Although there are several pitch gauges on the market, and sometime it’s difficult to determine which is best to use, I recommend one which is both easy to use and gives repeatable results. Notice I did not say it has to be accurate. First of all we have no way of knowing if any of the pitch gauges are accurate – we just take a reading and assume the manufacturers have made the gauge correctly. So to say one is more accurate than another depends largely on the manufacturing process which we cannot evaluate. Plus, the accuracy of the readings depends not only on the pitch gauge, but also on how level the flybar and swashplate are, and how well we align everything with our eye.
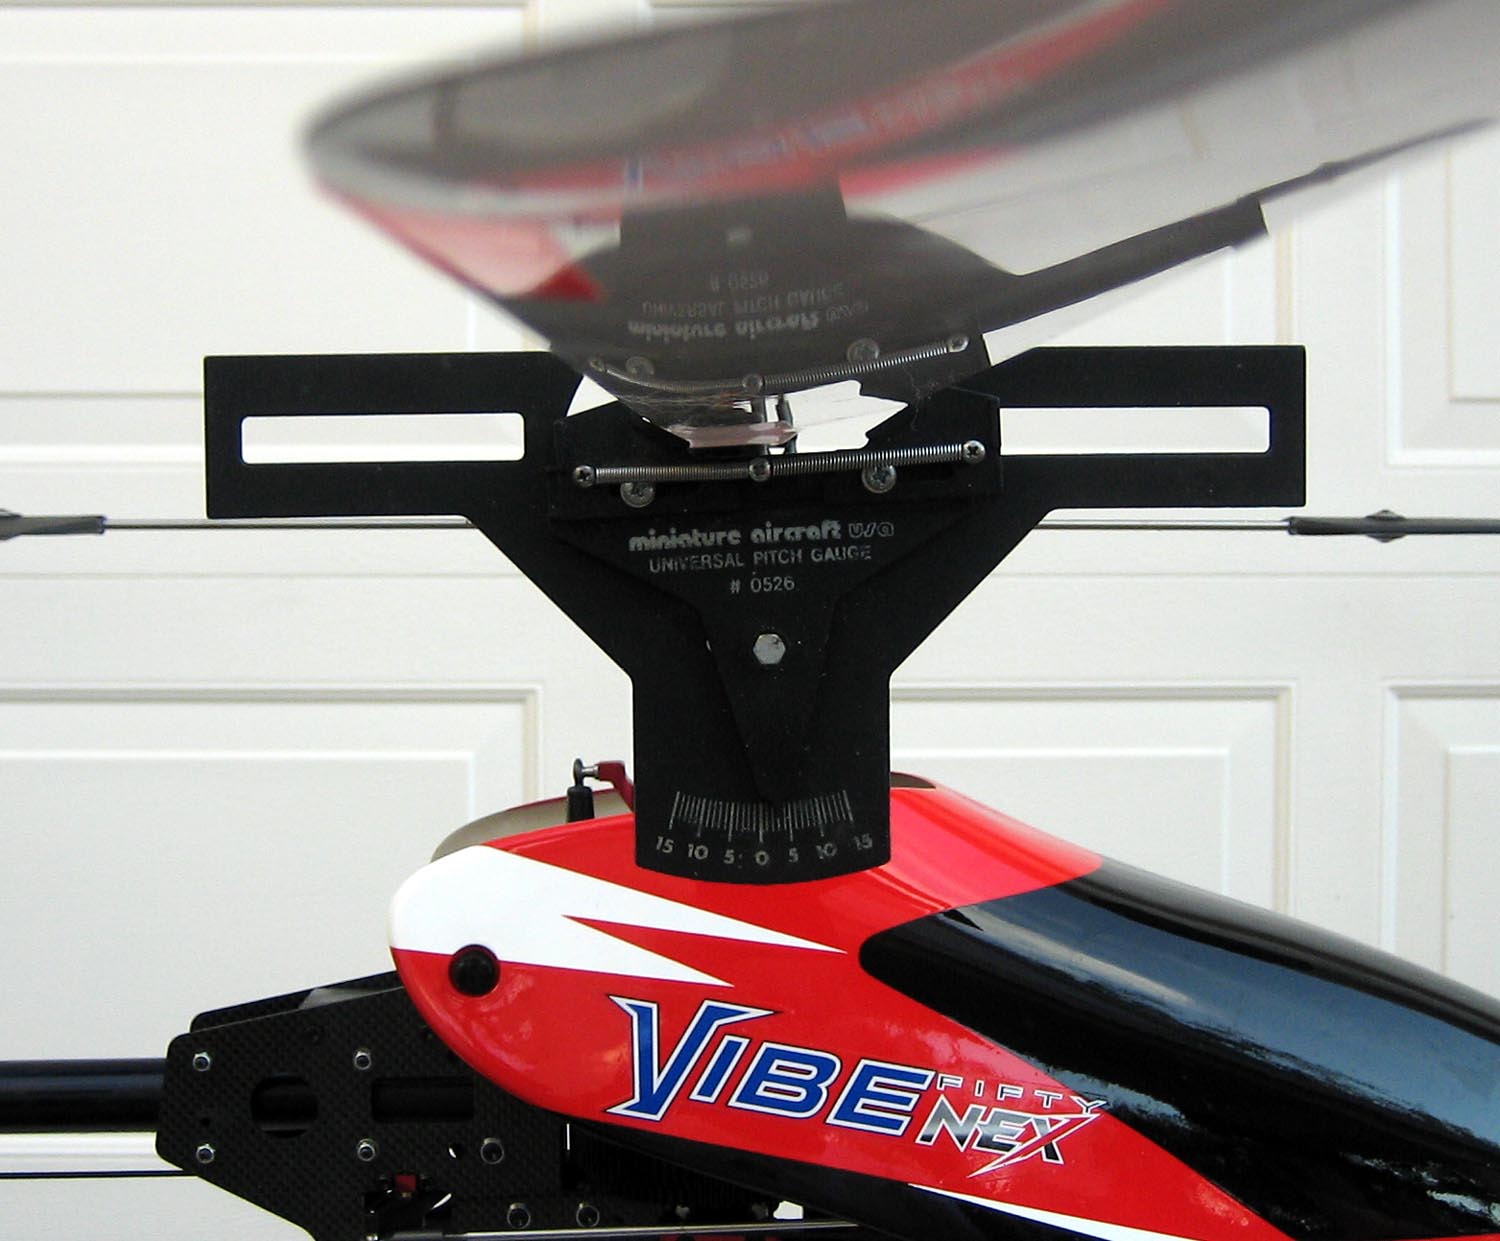
Two of the pitch gauges that are easy to use, give repeatable results, and are reasonably priced are the ones by Miniature Aircraft and Kalt. Both of these slip on the blade easily, are easy to align visually, and have large easy to read numbers. Some others are more complicated and require levels, or other parts to hold the gauge in position. They are not very easy to use at the flying field, and are no better in their overall accuracy.
But whatever pitch gauge you use, it’s important to follow at least a few basic principals to get accurate and repeatable readings. First, I recommend placing the gauge on the rotor blade near the root, vs. the tip, so it’s easier to line-up. Then make sure both the flybar and swashplate are level and parallel before any readings are taken. With the swashplate and flybar parallel and level, and perpendicular to the main shaft, the pitch gauge is then adjusted so the top surface is again parallel to the flybar. A pitch reading, in degrees, is then taken directly from the large and easy to read numbers on the gauge.
The pitch gauge also has a convenient knob that locks the gauge in any particular setting so linkage adjustments can be made quickly to set the desired pitch setting. This is particularly useful for initial setups, whether for maximum pitch, minimum pitch, hover pitch, or just to check the overall range of pitch movement.


