

When you find that you can not purchase a molded part for your scale project, it really isn’t all that difficult to make that part yourself. Here is a great way to make homemade fiberglass engine cowlings with readily available supplies. To make the engine cowling for my 1/4-scale Sopwith Camel, I used 1-inch-thick blue insulation foam, a 1/2–inch diameter dowl, some plastic food wrap, 3M Super 77 spray adhesive, a heat gun, 6 oz. fiberglass cloth, some old pantyhose and Zap’s Z-Poxy Finishing Resin.
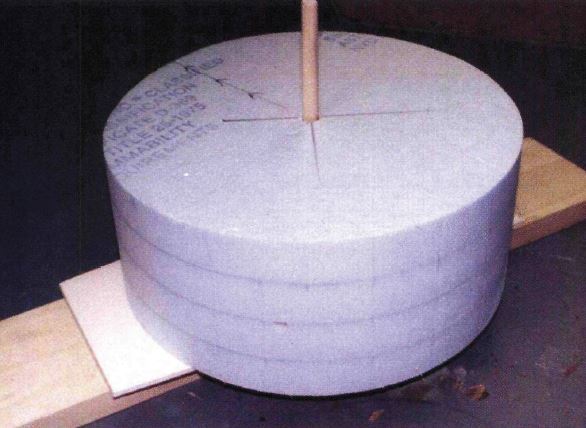 First cut four 12×12 inch squares from the blue foam sheet, and glued them together with the 3M Super 77. The adhesive does not interfere with the sanding of the foam plug. I used my drill press to drill a ½ inch hole in the center of the foam block and then glued the dowel in the center of the block leaving 3/4 –inch sticking out of the bottom and about 3 inches protruding at the top of the block. The dowel will act like a spindle so it must be plumb to the top of the block.
 I drilled a 1/2-inch hole into a piece of pine board to accept the dowel so that I could mount the assembly on the board and rotate it on my band saw: this made a perfect circle cut in the foam slightly larger than the final size I wanted the foam plug. I next clamped the board to my drill press table and with the drill press set at a low speed, I spun the foam plug so I could sand it to shape. Course sandpaper works best for the rough shaping, but make sure to use a shape template to check the profile of the plug as you get close to the final shape and size. The switch to a fine sandpaper grit to sand it smooth.
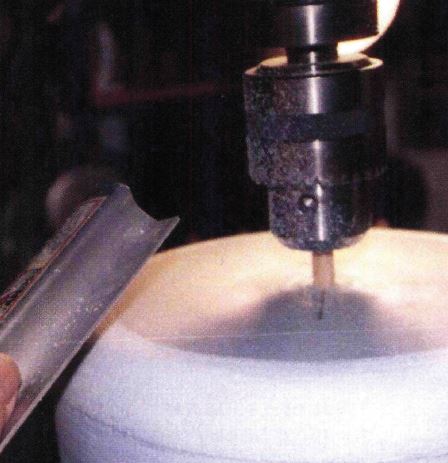
 Once you are satisfied with your plug, hold the dowel in a vice and cover the foam with plastic wrap. I secure it in place with clear tape and then with a heat gun, shrink the plastic wrap to get rid of any wrinkles. The wrap acts as a release agent for the fiberglass part.
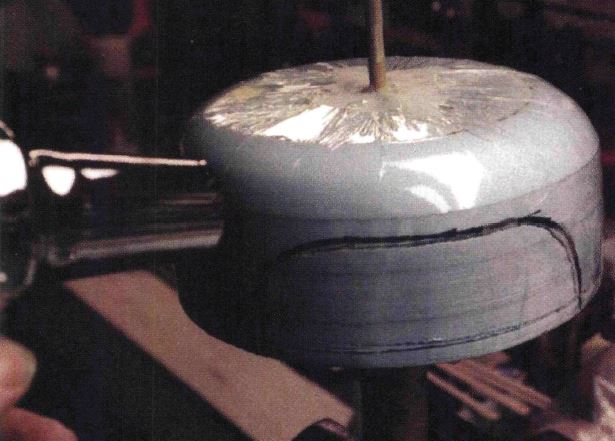
 Next cut 6 oz. fiberglass cloth into strips and wrap them around the plug and secure with clear tape. Cut some circular pieces for the top of the plug and continue adding until you have three layers overall.
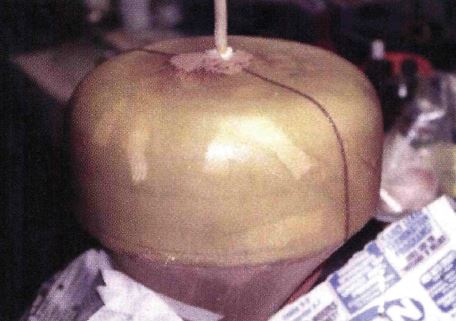 Pull an old pair of nylon pantyhose over the plug to press the fiberglass tightly around the foam plug. If necessary, reach under the nylon and smooth out the glass cloth so it lays flat. Pull the pantyhose down really tight and then secure it to the bottom end of the dowel with more take or some cable ties. Now stat brushing on the Z-Poxy Finishing Resin and let it soak through the nylon hose and into the fiberglass cloth. It “wets” the glass cloth very quickly. Keep applying the resin until there are no white areas left. Once cured overnight, the resin will be nice and hard, and it sands easily.
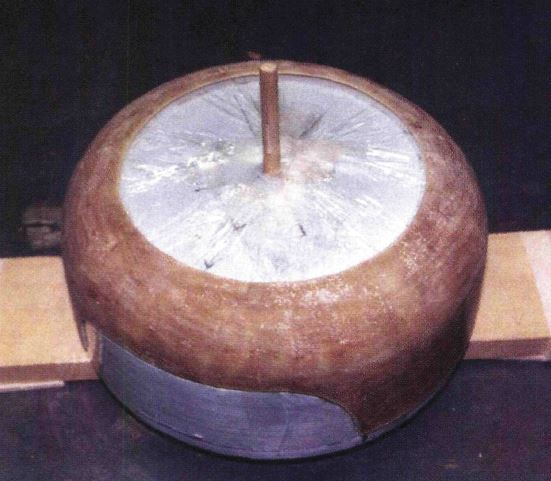
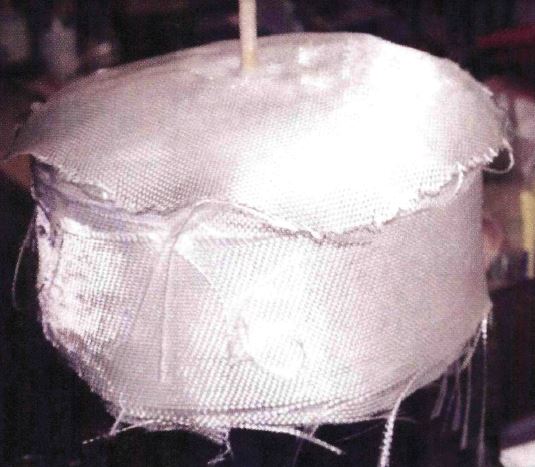
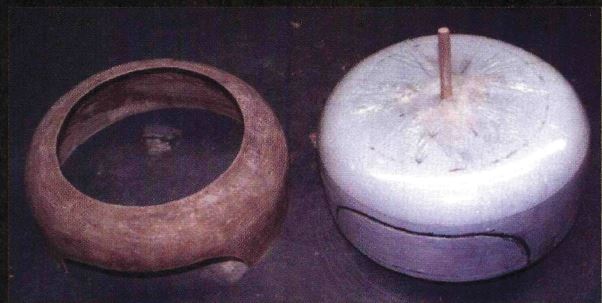
After the resin has cured, trim, cut and sand the cowl while it is still on the plug. The layer of plastic wrap will should allow you to remove the cowling from the plug fairly easily. You can then prime and spot putty the surface of the cowling before you paint it. If you like, you can add a finish layer of .75 oz. cloth and resin over the cowl to provide a nice finish.
Give this oldie but goodie technique a try. You will be pleased with how easy it is to make a glass cowl by yourself in your workshop.
Text & Photos by John Tanzer


