
Sooner or later you may want to try your hand at flying a scale subject. Since most full-size aircraft use flaps, many scale model also require them for true scale operations and function. A scale model with flaps fully deployed is a cool sight. If you have never flow a model with then there are a few things to know about. There right ways and wrong ways to use them. This article should help you understand what’s going on.
In a nutshell, when flaps are lowered they change the wing’s lift and drag characteristics and lower the stall speed. By changing the camber of the wing, the lift and drag are increased for a given airspeed. As a result of these changes affect the speed that the aircraft can land.

Common Flaps
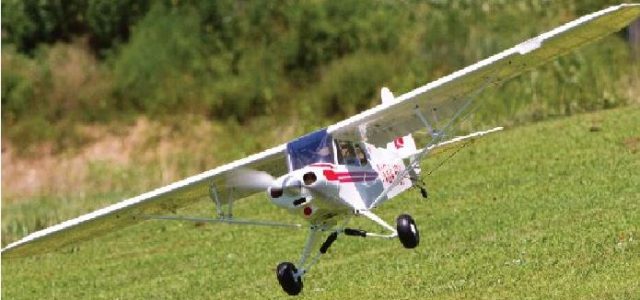
Though there are four basic types of flaps: plain split, Fowler and slotted. The plain flap is the most common and is simply a hinged portion of the trailing edge. It is usually hinged at the top of the control surface since it only moves in a downward direction. Super Cubs, Cessnas and other sport scale models use common flaps, to keep construction and function simple.
If you have never flown with flaps before, don’t worry. Flaps add flexibility to your model’s flight envelope, and it is a fun new experience. The major advantage is they shorten (and steepen) your landing approach by allowing your plane to fly more slowly in a nose down attitude. Here are some hints!
Do’s
- Learn how your plane reacts to flaps at a safe altitude before attempting the first landing.
- Reduce the throttle to around 1/3 and let the plane slow before dropping the flaps.
- If used for takeoff, use only partial flaps.
- Adjust the power to maintain the approach path. Flaps add drag and so will require more power.
- Add power on a go-around and begin your climb out before retracting flaps.
Don’ts
- Deploy flaps at high airspeed. The flaps may depart the wings or cause serious structural or servo damage.
- Use flaps on the first takeoff and test flight. You must first determine how much deflection is correct for your model.
- Use full flaps on takeoff. This adds a lot of drag.
- Let the plane balloon and lose its airspeed. Adjust the elevator to keep the proper approach path.
- Retract flaps when low and slow or you could settle onto the runway.

Deploying flaps may result in the plane pitching up or pitching down. The elevator must be used to compensate and keep the plane on the desired approach path. Another characteristic of flaps is that the first half of the flap’s deflection results in a greater increase in lift while the second half results in a greater increase in drag. Flaps also impart a large structural load on the plane and should only be used at a lower airspeed. Full-size planes have their air speed indicators marked for safe flap operating range.
Flap Facts
Since flaps provide more lift at slower airspeeds, you must be aware that when you retract them in-flight you will lose the lift and the plane could sink. For this reason, if you must do a go-around, make sure you increase power before retracting the flaps. Failure to do so could place your plane very close to stall speed before you can accelerate to a safe speed. This also applies to takeoffs with flaps. In most cases it is safer to take off with the flaps retracted or deflected no more than about 20 degrees. Larger deflections add more drag and can cause the plane to become airborne at too low of an airspeed.
Flying a scale model with operational flaps is a very rewarding experience. Not only do they look neat, but they also provide the same benefits as the full-size version.
Flaps impart increased loads on the wing and require attention during their installation. Make sure you use enough heavy-duty hinges on each flap and a heavy-duty control horn. There are many ways to actuate the flaps, including torque tubes and bell cranks. For large, fast or heavily-loaded models, the best way is to use a servo for each flap. These planes will also benefit from the flaps being locked in the down position preventing the airstream from blowing the flap back to the up position. This basically means that the servo arm is directly in line with the flap horn at full deflection and this takes the strain away from the servo. This is accomplished by turning on the radio and selecting full down flaps and choosing a servo horn position that is in line with the horn. Now, retract the flaps and make up the linkage from the servo to the horn. The amount of flap deflection is determined by the length of the servo arm; for more flap deflection, place the linkage farther out on the arm. The use of ball links may be required for smooth action and to eliminate binding.
Flap Deployment
The modeler has several options for the transmitter flap actuation method. The least desirable is to use a two-way switch, which only results in flaps up or full down. This is not very scale-like and could result in large pitch changes when the flaps are actuated. A three-position switch will allow the use of half-flaps for more scale-like flight. A knob or slider switch is another way to go and allows an infinite number of flap settings. The only drawback is that it is sometimes difficult to tell how much flap deflection is selected.
Servo Speed Reducer
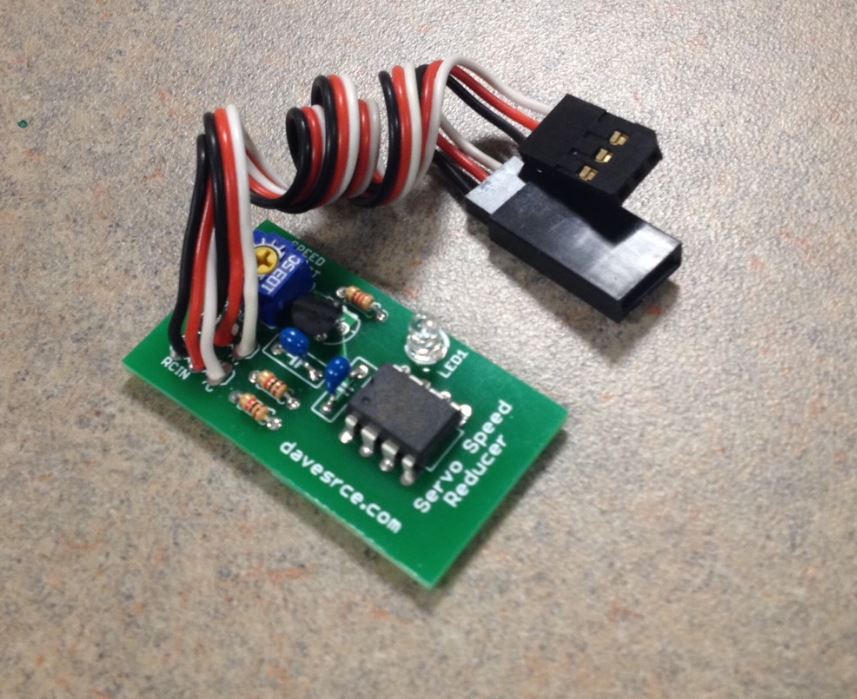 Another way to minimize the trim changes associated with flap deployment, is to use a slow servo speed. Many programmable radios have the ability for you to slow down the response of specific servos. But most pilots will find that simply adding a Speed Reducer like the one from Dave’s RC Electronics, a quick and simply way to deal with the situation. When the flaps take several seconds to lower, it minimizes the abrupt change in lift and gives the plane more time to settle down. Simply plug the unit in between the receiver and the flap servo(s) and you can adjust the speed by adjusting the adjustment pot on the circuit board.

Flying with flap-equipped airplanes is a great experience and just plane fun. Flaps allow you to operate your model from smaller flying areas and when it comes to scale competition, they allow you to full exploite your subject aircraft’s flight performance while giving you another flight option to add to your flight routine. Give it a try. It’s a blast.


Good article. Thanks.
Great instructions for all the new Timber pilots flying flaps for the first time. Lots of ballooning take offs. Including myself!
Thourghly enjoyed the article on flaps. Very informative.You never can learn enough about flying,but articles such as this are a pleasure to read and learn. Thanks so much.
When deploying flaps in flight should elevator trim up or down or does it depend on the aircraft?
Hi Tom, most of the time, it will require some down elevator mix by a few percentages, but it does depend of aircraft design for how much.
It’s been my experience that it depends on the aircraft. Most of the planes I equipped with flaps or flaperons(flaps & ailerons) were gliders and they all needed a small bit of down elevator to compensate for the increase in lift. There was, however, another sport plane I designed that the opposite was true. I assumed it would need a little down elevator and programmed it in my transmitter. When I deployed the flaps I nearly crashed due to the plane pitching down instead of the anticipated up. Fortunately I had enough altitude to recover.
Great, informative article that explains flap usage in plain, easy to understand terms.
Thank you!
I have never flown with flaps, but after reading this excellent article can’t wait to try it. Thanks for taking the time to help new flyers.
Gerry, Your cautionary notes are well taken.
The owner/builders of full-scale airplanes (“home-builts”) often hire a test pilot for the initial flights – a good idea! If you’re new to the use of flaps, and are not an experienced pilot, it’s best to ask for help with the radio setup and the initial flights. Could save a lot of frustration and possibly an airplane.
Also, there can be great differences in how various airplanes will react to flaps. Here’s one of the things I look for during initial test flights: TRUE, deploying flaps reduces the “stall speed” and that’s good, BUT it also reduces the angle of attack where the wing will stall and that can be bad. Bottom line: I use flaps only for landings and avoid deploying flaps until I’m “on final” (have no more turns to make) and keep the nose down (AoA as low as possible). And I use extra caution in turbulent air.
Steve Hollis
I just started learning flaps came in on the turn and deployed half flap in cross wind and trees my plane butits out and after these tips I made my first smooth flap landing yesterday ty
Thanks Jerry, you explained about deploying my new flaps in final, this is the first time been able to get that info.
The advice to deploy flaps on final is great, but not well aplicable on airfields where the final is short because of trees, building or other obstacles. In that case is better to deploy flaps during a base leg and make all throttle and elevator adjustments to achieve a steady rate of descent in advance, because no matter how smooth and well mixed your flaps operation is, it is still transition from one flight state into another one. And after the flaps are deplyed you also have to make adjustments to your actual crosswind correction (becaise your speed has changed) etc. and all this is nothing you want to deal witb just moments before touchdown. So in case of short final deploy flaps sooner than later (during base leg) keep your speed well above stall speed, make a slow smooth turn to final and you will be ok
Very nice indeed.
Flaps are great if you take the time to learn how to use them. I have 4 aircraft with them ( Ultra-Stick 30cc, both versions of the Tundra and a Carbon Cub) and love them all. I would not recommend a plane with flaps to a beginner, you don’t have to use them ,but temptation will get you! I know for over 50 yrs experience. Follow the advice given on this page and you will have great fun and be able to take off and land in places you thought you couldn’t. HAPPY FLYING,, Jerry
I need help. I need to change my brother’s address but can’t fine out how to do it. He already has a subscription. His Name John R. Steele Please help me. I
am sorry but I do not have a subscription number,only his old address if that will help. Please help me.
Thanks for the info, I’m Thinking of getting the TIMBER 1.5 and I’m sure this will help me , I think I will get some help on the first flight.
If you’re airplane has flaps is it okay to land not using them at all
I fly diy Flite Test airplanes. They are made out of foam board and are very lightly loaded. I tried Full-length Flaperons on my Bushwacker (Timber clone), and the plane practically dropped out of the air. I expected it to balloon, so I had the throttle at 50%. I quickly accelerated to bring it back up in the air and put the flaps back up. They are awesome on takeoff, but something of a liability on landing. They work much better on my UMX Turbo Timber because the SAFE system trims out the flaps. I have since put my toes in the water, but this article has me wanting to try them again, but I will be sure to keep the throttle on!
I recently purchased a Turbo Timber and set up the flaps per the included manual. This aircraft has two flap positions in addition to zero flaps (3 position switch). The manual suggested a mix of 16% up elevator at half flaps, and 30% up elevator at full flaps. Flying with my instructor today, deployment of the flaps at 1/3 throttle caused the aircraft to nearly do a loop. Subsequent attempts at altitude and 10% throttle still resulted in too much up angle of attack. Kinda scary.
I took out the mixing of the elevator and only deployed flaps at zero throttle. The aircraft pitched up slightly, but the settled back down to a gentle zero throttle gentle glide path and touch down. Loved it!
My question is, would the mixing recommended in the manual typically be up elevator? Seems to me I had to apply a little down elevator on flap deployment to maintain glide slope.
Ken, You need to consider the center of gravity (CG) of the plane when anticipating the effect of deploying flaps. Deploying flaps causes increased drag on the wing. In a high wing plane, the CG is located beneath the wing (within the fuselage below the wing) while a low wing plane has the CG above the wing. When flaps deploy, drag acts to pull backward on the wing and the plane rotates around the CG. As a result, high wing planes rotate upward and low wing planes rotate downward. I adjust the elevator setting at a given slow speed (1/3 throttle) until the plane flies level. You should make observations at a safe altitude, then land the plane and make adjustments. Repeat the process until satisfied with the result.