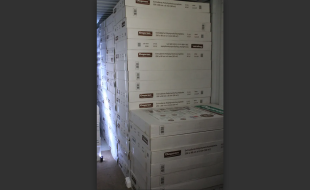
Fly this updated loop!

Fly this updated loop!

Even though this maneuver is intended for indoor precision aerobatic competition, the setup process for both an indoor aircraft and an outdoor park flyer are similar.

Fly this updated loop!

Flying indoors usually requires more control surface deflection due to the obstacles that exist, which is acceptable for a 4.5-ounce foamie. (Photo by Xavier Mouraux)


Since we are talking about an indoor aerobatic maneuver, I thought it would be helpful to cover both indoor and park flyer setup. For my indoor 32-inch-span airplanes that weigh about four and a half ounces, I prefer to use maximum rates at all times. Control throws are 45 degrees for aileron, elevator, and rudder deflections (active all the time), with about 65% exponential across the board. Generally, when you fly indoors, your plane has to perform in a rather confined space. Gymnasium and other indoor sports complexes have different obstacles with which to contend. Since indoor airplanes are extremely lightweight, their flight characteristics are much different than larger electric and gas-powered designs. In fact, indoor flyers are relatively docile–even with such extreme control surface deflections! While flying indoors, maneuvers happen rather quickly. As a result, I change the exponential amount so that the aircraft is smooth whenever the control sticks are around center, but maximum rates are present when having to perform a snap roll or a spin.

For the typical aerobatic park flyer, low rate settings are a must for all control surfaces. I recommend 25 degrees of aileron deflection with 25% exponential, 20 degrees for elevator deflection with 35% exponential, and 35 degrees of rudder deflection with 50% exponential for the low rate settings. Mainly because of its higher wing loading, park flyers are not as forgiving as a four-and-a-half-ounce indoor aerobatic airplane.

The above settings are my personal preferences and should be a good starting point. You should test fly your plane and adjust each of your control surfaces to determine what changes, if any, need to be made. Take full advantage of your computer radio to fine-tune your plane.

Overview

During this maneuver, the aircraft should be flown parallel to the runway and upwind–unless it is indoors! You should initiate the loop by pulling back on the elevator control stick as soon as the aircraft is directly in front of yourself (known as the center position). Since the maneuver must be round, the initial pull that starts the maneuver determines the size loop. A more gradual pull results in a larger maneuver and an aggressive pull results in a smaller loop. The two quarter rolls are performed at the top of the maneuver. The first quarter roll begins at the “10 o’clock” position with the model in knife-edge flight at the top. The second quarter roll (in the opposite direction) begins immediately after the first roll and it ends at the “2 o’clock” position. The entry and exit point altitudes must be the same, and it is important to regulate throttle input to balance the maneuver.

Steps to success


Fly this updated loop!


STEP 1: This maneuver starts and exits directly in front of the pilot. Aligning the airplane, head into the wind, upright, parallel to the runway, approaching the center position. For this example, the aircraft is traveling from right to left. Advance the throttle to 80% and begin to pull elevator as soon as the airplane is directly in front of you. A gradual pull is best.

STEP 2: As the airplane approaches the 130 degree (about “10 o’clock”) position of the loop, begin the quarter rolls in opposite directions. Executed perfectly centered, the first quarter roll is complete at the top of the loop with wings in knife-edge. If the roll is to the left, the pilot will see the top of the aircraft. If the roll rate is slow, some left rudder may be needed to keep the loop during the roll. No flat spots should exist!

STEP 3: Only 50 degrees of the loop remains to execute the second quarter roll in the opposite direction of the first. As right aileron is applied to begin the second roll, a touch of left rudder may be needed as well as a slight pull on the elevator to keep the shape of the loop. The second roll must be completed at the 230-degree (about the “2 o’clock”) position of the loop.

STEP 4: Keep the elevator pull constant and regulate the throttle so the airplane maintains a constant flight speed throughout the maneuver and maintains the loop’s round shape. At the end of this step, the aircraft should approach level flight again directly in front of the pilot.

This maneuver requires lots of practice, patience, and a properly set-up aircraft. Perform your first few attempts at a safe and high altitude, maintaining a fairly quick roll rate for the two quarter rolls. With time, you can decrease the roll rate to improve the overall presentation of the figure.

Final thoughts

While this is a fairly difficult maneuver to fly well, it is important to set up your aircraft so its response doesn’t make the maneuver more difficult to perform. If the aircraft is too sensitive, the pilot may consistently fight the model throughout the maneuver. You should spend time focusing on the setup of the plane, making small incremental adjustments as needed to ensure success. Remain in your comfort zone and practice, practice, practice!

LLUSTRATION BY FX MODELS


Updated: July 30, 2015 — 11:44 AM

1 Comment

  1. In today’s world, all “How to…” should be always come with a video or animation. Specially with the explanation of maneuvers with multiple interactions of inputs and desired outputs.
    Theory is OK. Presentation is paramount.

Comments are closed.

Air Age Media ©
WordPress Lightbox