
When it comes to building scale models, there’s one task that often stops most projects from even getting started. That being having to make a scale engine cowling. To produce a fiberglass unit, you have to build a master plug then lay up a female mold over that so you can then lay up the final cowling with fiberglass cloth and epoxy resin. Very time consuming to say the least. Here’s a way to make a “one-off” cowl and the technique and materials can be used for any scale model you want to build.
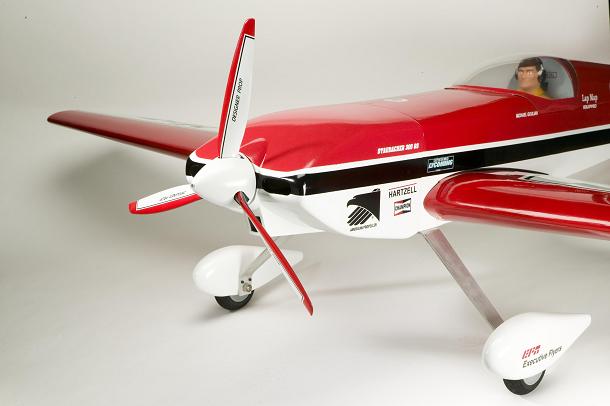
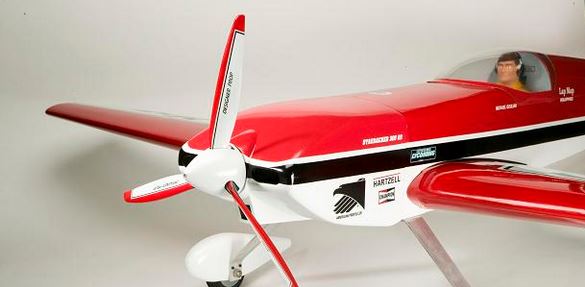
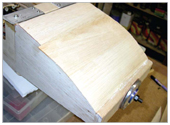
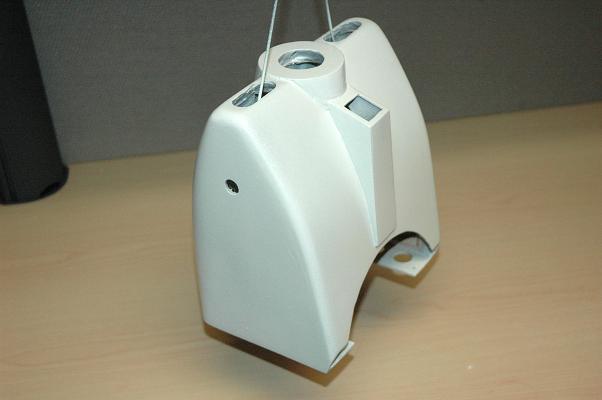
1. Here’s the “one-off” balsa and foam engine cowl I built for my Staudacher 300GS featured as a Model Airplane News construction article.
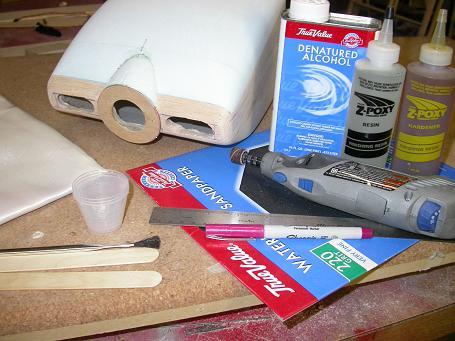
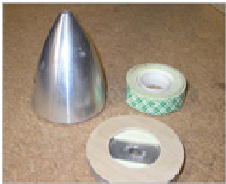
2. Here’s the stuff you need! Sandpaper rough and fine 150 , 220 and 320 grits, Pacer/Zap Z-Poxy Finishing Resin, 2oz. and 1oz. fiberglass cloth, basic hobby tools, balsa sheet, blue foam and a clean place to work.
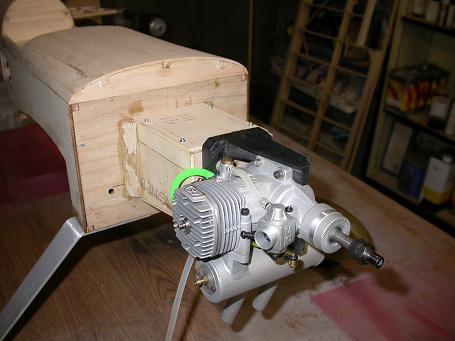
3. Start by attaching your engine and engine mount to the model’s firewall/engine mount box assembly. Be sure to properly position the engine so the propeller and spinner are at the correct spaced and positioned from the firewall.
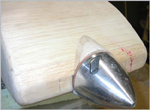
4. If you are using one, prepare your spinner by making a plywood spinner spacer disc the same diameter of your spinner’s back-plate. Sand smooth and stick it to the back-plate with double-sided sticky foam tape.
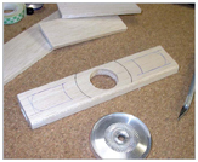
5. Make the forward face of the cowl out of two layers of 1/4-inch or one layer of 1/2 inch balsa. Mark the air inlet openings but don’t cut them out yet. Use your plans and photos to determine the proper size and spacing.
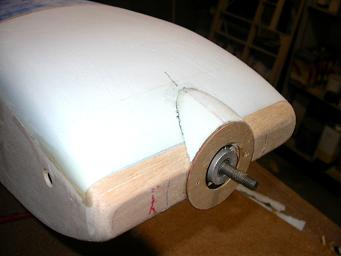
6. Tack glue the aft plywood backing pieces for the cowling to the firewall. The top piece is cut flush with the outer edge of the fuselage. The two sides are inset slightly so the side pieces can be glued to them and still be flush with the side of the fuselage. Once the cowl has been made, screws will hold these backing pieces to the firewall securing the cowl in place.

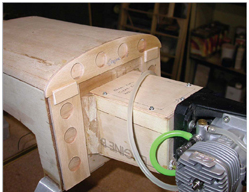
7. Tack glue the spinner disc to the face piece and then bolt the spinner back-plate to the engine. Make sure the face piece is level. Cut out and glue the two 1/8-inch balsa side pieces to connect the face piece to the cowl backing pieces at the firewall.
8.Add the lower corner doubler pieces to the inside edges of the cowl sides. Here I used 1/4-inch sheet balsa (bottom) and 1/4 inch square balsa pieces (top.)
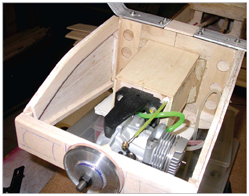
9. Sheet the bottom of the engine cowl with 3/32 inch balsa sheet. Notice that the grain runs across the fuselage from left to right. This adds stiffness to the sheeting. Use Zap CA and kicker to speed construction.
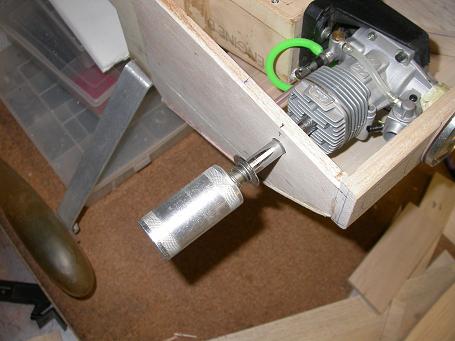
10. Now is a good time to make the needle-valve and glow plug driver holes in the side of the cowl. Before the foam top is added, you can see how things line up.
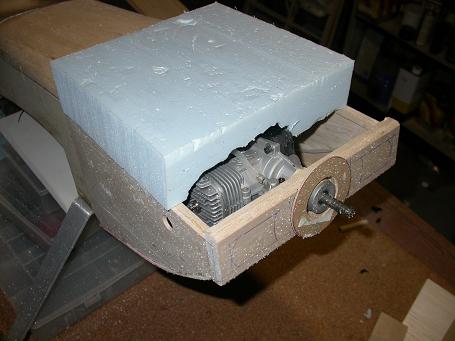
11.Cut a piece of 2-inch thick blue insulation foam to size and place on top of the balsa sides. You’ll have to carve and route the foam out to fit around the engine and engine mount. Another piece of foam will be added to the fill in the rest of the space behind the balsa face piece.
12. Using a hobby saw, roughly cut and trim the foam blocks to the shape of the engine cowl sides. Once this is done, you can start to shape the entire foam section! But don’t glue the foam into place just yet!
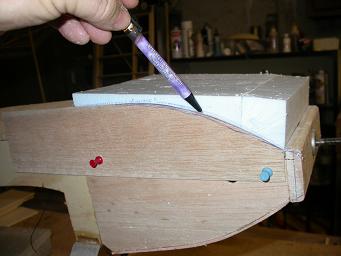
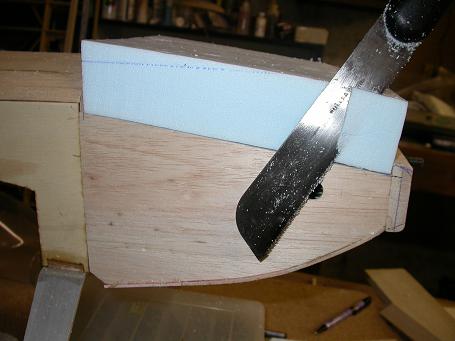
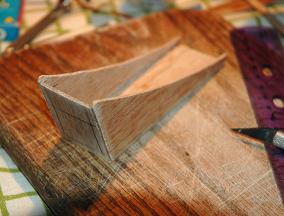
13. I used a piece of balsa sheeting as a template and pinned it in place to accurately mark the side-view shape of the cowl onto the foam block.
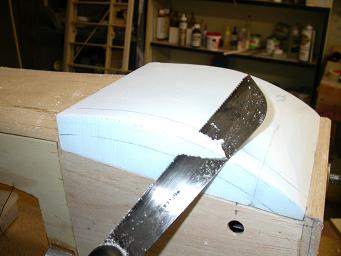
14. After cutting foam to the side shape, start removing the corner material to round the block. This saves a lot of sandpaper.
15. Once you’ve roughly shaped the foam, epoxy it into place against the balsa side pieces and the aft plywood stiffener. Notice that the fuselage has been wrapped with plastic sheet to protect if from the glue.
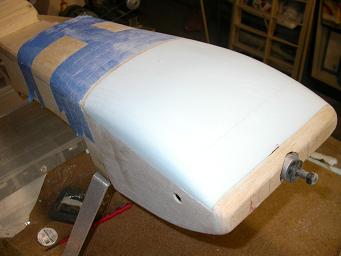
16. Here the foam block has been smoothed to shape and it blends nicely into the balsa sides and the front of the fuselage. I used a lot of blue tape to protect the fuselage from the sanding bar.
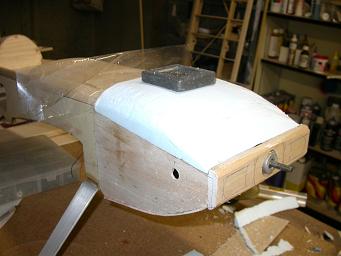
17. Here the plywood spinner ring and foam fairing block behind the ring have been glued in place and shaped to blend together. Use a very small amount of glue to hold the foam block in place. Notice that the balsa face piece has also been shaped and sanded to blend into the foam.
18. To add strength to the underside of the cowl, glue a balsa spinner ring fairing to the bottom of cowl and sand it to shape to blend into the spinner.
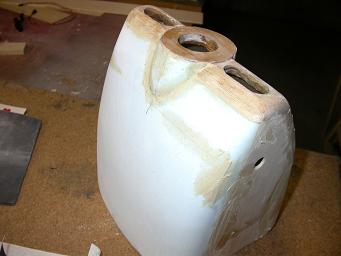
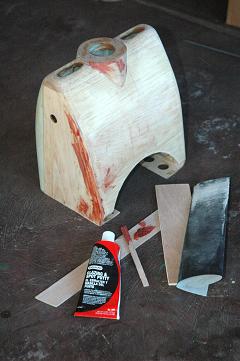
19. Here the cowl has been removed from fuselage to make it easier to fix and address any dents and seams with filler. Use a lightweight filler and allow to dry before sanding with 220 grit sandpaper. Repeat the process until all defects are eliminated.
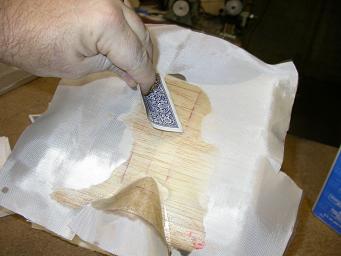
20. After sanding all the filler smooth, apply the first layer of 2oz. fiberglass cloth and coat with a thinned mixture of Epoxy resin and Alcohol (60:40 mix) using Pacer/Zap Finishing Resin.
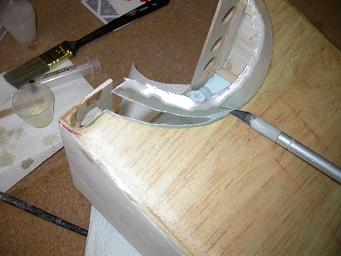
21. After the resin cures, cut and trim the cloth to shape and sand the edges smooth. Now apply 2oz. cloth to balsa sides and two layers over the top of the foam. Once everything has cured, sand smooth and apply another layer of Cloth and Resin (Use 1oz. this time.)

22. Sand all the cloth smooth again and apply a final layer of finishing resin. Sand smooth with 320 grit sandpaper.
23. After sanding the resin smooth with 320 grit sandpaper, apply red automotive glazing putty to fill any exposed weave and pinholes.
24. If your cowl has one, use balsa to make the basic scoop and then sand smooth and apply fiberglass cloth and resin to seal the grain. Cut the opening in the bottom of the cowl and glue the scoop in place. Fill the gaps and seams and sand smooth.

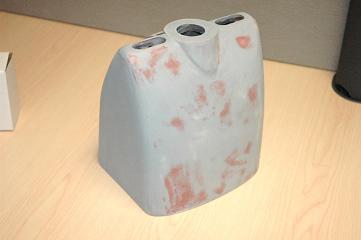
25. Here the cowling has been sprayed with the first of several coats of sanding primer. The primer is available at most department stores and automotive supply shops.

26. Sand each coat of primer smooth and then fill any defects and pinholes with red glazing putty.
27. Here you see the glazing putty sanded smooth. You have to sand almost all of the putty off to properly prepare the cowling for paint. Repeat this process again until you have a smooth defect free surface.
28. Using your favorite brand, apply a coat of white primer, sand smooth and apply several light mist coats of gloss white paint. Hang and allow to dry.
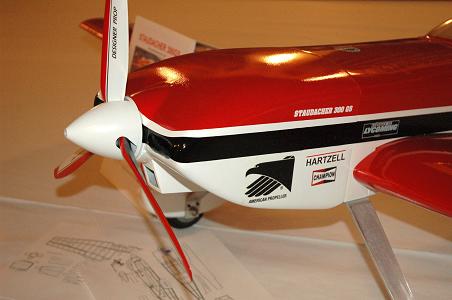
29. Allow the white base coat to dry over night, mask off and spray on your trim colors. Lightly sand the paint with 400 grit sandpaper and then rub down with some extra fin steel wool. Wipe down with a tack-cloth, add any decals and then apply two or three coats of your favorite glossy clear so the painted cowling matches the shine of the film covering on the rest of the model.
Attach the cowl to your firewall with suitable screws and brackets/blocks and you’re ready for the flying field. For an even nicer scale appearance, apply paint and scale markings to your spinner and propeller blades.
I hope this will inspire you to try this building technique for yourself. Complex shapes as well as round radial engine cowls are easy with this easy step by step method.


I followed this procedure when this model first appeared in MA several years ago. However I was unable to find the blue foam mentioned in the article. Instead I found a red foam easily carved and sanded. It turned out fairly good.
i love using lost foam method, i think its a bit easier and faster, but great step by step tutorial, thankyou 🙂
Hi Ron,
Please advise where to get the red foam material. Thanks