
Recently, I took a look at a few known International Miniature Aerobatic Club (IMAC) programs and came across an interesting maneuver that serves as a great building block for other, more intricate, maneuvers. The 3-roll 270-degree rolling circle is maneuver four in the 2011 Advanced Class program. Many pilots claim to perform rolling circles, but to perform a rolling circle with a defined amount of rolls in a distinct direction without changing altitude and while maintaining a perfect circular shape, or in this case a 270-degree circle, takes a great amount of skill and teaches the pilot a lot about flying the airplane, and not the other way around! We’ll simplify this rather complex maneuver by breaking it down into four steps. Before we begin, let’s look at the dual-rate and exponential settings on your aircraft to make you a better pilot.
FIRST THINGS FIRST
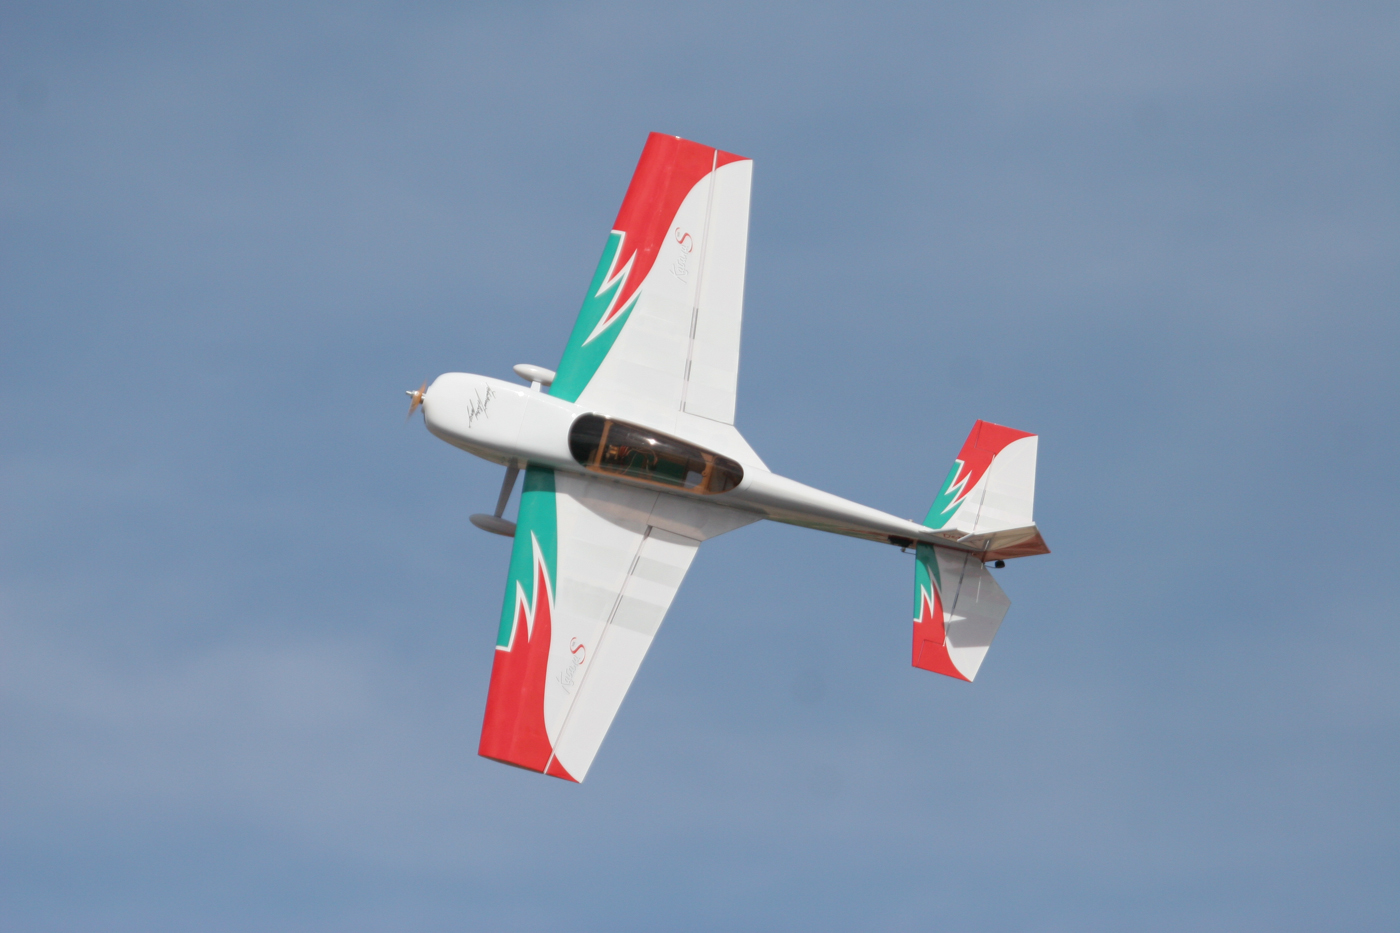
As an example I will use my E-flite Extra 300 and Spektrum DX8 transmitter. On all of my aerobatic models, I use the rudder switch and have three separate modes:
| Pos. 0 (3D rate) | Pos. 1 (snap rate) | Pos. 2 (precision rate) | |
|---|---|---|---|
| Aileron | 35 deg./65% expo | 30 deg./45% expo | 15 deg./20% expo |
| Elevator | 40 deg./65% expo | 25 deg./45% expo | 12 deg./25% expo |
| Rudder | 40 deg./65% expo | 32 deg./45% expo | 35 deg./50% exp |
As you can see, these control surface rates are not your typical “low, medium and high” settings. On my low rate setting (position 2), I have relatively mellow rates for both the aileron and elevator control surfaces, but I have a lot of rudder travel for maneuvers like the rolling circle, where rudder input is demanded at certain times and to ensure that the cardinal points of the circle are met. My medium rate setting (position 1) is used only to perform snap rolls and spins. Lastly, my 3D rate (position 0) is used strictly for executing 3D maneuvers. As you can see, flight modes come in handy to perform different maneuvers immediately after others that require different control surface rates. For example, if you were to perform a 3-roll rolling circle followed by a positive snap roll, you’ll spend less time searching for different switches and can focus on perfecting the maneuver!
Whether you are flying a 52.5-inch-span aerobat like the Extra 300 32E or a giant-scale aircraft, take the above settings into consideration. I use similar values on my giant-scale aerobats, as I want all of my airplanes to have a similar feel. You should adjust these settings to suit your personal flying style. You may find that your aircraft feels too sensitive or not sensitive enough, and the only way to test this is by feel. If you move the aileron stick to its maximum and the roll rate of the aircraft is too slow, increase the dual rate for that particular control surface. Similarly, if you feel that the airplane is too quick to respond around neutral but the end-point value is great (the dual rate value), increase the amount of exponential you are using. Then, perform this test on all control surfaces.
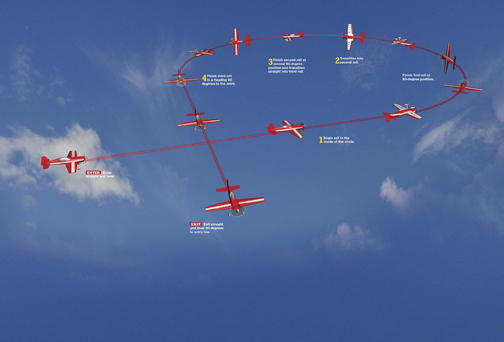
3-ROLL 270-DEGREE ROLLING CIRCLE OVERVIEW
Regardless of the size of the aircraft being flown, begin at a safe altitude when you first attempt this maneuver as you may become disoriented at any given time. Interestingly, the last 90-degree portion of the circle is the most difficult portion as the airplane is coming toward you and controls can appear reversed. In that case, picture yourself in the cockpit. With time, this maneuver and its inputs should become second nature.
Orient your model in a manner that is in upright level flight and travelling parallel to the runway and into the wind. Increase throttle to about 75 percent. In this example, we will fly the aircraft from left to right, and will roll to the left so that the airplane completes the 270-degree circle coming directly toward the pilot. If you want to perform this maneuver exactly how it is required in IMAC completion, you will have to roll to the inside of the circle.
Step 1. Fly to the right side of the field and as the aircraft approaches the end of the runway, begin the first roll to the inside. You want to push the airplane out at the start, so you’ll roll to the left. Remember, the first roll should be finished at the 90-degree portion of the 270-degree rolling circle, so keep a constant roll rate. When you first bank the aircraft, you will need to hold right top rudder to maintain altitude and pull slightly on the elevator control surface. As the model rolls to inverted, it should be at the 45-degree portion of the circle. Control the circular shape by using a combination of rudder and/or elevator, as needed. Once the aircraft is rolled beyond 180 degrees on the first roll, you will have to feed in a slight amount of down-elevator and left top rudder to maintain altitude. Add necessary elevator and rudder inputs, as needed, until the first roll is complete. Try to keep your throttle constant for your first attempt, provided that little wind exists.
Step 2. Now you will have to transition directly into performing the second roll without hesitation. Just like the first roll, you will need to hold right top rudder to maintain altitude and pull slightly on the elevator control surface when you start the second roll; alter this amount until the airplane is inverted. At this point, the maneuver is 50-percent complete!
Step 3. Add in a slight amount of down-elevator and left top rudder to maintain altitude. Balance the throttle so that the airplane maintains a constant flight speed. While this isn’t critical in calm conditions, it will be necessary when a fair amount of wind exists.
Step 4. Two rolls down, one more to go! Transition directly into the third roll without hesitation from the previous roll and hold right top rudder to maintain altitude and pull slightly on the elevator control surface when you start the third roll. Repeat the control inputs mentioned in the previous steps as needed and focus on completing this maneuver so that the airplane is travelling directly toward you so that it is perpendicular to the runway.
As mentioned in step 3, we have just described the perfect scenario where little to no wind is present. However, if you’re flying in an extreme headwind, you will need to begin the maneuver a little later than normal to compensate for wind drift. Also, when you notice the airplane drift in heading, change the throttle setting to minimize the amount that the airplane drifts when heading downwind. All in all, practice makes perfect! If you want to learn more about the judging criteria of this or any other IMAC maneuver, visit the official IMAC website at mini-iac.com/.
You have now learned how to fly the 3-roll 270-degree rolling circle with utmost style. This maneuver is demanding on both the pilot and the aircraft, but with time and dedication, anything is possible. Remember to take time in setting up your aircraft to cater to your needs so that you can focus on
performing it with perfection. Also, if you feel that you are unsure of your airplane and/or pilot skills and have a particular question, ask a question at my blog on ModelAirplaneNews.com. Until next time, safe flying and always remember to have fun!


hehehe very talented indeed to be able to turn 270deg into a circle (360deg)
I attempt to fly IMAC and I love reading these articles. I always pick up a few pointers. I haven’t tried this manouver yet. I’m just getting comfortable with the quarter rolling circle in the Intermediate routine. Thanks. Keep it up!!