
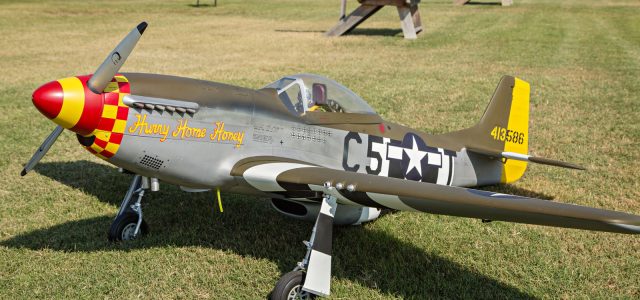
Lane Crabtree has been detailing how he painted his CARF Models P-51. He started by documenting how he primed and painted the silver and olive drab, and last week he masked the canopy and created the stars and bars. In this installment, Lane applies squadron markings and the checkerboard pattern.
Now comes the Squadron ID alpha-numerics on either side of the S&B. These are what I call single-stage paint masks as they only require one color to complete.
Well, one more boo-boo as I missed another photo before painting the black. But you can see the paint masks in place and the masking all around them.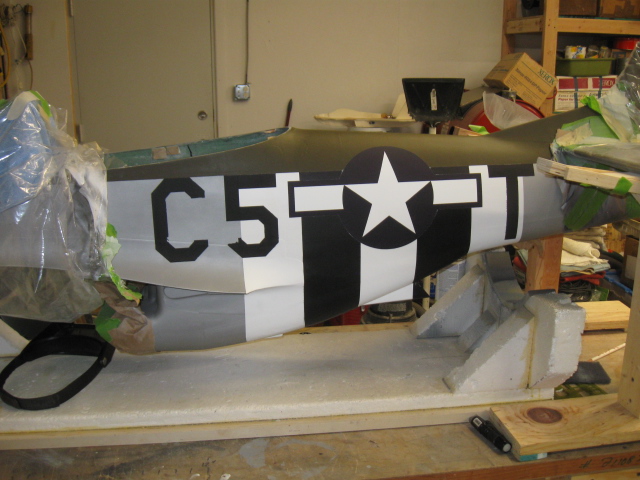
Speaking of boo-boo’s, made one here. The paint peeled up with the mask and left a torn edge in a couple of places. No problem. I let them dry thoroughly and touched them up later with a paint brush. But, like I recommend, remove the masks CAREFULLY and save yourself some touch-up work.

See, no big deal. Peeling problem solved.
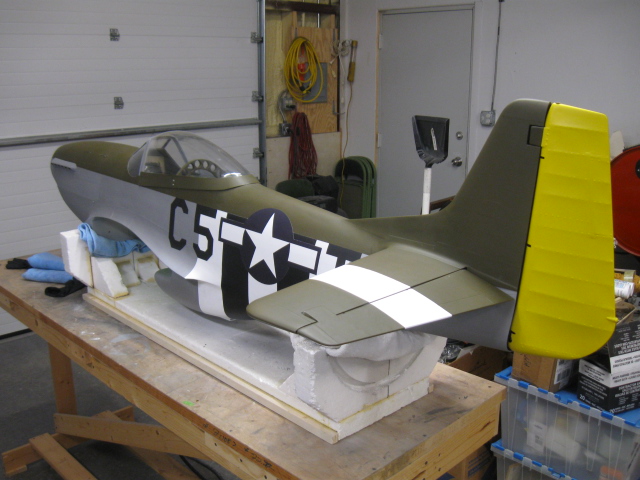
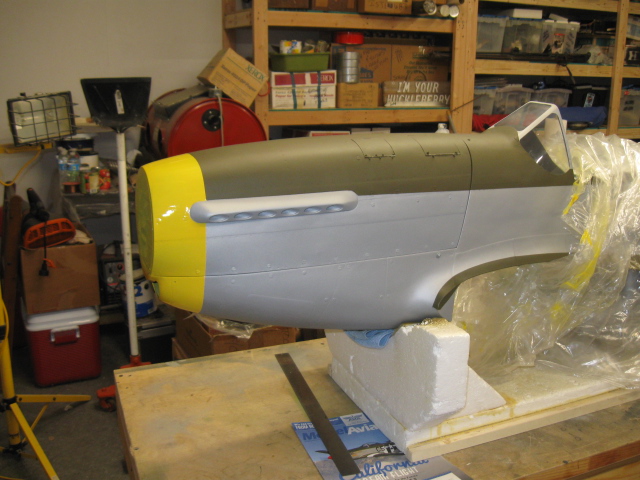
Jumping ahead here, but a view of the progress and with the rudder painted Identification Yellow MS 33538 and with horizontal tails painted with white flashes. The rudder on the CARF P-51 detaches easily with a long rod hinge pin. So I painted it off the model to save masking work.
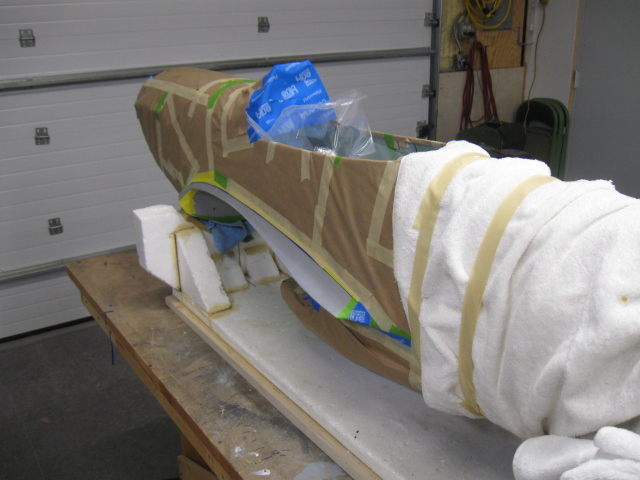
One item I left till this time is the overlap of the OD Shade 41 on the fuselage wing fillet. Required some careful layout of the masking tape and full masking of the model. I even used an old towel to mask the aft end.
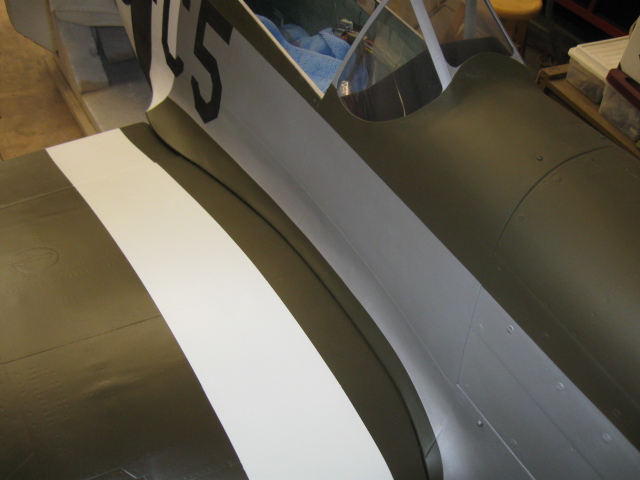
I don’t need to show you the paint with masking still on, you get the idea. But here’s the final result of painting the wing fillet. Take your time while masking and you will have a smooth line from fore to aft. White flash on the wing matches up with the invasion stripe on the wing bottom. A little out of sequence, I admit, since we haven’t discussed painting the wing yet.
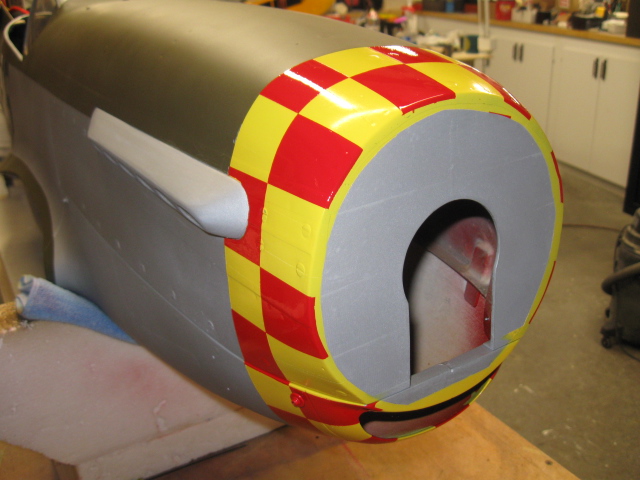
Now to one of the most difficult parts of the whole paint job – the checker board. Callie included a paint mask for this, but I must admit I couldn’t make any sense of how it was supposed to work. So, I went “old school” and laid it out with a divider, scale, fine line felt marker, and some kevlar fishing line. One of the difficult things to do on a round fuselage nose is making the lines vertical all the way around. To do this, I made the base color (yellow) about 4 inches wide fore to aft, measured off the flat spot on the nose. The kevlar line came in handy again for marking around the bottom of the nose. After this, I masked off the rest of the fuselage. For this job and the spinner as well, I used rattle cans (Valspar spray paint) of bright yellow and bright red. One problem you need to be aware of is that this paint needs about a week to dry to the point you can mask over it. Masking too soon will cause the paint to mush and you’ll have to sand it all off and begin anew. If you can place the model outside, safely, for a few hours each day, higher temps will cure the paint faster. I put the fuselage in the camper shell on a warm day to act as an incubator to speed things up. It worked.
I’ll skip the masking as we’ve covered that enough. But, you can see that the paint line is near perfectly vertical. Let this dry a LONG TIME – a week at least.
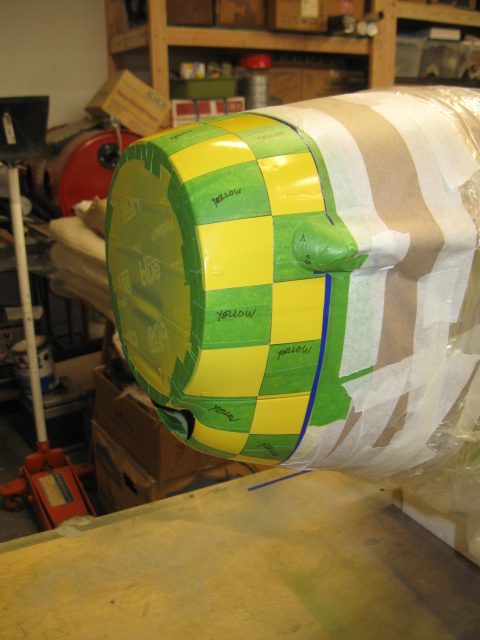
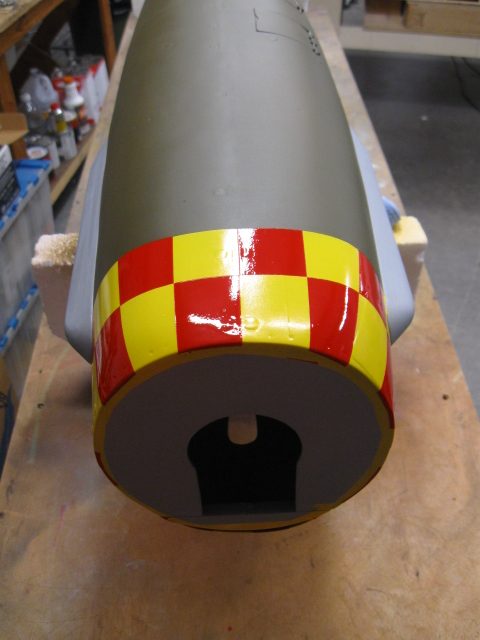
Paint dry. Now, the hard part. To make this look correct, you need a photo of your prototype aircraft. On HHH, the checkers start and end with specific colors around the header manifolds. And the aft checkers are slightly less wide than the front ones, for some reason. Use your dividers to gage the width of each checker until you get a width that makes equal spaces all the way around the nose. Alternating the checkers, mask off the front and rear rows with Green Frog Tape. I marked them to keep them straight in my head. The ones marked yellow will remain yellow when the masking tape is removed. This is important to keep the colors in the correct order. Once the tape is down tight, and you have double checked it, hit it with the bright red rattle can.
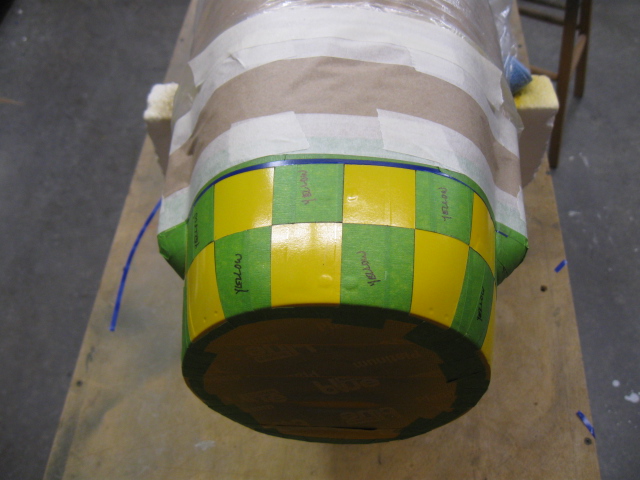
Another view of the checkers before painting.

It’s red all right!
With the tape removed, be careful for another week until the paint has dried. Rattle can paint doesn’t tend to peel upon tape removal like the latex. But, when pulling any tape up, always take your time.
Another view.
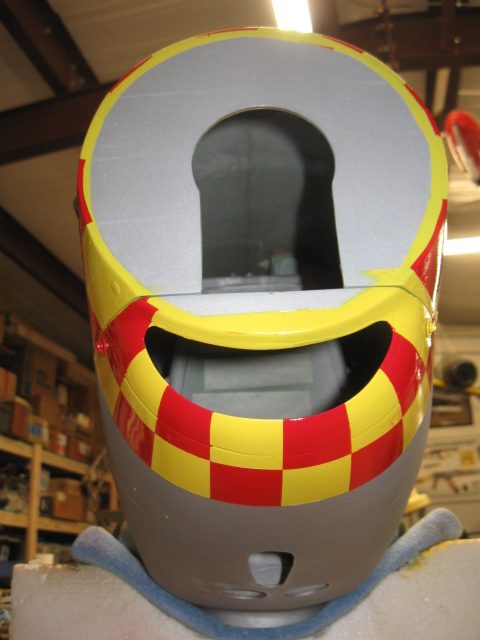
One last view. After paint has thoroughly dried, CAREFULLY wet sand with 1000 or 1500 grit paper to remove the masking lines. A nice finishing touch.
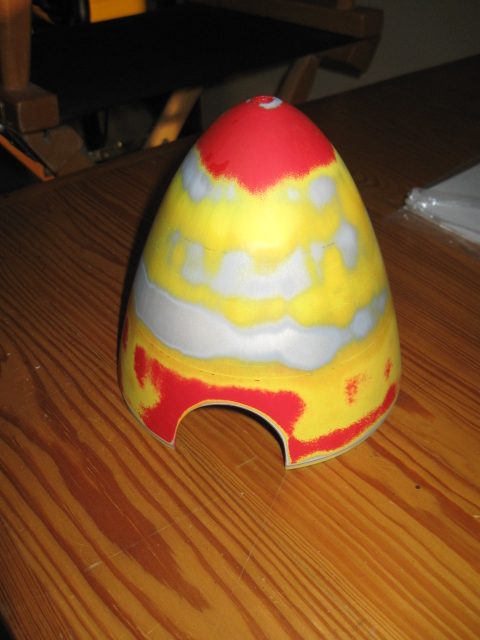
Remember what I said about letting the yellow dry a week or so? Yep, that’s right, I didn’t do that on the spinner. After masking and painting the yellow and red, I pulled off the tape and the yellow was UGLY. Required sanding off and starting over.
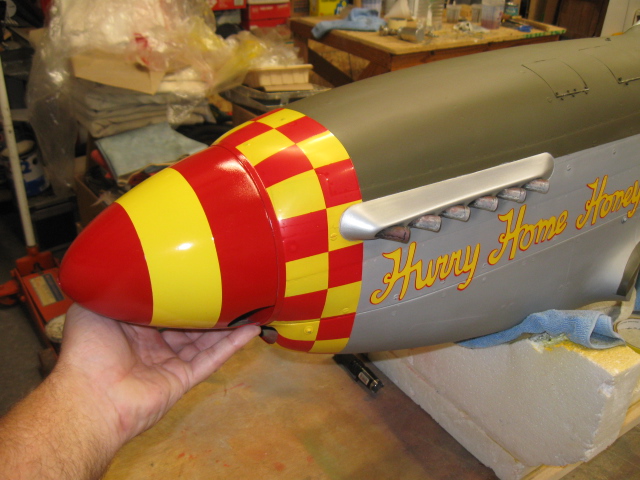
Done properly this time, it looks fine. Later, I sanded down the spinner with 1000 – 1500 grit and clear coated with Polycrylic. Despite the fine grain of 1000 – 1500 grit, it cuts very fast with water. So go slowly.
Next week, Lane will show how he created the Hurry Home Honey nose art, the invasion stripes, victory markings and the exhaust stains for the replica Rolls Royce V12 engine. Click here to go to the next article.
BY LANE CRABTREE
OPENER PHOTO BY NANCY ABBY; HOW TO PHOTOS BY LANE CRABTREE


Very interesting! Right in this period (spring ’23), I will paint my 1:5 old Mustang*, kept for years wauting to have time to progress. What you are showing is extremely important for me. Thanks a lot. If you are interested about step-by step documentation, I will save and keep for you, while I am progressing.
Thanks and best regards
Francesco Tamburrano
* Byron Originals, Quadra 52 gas engine, extremely well documented