
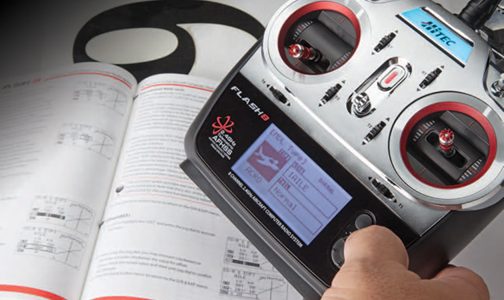
There are some basic radio programming features that all pilots should know to improve their airplane’s performance, and they can be used on any airplane to make flying more enjoyable. When these features are used and programmed correctly, you will experience a faster rate of learning and better results. These programming features are used by the pros for their competition aircraft, but they will also aid pilots of every level and make just about any airplane easier to fly. The key three features that we are going to discuss are dual rates, exponential, and program mixing.
Dual Rates
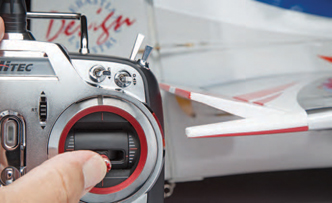
The Dual Rate screen will allow you to program in different throw rates (attached to one switch) for a high and low rate. This rate will generally be displayed as a percentage.
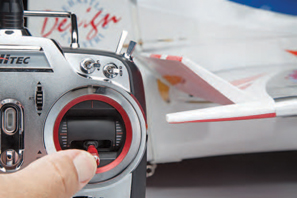
With the switch in high rates, you will have the full travel available for that control surface.
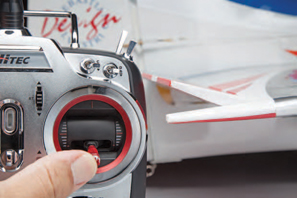
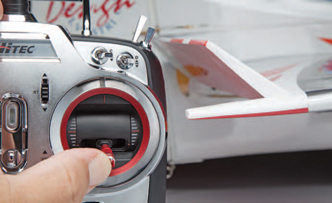
While in low rates, the same travel distance on the stick will yield a lower amount of travel on the control surface.
One of the key programming components that allows a pilot to perform 3D aerobatics is dual rates. To perform any type of 3D maneuver, the plane needs to have very large control-surface movement, but this will not allow the pilot to fly the plane smoothly during normal flight. The dual-rate switch is a way to move between high and low throws so that the pilot can use extreme movement when needed for 3D and then reduce them when flying with precision. But dual rates can also be used on other type of aircraft; for example, on a scale bird, you might need a little more control when slowing the plane down for landing—using a higher rate for that could help.
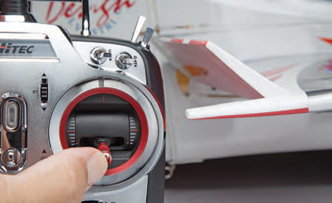
On most radios, the elevator dual-rate switch is usually in the upper left front of the transmitter, while the aileron dual-rate switch is in the upper right front. The rudder switch, if there is one, will be located on the upper top right of the transmitter. Higher-end transmitters will have triple rates (low, medium, and high) to give the pilot even more selection. Just because all three control surfaces start out on different switches does not mean they have to stay there—pilots, if they choose to do so, can assign them all to one switch. With this setup, flipping one switch will change all control surfaces from low to high. I like to keep them on different switches until I dial in the right amount of throw on each one, and when I am happy with that movement, I transfer them all to one dual-rate switch.
The purpose of these switches is to establish a limited servo travel position when the switch is moved to either of its two positions (three on some radios). When a switch is in the away position, for instance, it will allow 70% servo travel (if that is what you have programmed in for that position). If the switch is clicked toward you, the dual-rate setting might provide 100% travel of that same servo or control surface.
Here’s a specific example. Let’s say that you are flying a tail-dragger, and on takeoff, you only want to input small amounts of rudder. With the rudder rate on low, you have 70% of the available rudder throw, which makes takeoffs smoother. Once in the air and you want to start performing aerobatics, you now need to have 100% of the rudder throw, so just flip the switch to the high rates. Of course, you, the pilot, will have to fine-tune the control throw after many flight experimentations, by using different percentages until you find the one that best fits you flying style. Other factors that control the amount of surface deflection are the servo arm and control-surface horn lengths. The programming of the dual rates will be one of the final steps, however, in tuning your aircraft to fly to your liking.
All pilots should use dual rates. This feature is an important component, provided by radio manufacturers to help make us smoother, more accomplished fliers. The best part is that the rates are easy to program, and even the beginner-level transmitters incorporate dual rates.
Exponential
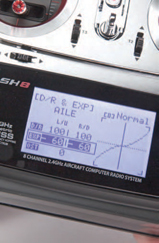
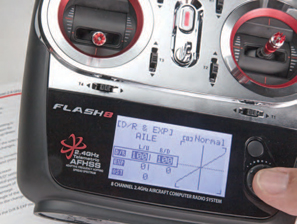
Exponential will generally have a graph like this on a displayed screen so that you can see a visual reference of what is programmed in.
While dual rates do allow different rates so that the pilot can perform 3D maneuvers, exponential is the second equation to controlling the “big throws” on an aircraft. Simply stated, exponential allows less movement at center stick while increasing the movement as the sticks move toward the end of their travel to accomplish the maximum throw rate. This gives the pilot a softer feel around center stick and allows the plane to fly precisely with the higher rates. But the pilot can still enjoy the full throws of the control surface when needed. Exponential works in unison with rate settings and is another part of the programming so that your radio controls perform exactly the way you want them. There is no way around it: Exponential is a setting you have to feel out. You have to fly the plane and try different settings to find one that works for your type of flying and aircraft. Exponential is programmed in by using a percentage value, and depending on your brand of transmitter, this could be a positive or negative percentage to get the softer feel at center stick. If you go the wrong direction, you will make the center stick more sensitive, so be sure to check you radio manual for the correct direction to go when inputting the percentage. The best way to input exponential is slowly; always start out with a small percent like 10–15%. Once you have trimmed out the airplane, try the starting percentage, then fly the plane and see how that feels. Land and put in another 5–10%, and fly the plane again. If the plane feels good to you, keep repeating the process while adding a little more expo each time. When the flight performance starts to feel sluggish or slow, land the plane and program in the last percentage that felt right to you. The final number will be different for each pilot and could range from 5% all the way up to 85–90% or more.
No exponential creates linear movement from the stick to the control surface. So when the transmitter stick is halfway, the control has also moved halfway.
With no exponential, linear movement will result in full control movement at the end of the transmitter stick movement.
STANDARD SWITCH POSITIONS
Let’s talk about the standard switch positions on the radio. It is a good idea to have a standard position for all your transmitter switches. For example, set your rates (for elevator, rudder, and aileron) so that all the switches are positioned away from you when they are in low rate and toward you on high rate. Having different positions for different rate switches can quickly lead to confusion when you’re performing complex maneuvers. By having all the rate switches set in the same standard direction, it is easy to avoid confusion, especially when you are making a quick move and need to be sure of your rate setting. In addition, it is easy to set the rates without even looking at the transmitter.


With exponential on, the control-surface movement will be less when the transmitter stick is halfway—how much less depends on the amount programmed in.
With exponential on, you will still have full movement when the stick reaches the end of travel on the control surface. There will just be a bigger amount of surface travel on the second half of the stick movement.
Program Mixing
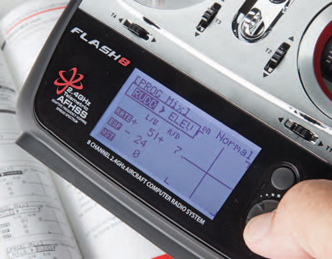
The first channel (Rudder) on the mix screen is the master channel; the second channel is the slave channel (Elevator). This screen allows you to set a percentage of movement from the rudder control to affect the elevator.
Program mixing allows one channel (the master channel) to work with another channel (the slave channel) or allows the channel to be activated by a certain movement of a different channel. Almost all radios sold today will have a number of preset mixes that allow pilots an easier way to program certain functions. In addition, many radios will have a number of program mixes that pilots could use to set up just about any combination of channels to work with each other.
Two mixes that are included in many radios are the rudder-to-elevator and rudder-to-aileron mixes, both of which are used to fine-tune the model’s knife-edge performance. This mix offsets the yaw effect from using the rudder to guide the plane through the sky, mostly in knife-edge flight, but it does help keep the plane from drifting during level flight. What happens is that, when the pilot applies rudder to keep the plane level in a knife-edge, the plane will want to roll in one direction, and it will also want to move toward the canopy or gears (left and right). To prevent this, we use a rudder-to-aileron or rudder-to-elevator mix. The master channel, which, in this case, will be the rudder channel, will be mixed to a slave channel, which, in this example, is the aileron or elevator channel.
When the master channel (rudder) stick is moved, it will automatically cause the slave channel (aileron and/or elevator) to move a certain percentage in the direction that is needed to keep the aircraft straight. When programmed correctly, the ailerons and elevator will counteract the unwanted movement from the plane during knife-edge flight. The pilot just needs to move the rudder to get a clean, straight, knife-edge flight down the runway. Because of the mixing, he does not have to worry about any aileron or elevator corrections during knife-edge flight.
Another example of a good use of mixing is the flap-to-elevator mixing. On certain planes, when the flaps are activated, the plane will want to balloon up. Pilots would have to counteract that by applying some down-elevator when coming in for a landing. This is an unnatural thing for most pilots to do. By mixing the flaps (master channel) to the elevator (slave channel), pilots are able to program in a percentage of down-elevator to be activated when the flaps are lowered. The landing descent will remain the same—without ballooning—as it was before the flaps were lowered. This allows pilots to concentrate solely on the landing touchdown.
FINAL THOUGHTS
With the rudder-to-elevator mix, the elevator will move a proportional amount when the rudder stick is moved, depending on the percentage programmed in.
All modern transmitters will come with at least these three programming features, and of course, most come with many more. You paid for those features, so take the time to learn and use them. They will make your aircraft fly better and allow you, the pilot, to advance your flying skills faster and with more confidence.


