
I’d like to present this article as one more example of how doing repairs to your favorite warbird can be done if you take it one step at a time, and “eat the elephant in bites” rather than fretting over the entire sad picture.
I will also say it was a privilege to work on such a professionally built and finished giant scale RC warbird. I have not met the builder, but kudos to him for such a monumental building task! I am envious of his skills and attention to details.
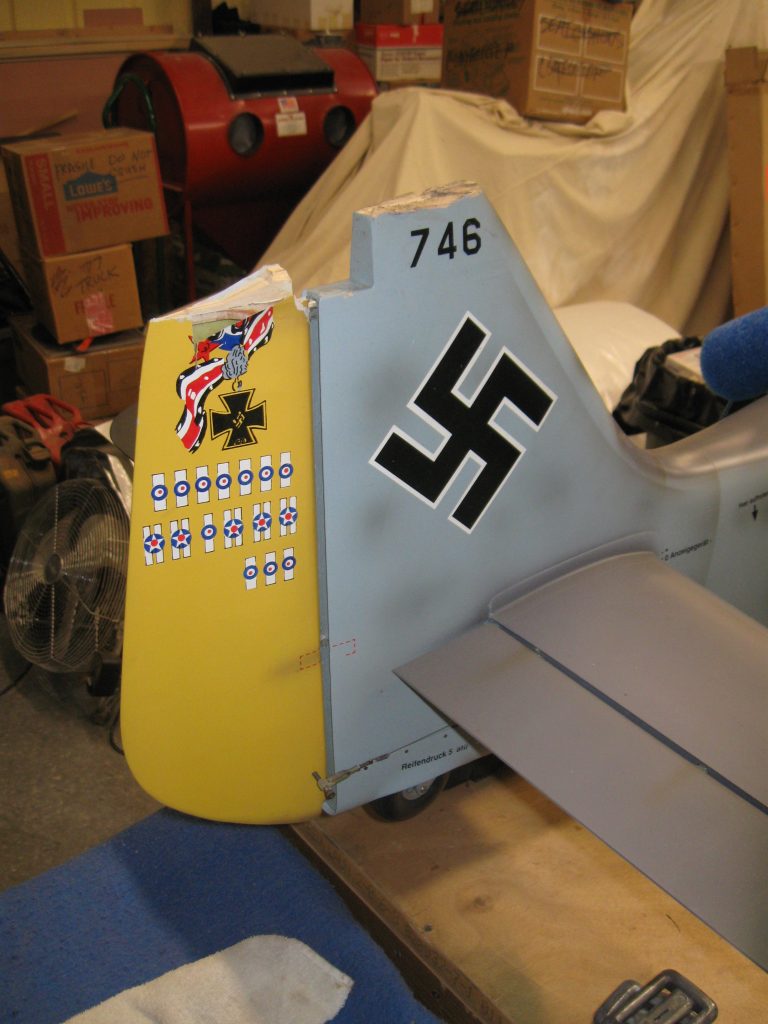
A fellow RC club member bought a beautiful FW-190A from Vailly Aviation plans with 113 inch span that was extremely well built and ready to fly. At Warbirds Over Texas, 2014, he took Best WW II Warbird honors with the Butcher Bird! He flew it very well a number of times off pavement, but flying it on our home grass field, on landing, it dug-in on a soft area and flipped over. Ugggghh! Well, these things happen, but to happen with this absolutely fine warbird was a real shame. The owner was sickened of course, and didn’t know what he was going to do about the damage. I told him if he’d order the plans I would tackle the repairs for him. He was pleased to hear that offer. Took a few months to get the plane over to my shop, but he delivered it with the plans and parts less the engine which greatly reduced the weight of the model. The most obvious damage was to the vertical tail and rudder tops which had broken off. Also, the left wing outer panel aluminum spar (3 piece wing) and left main retract were bent when the plane went over during the flip. I told him I’d do the repairs without ever having seen the model (wasn’t there for the mishap) and was actually relieved that the damage wasn’t as bad as I had imagined. Had I seen the plane first, I could have saved him the cost of buying a set of plans as I really didn’t need them.
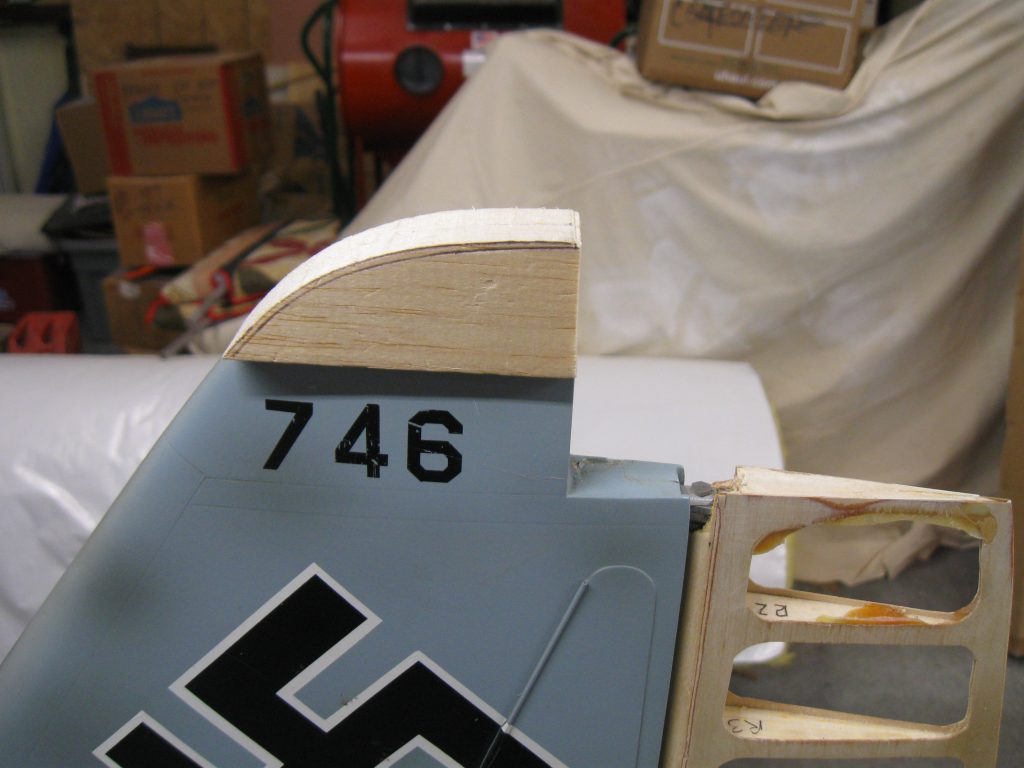
Close up of the rudder/stab damage. Much less damage than I had expected.
To start off the repairs, I tackled the damage to the rudder and stab as that looked like the easiest job. As much as I hated to peel off the rudder covering with the German kill marks, it had to come off to take a look-see at the damage underneath. Other than the top of the rudder being gone, it looked pretty healthy under there. I didn’t do the same investigation to the stab as it was obviously solid, but just took the 80 grit sanding bar and evened it up as much as possible to accept the new balsa top. Same for the rudder top. The new balsa tops were cut to shape on the bandsaw and attached with CA. Once secured, they were sanded to the contours of the stab and rudder with blue painter’s tape applied to protect the model as much as possible. But, a few scuff marks always seem to happen. Oh well, going to be repainted anyway. I bowed out of doing any paint repairs. ha.
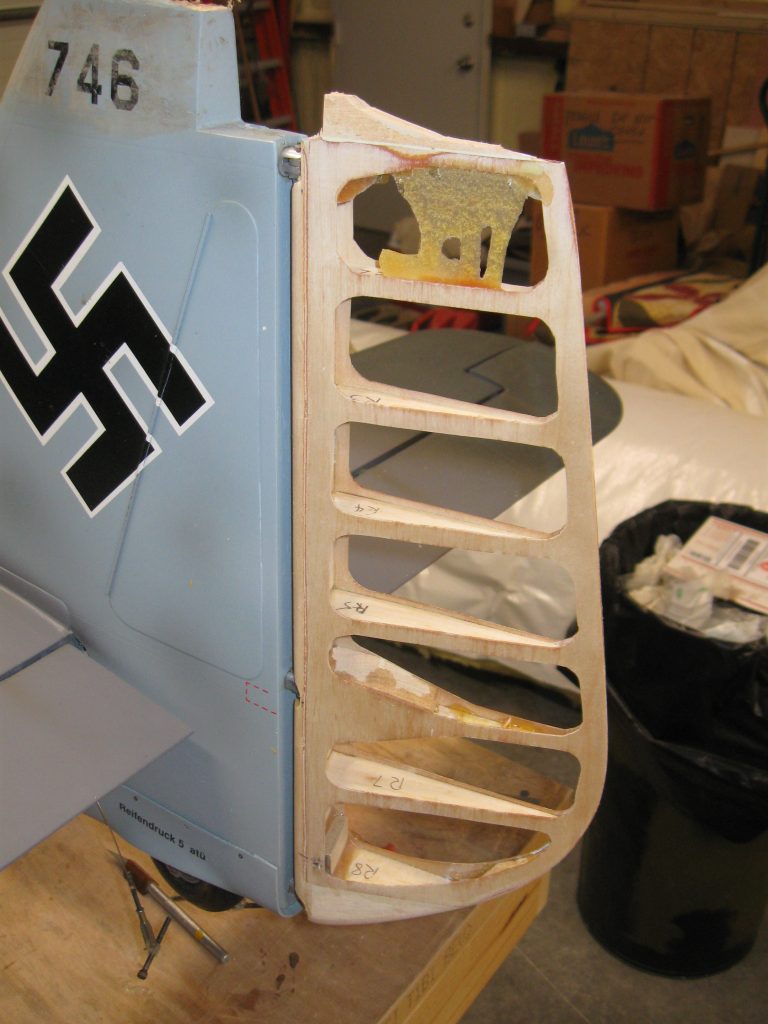
Bare rudder. Well built. Note the hinges –massive!
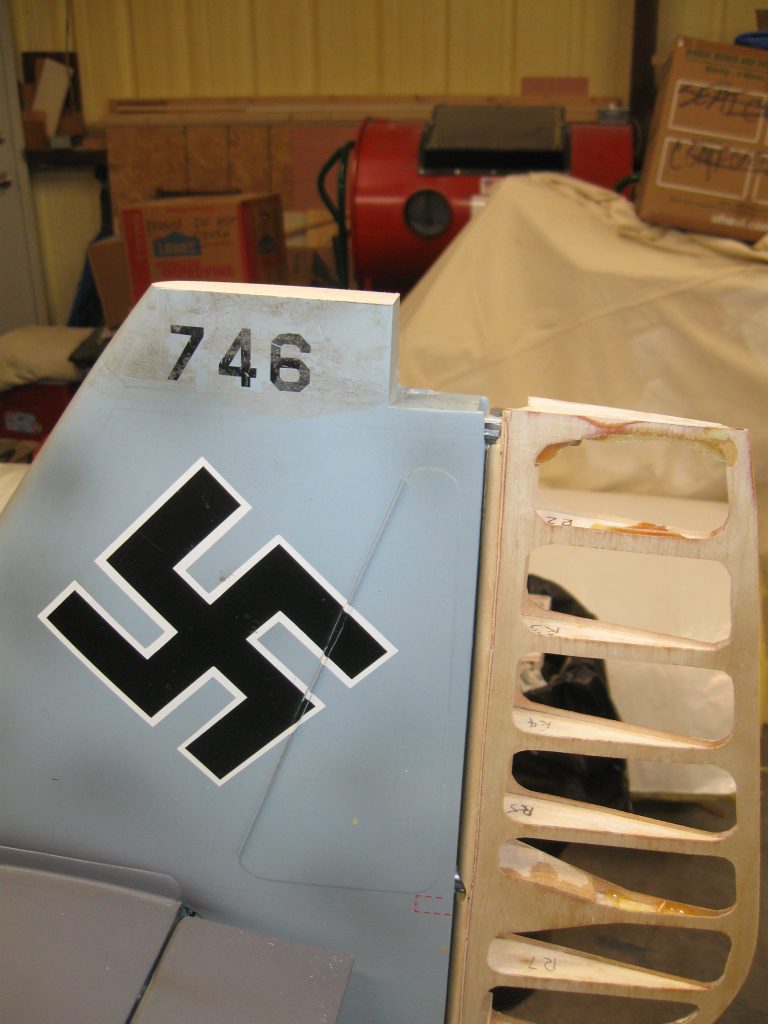
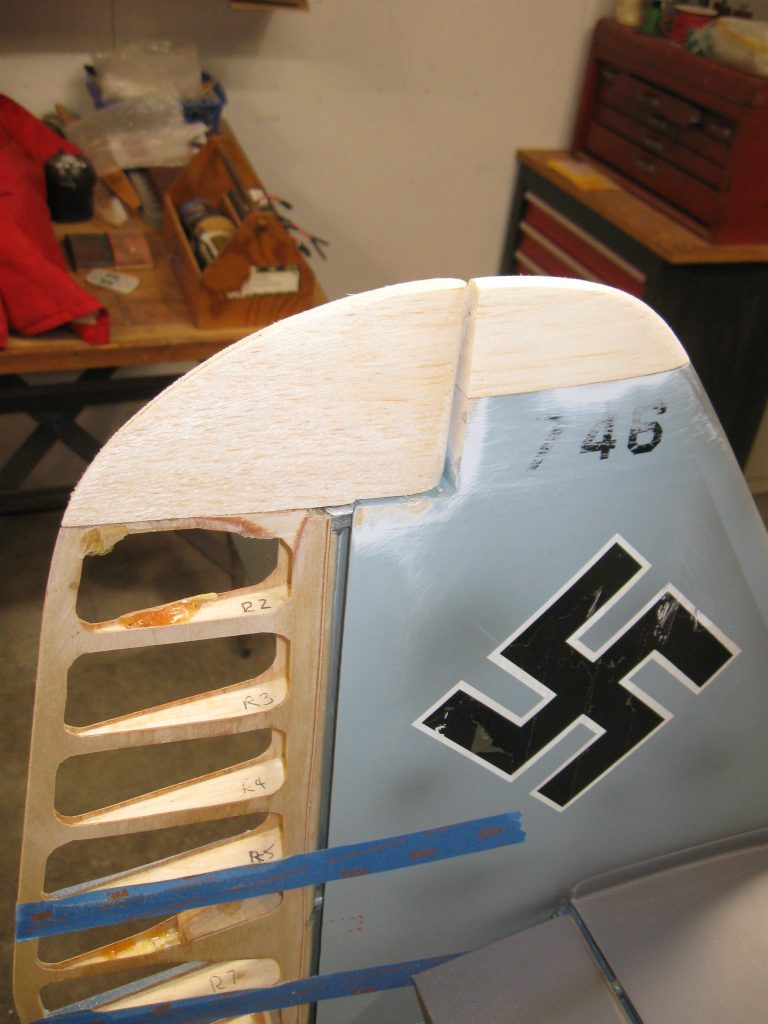
Rudder and stab cleaned up to accept new balsa tops.
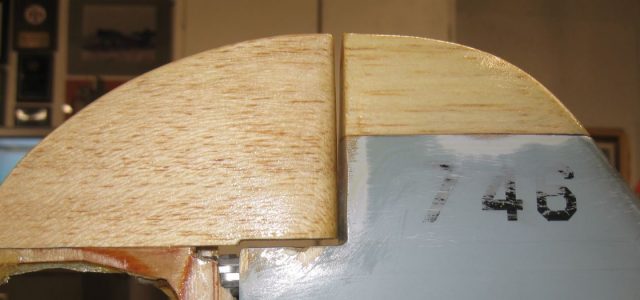
Stab gets new balsa top. CA works fine here as it’s balsa to balsa and will be glassed for added strength.
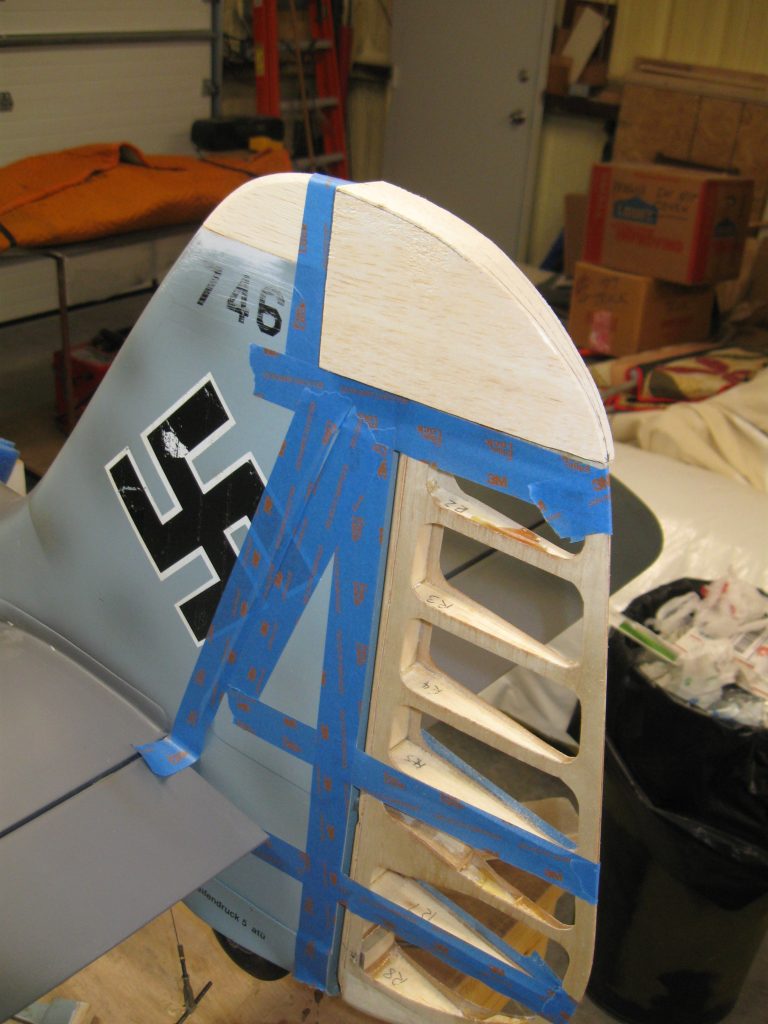
Blue tape over the rudder to keep sanding marks off those areas while shaping the rudder top. Also blue tape to keep rudder perfectly inline with stab while sanding.
Balsa repairs sanded to shape. Be careful to not oversand the soft balsa! With an 80 Grit sanding block, you can get carried away quickly. Note center-of-rudder reference line, marked in ink, to keep sanding even.

Balsa repairs primed with Z-Poxy Finishing Resin to stiffen up the balsa before being glassed. Sand lightly before adding glass cloth.
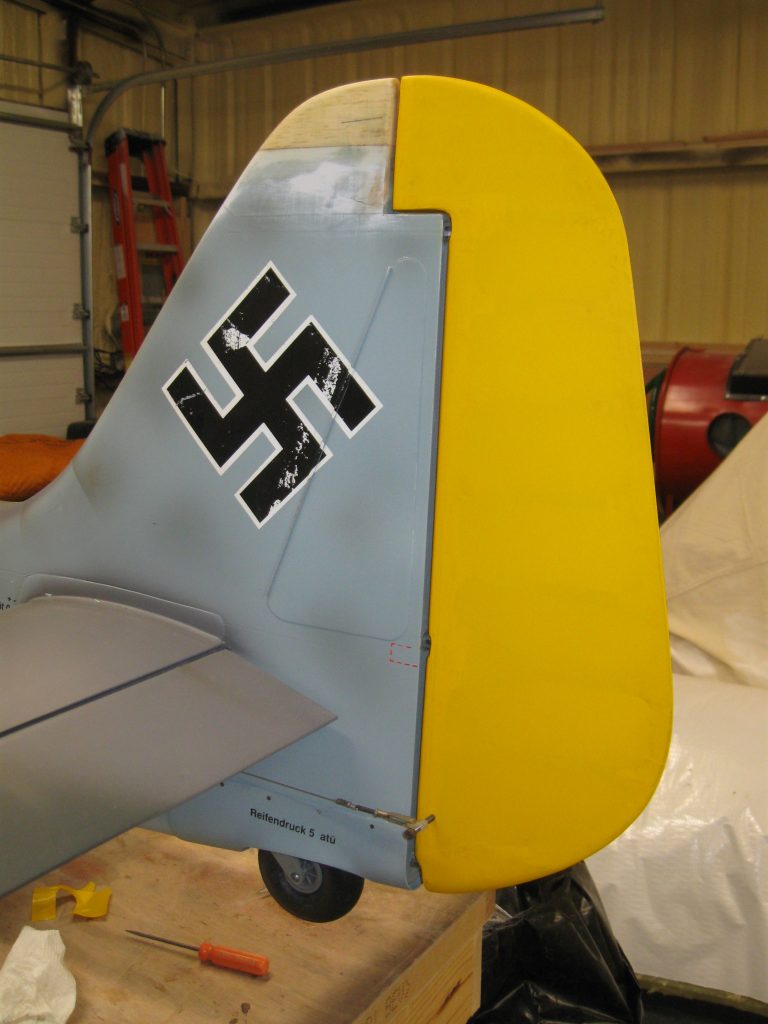
Stab and rudder tops glassed. Rudder covered with Yellow Solar Tex. Rudder/stab all done and ready for paint. Also note that the glass cloth overlaps the balsa onto the vertical stabilizer for strength. Rudder pull-pull cables hooked up and ready to go. I am quite pleased on how well this repaired area looks! Solar Tex is my favorite iron-on covering material.
No shots of the covering process, but suffice to say the rudder recovering turned out nice using some yellow Solar Tex I had on hand. It needs to be primed and painted, but could be flown like she sits. The owner still has not flown it again due to our field being soft in places. We had some fill dirt added to level-out portions of the field a couple of months ago to better drain the water, so, maybe this Fall he will bring her out and set her free to blast the skies once more. The other repairs will be covered in a future repair article.
BY LANE CRABTREE


Great rebuild article Lane. Thanks for sharing!
Nice work……I’ll take balsa over foam any day when it comes to ease of repairs.