
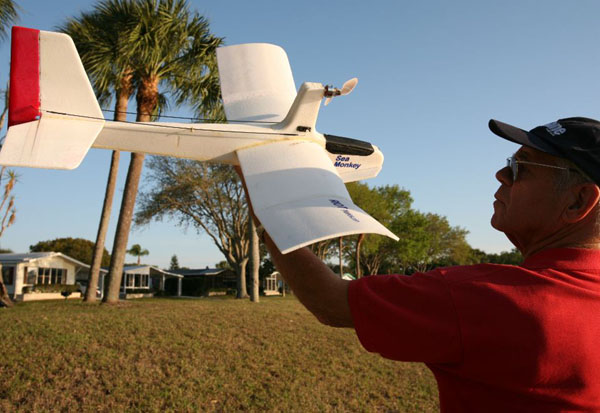
I live within a couple minute walk from a very nice small lake, or you might consider it a big pond. With this at hand calm evenings often brought the desire for a slow fly electric sea plane. While at the 2013 WRAM Show I found just what I was looking for at the Zippkits booth. My old friend and at one time fellow club member, Joe Petro, Mohawk Valley Fire Birds, was there with the Sea Monkey. Joe, Zippkits, has been producing wood boat kits for many years and decided it was time for some airplanes. Riot Planes is his new aviation subsidiary.
Text by Nick Ziroli Sr., (Photos by Tom Smith & Nick Ziroli Sr.)
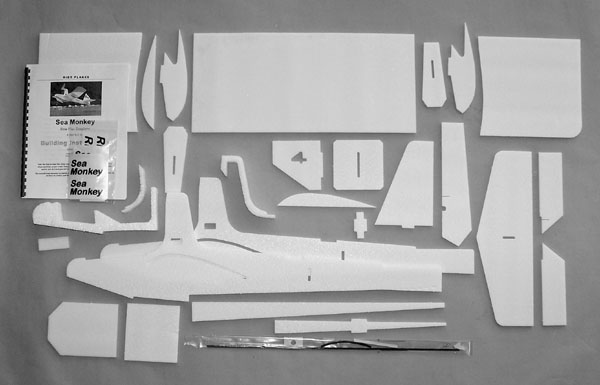
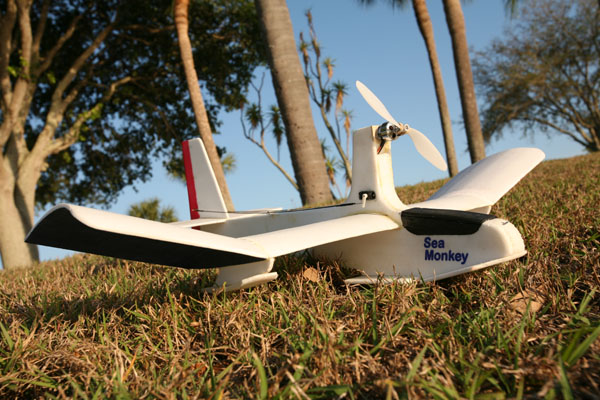
The Sea Monkey is his first offering with a 35” wing span Yak 54 and Extra 300 to follow. These are all CNC routed 5mm thick ESP foam sheet. This is a material that is, if you can have it both ways, both flexible and ridged. It is not brittle and a 5mm piece can easily be folded 90 degrees and almost 180 before it breaks. It’s a great choice for the models Riot Planes, www.riotplanes.com , has in mind.
Building the Sea Monkey is very easy. There is no cutting or fitting of parts. They all fit perfect. As you use the parts sand the edges to remove projections left from machining. Gorilla Glue, the clear 2x expanding type is recommended for most assembly. I had the standard Gorilla Glue and used it with good results but it was messier than I would think the clear 2x would be. Sand the surfaces to be glued with #120 or finer sandpaper and as the instructions say use the glue sparingly. I used a large T pin and punctured 1/4” deep holes along all glue lines. The glue expands into these holes for a very strong joint.
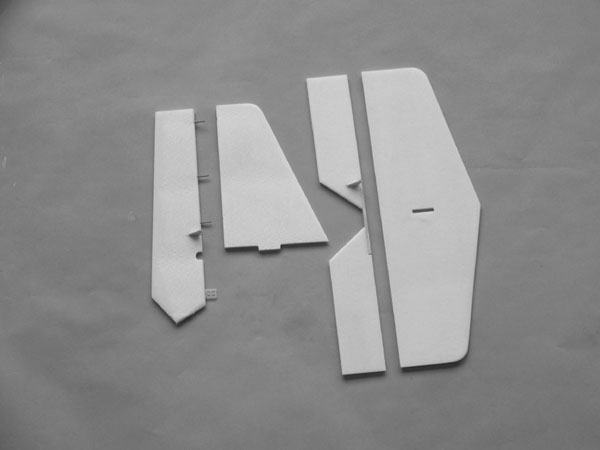
Follow the construction book. It is over 20 pages of photos and instructions. The first thing that is described is gluing a dihedral gauge together to show how little glue is required. Basic assemblies follow, join elevators, tip skis and then the fuselage. This must be done so the sides are both square to the 1” thick fuselage core. The instructions are clear. While the fuselage glue cures finish the tail surfaces. I glued the control horns in place before hinging. They are different. The rudder horn has a point in the front and the elevator is flat. Make sure they are on the correct side of the surface. You are instructed to hinge the control surfaces with hinge tape, medical Blenderm. I had a small piece enough for the elevator and some mini Robart Hinge Points 3 of which I used on the rudder. I slit the bottom of the rudder and inserted with glue a triangle of 1/32” plywood about 1” long on the edges. There is a wheel conversion available that I have and may install. This insert will save the lower rudder. Glue the fin to the stabilizer.
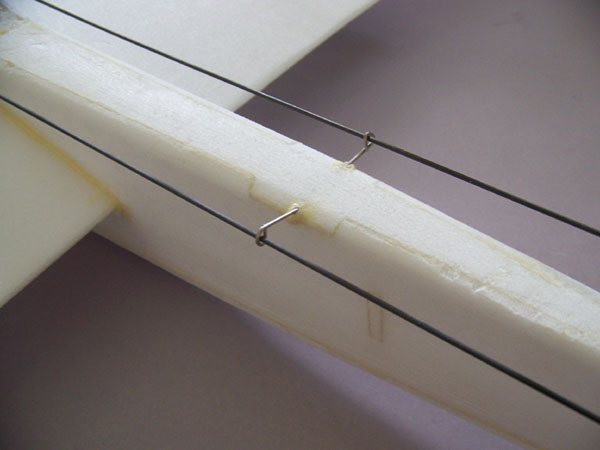
I assembled the pushrods a little different than described. Rather than glue the wire Z bend ends to the 1/16” carbon rods I used the heat shrink tubing to hold them in place and once adjusted after being installed ran some thin Zap ca into the heat shrink. Assemble the first end with the z bend about 5/8 from the end of the carbon rod. The other end will be about the same. The length can be adjusted before gluing.
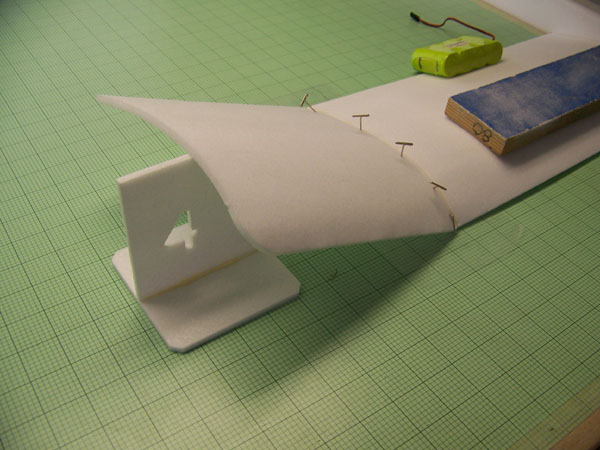
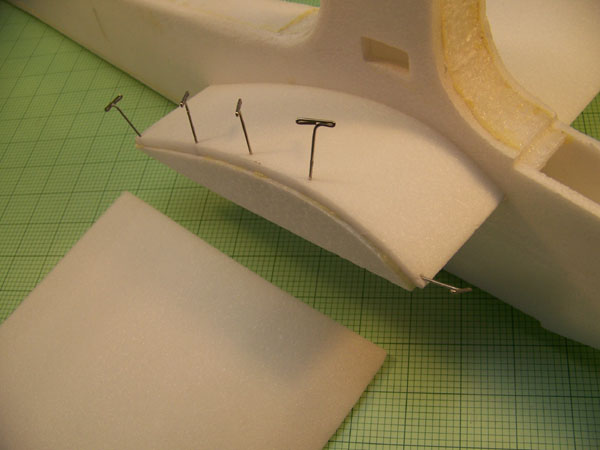
The flat wing panels must be formed into an airfoil shape. This material forms quite easily over a round tube as instructed. Once formed it does hold its shape well. I inserted the center wing panel through the fuselage and with the end extending about 2” from the fuselage side glue and pin the end rib in place. The fuselage helps hold the panel at the correct airfoil shape. Let the rib extend half its thickness pass the end of the wing panel. This makes it easier to position and hold the tip panel when it is glued in place. Slide the wing panel off the fuselage. Prepare and glue the wing tip in place per the instructions. That completes one wing. When the glue is cured, slide the wing back into the fuselage and glue the second rib in place as you did the first one. Pull the wing all the way through the fuselage. Lay the wing panel on the bench with the fuselage hanging over the edge. Glue the second tip panel in place. Center and square the wing to the fuselage and glue in place. Install the hull bottom ski plates and tail surfaces.
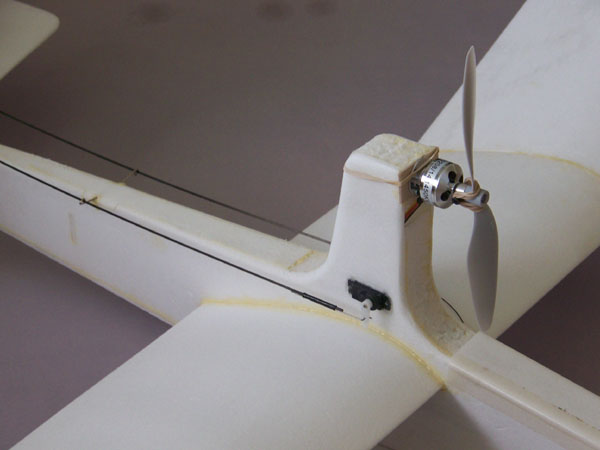
Make sure they are all centered and square to the fuselage. Glue the tip skis in place to complete the air frame. Install the motor, speed control and servos. I used the power package and servos available from Riot Planes. Prices are reasonable and they work very well. Check their website. For control I used my Airtronics RDS-8000 Transmitter and 92664 Park Flyer receiver wrapped in kitchen plastic wrap to keep it dry in case of an upset. Center the servos with the transmitter so the arms are straight down. Install the made up pushrod end on the servos and assemble the aft ends on the horns. I made up a cardboard heat shield to protect the tail surfaces from the heat of a match that was used to shrink the tubing. Adjust the length to make the control surfaces neutral then glue the heat shrink with thin ca. Do this from the rear forward so it does not run to the control horn. One thing I did add was a pushrod guide at about half the length of them. At the speed the Sea Monkey flies it probably is not necessary but I feel better with them secured. It is simply a large T pin cut off with a loop bent into it. Make the loop a loose fir over the pushrod, about 1/8” id. Stick the pin through the fuselage side into the top skin. Glue in place. I set the control throws to 5/8” up and down and 3/4” right and left with 35% expo in both.
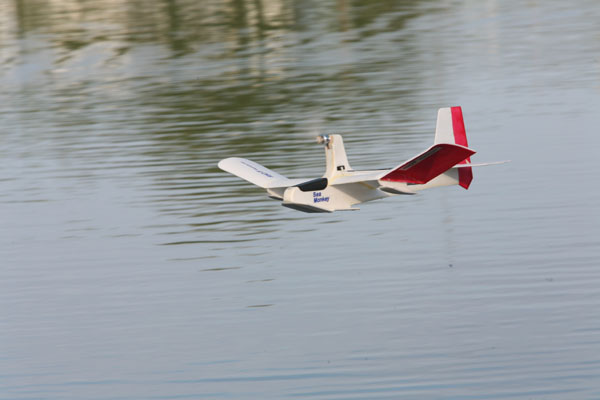
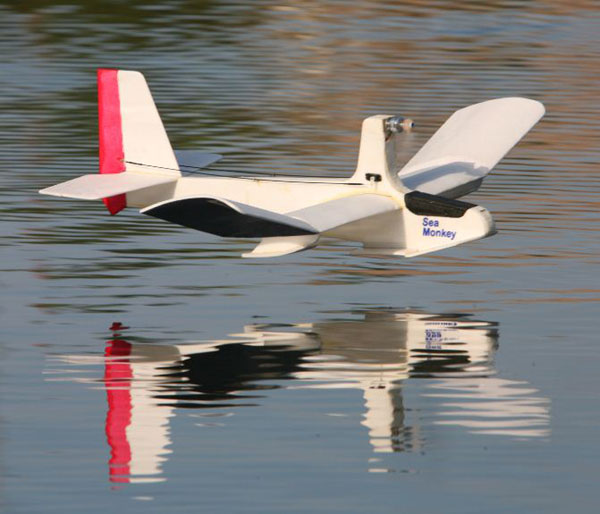
In the Air – The Sea Monkey is definitely a slow fly model. The highly cambered wing does not like to fly at high speed. At the speed it is designed to fly at it is quite docile and fun to fly. Is it aerobatic? Not really. It will do a good loop, a stall turn or wing over and maybe a not very good roll. One thing it really does not like is wind. More than a few miles per hour takes the fun out of a flying session.
My test flights were made with a 900 mAh 3 cell LiPo battery. Two cell is recommended and is the correct power. I didn’t have a 2 cell for the test flight. The 3 cell made the throttle to sensitive in the desired speed range with way too much top end. I obtained an 1,100 mAh 2 cell battery and it has much better throttle range. The slightly heavier than recommended, 800 to 1,000 mAh, battery moved the CG slightly forward of the 40% location called for. That was alright. I think 40% plus some down trim is a little farther aft than I would choose. I took a good look at the wing and found that the leading edge had a upward bow from the fuselage to the dihedral break. This adds incidence to that area requiring down trim. I did some finger message work to the wing to straighten the leading edge and also twisted the outer panels to add 3/8” of washout. This took care of most of the down trim.
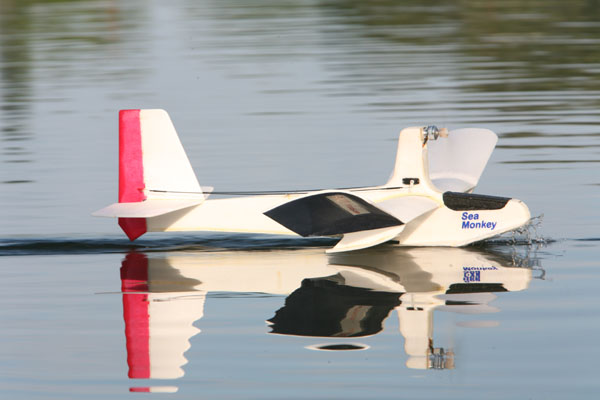
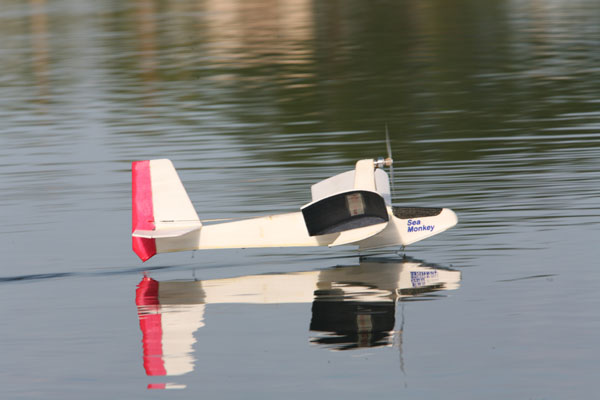
On the Water – This is the fun part of flying the Sea Monkey. It handles very well in calm water and you can run it around on the step like a slow speed boat. It gets easily up on the step for a fast take off. But a long smooth take off is a pretty sight, very satisfying. Landing is the same, a long smooth approach with enough power to keep it planning then slowly off the power. When it stops planning it stops dead in the water. It is so abrupt that the first time I flew it, when I landed. I thought I ran aground. It is not a very hydro efficient bottom and in this case doesn’t have to be. The flat bottom hull and tip skis are a better choice for the light weight Sea Monkey.
This has been an interesting building experience and flying, too. The toughest part of this project has been trying to get some calm mornings or evenings. It’s March in Florida and it’s been a windy one. Better weathers is coming.
SPECIFICATIONS
Model: Sea Monkey
Manufacturer: Riot Planes
Available from: www.riotplanes.com
Type: Slow flier Seaplane
Wingspan: 34 in.
Length: 31 ¾ in.
Wing area: 268 sq. in.
Weight: 9.0 oz.
Wing loading: 4.8 oz./sq. ft.
Radio req’d: 3 channel
Motor req’d: 80-130 watt brushless, Riot 502 combo used
Price: $39.00


Fantastic build article. Love it.
are kits still available anywhere?
looks like website now goes to an inappropriate website..