With today’s amazing supply of top quality and reasonably priced radio equipment, equipping your airplane can be a relatively easy assignment. But you do need to know a few basics rules of the road. Here’s some tips to get you off to a good start.
Initial Setup
Before setting up your radio’s control functions, you have to properly setup your transmitter. Here’s what to do.
1. Fully charging your transmitter before turning it on is the very first thing to do.
2. Switch on the transmitter and enter the Model Type menu. Depending on your radio’s functions, you should select the appropriate type, Aircraft (Acro), Sailplane (Glider) or Helicopter (Heli.)
3. Once you have the proper Model Type, you should select one of your transmitters Model numbers. (Model1 for example.) Then you should go into the Model Name menu and enter a simple name to identify the settings for your model. Keep it simple. If you have more than one Piper Cub, use BigCub or LittleCub or ECub etc.
4. Once you have the model named, go into the Wing Type menu and select your appropriate setting. This is determined by the control functions you have and how many servos are used. Wing types include normal, Elevon (Delta wing) as well as Flaperon for Fun Fly airplanes.
5. If your transmitter has a Tail or Fuselage Type function then enter the menu and select the proper setup. You could have V-Tail, Normal (rudder / Elevator) or multiple servo setups.
6. Now switch on your receiver and check the servo control directions. If any of the control surfaces are backwards, use the Servo Reverse Menu to correct the control directions.
7. To adjust the control throws for your airplane check the manual and
At the flying field.
When you first get to the flying field, it is important to switch on your radio gear in the proper sequence.
1. Pull throttle stick back to idle and otherwise disarm your electric powered motor system.
2. Turn the transmitter on and allow the radio to initialize until the home page screen appears.
3. Confirm that you have the proper model memory selected for the model you wish to fly.
4. Turn on your receiver power switch.
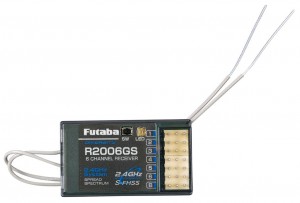
(Above) Always read the instructions for proper installation of your radio’s receiver antennas.
5. Test all the control functions. If control function is backwards or does not work properly, do not fly until you have corrected the situation. If you have selected a FailSafe function with your receiver, switch the transmitter off and confirm that it operates properly and the servos move to their designated positions. (throttle at idle and servos in their neutral positions.)
6. Do a range check with your model’s motor or engine running.
7. After a successful flight, bring the throttle back to idle to stop your electric motor, or with a kill-switch or throttle setting, shut off your model’s engine.
8. Switch off the receiver.
9. Switch off the transmitter.
Develop a routine and repeat this process until it becomes habit. Safety is the key to having a fun and enjoyable RC flight.


Basic setup of the TX for any new installation needs:
START with a CLEARED model memory.
This needs to go in between step 2’s turning on and selecting the type of model.
You don’t want your initial setup to be based on “centering up” the control surfaces with trim already in the TX’s model memory.
Failing to clear memory for each new setup can eventually add up to the trim being at the computer’s limit.
When doing the radio initial setup, My list:
1 Charge
2 Turn TX on, select the memory slot for the model and clear memory
3 select model type (Acro, heli, sailplane)
4 Select “wing type” (V tail, elevon, CCPM 120, mechanical collective…)
5 With servo arms removed, turn on RX
6 Connect servo linkages getting everything centered mechanically
7 Set control directions
Insert model naming anywhere in the list you want…
NOW you can start dealing with other mix functions if needed.
Generally for a beginner’s model there are no mixes needed.
Maybe put in some expo to pre-empt the average beginner’s tendency to over-control the model.
Charge the model again before flying… setting up can use a surprising amount of the battery’s capacity.