
From the MAN “Classic Article” archive, this Basic Technique is a must for anyone thinking about building an airplane from a kit.
For many reasons, heat-shrink plastic films are easily the most popular way to cover a model airplane. They’re easy to apply and come in just about every color imaginable; they’re odorless, non-toxic and almost completely fuel-proof. It’s easy to achieve a great-looking model without a lot of effort; you only need to know the basics of surface preparation and how to plan ahead, and you need the proper tools. Top Flite MonoKote was one of the first plastic films on the market; I’ve used it for years with great results, and I used it for this article.
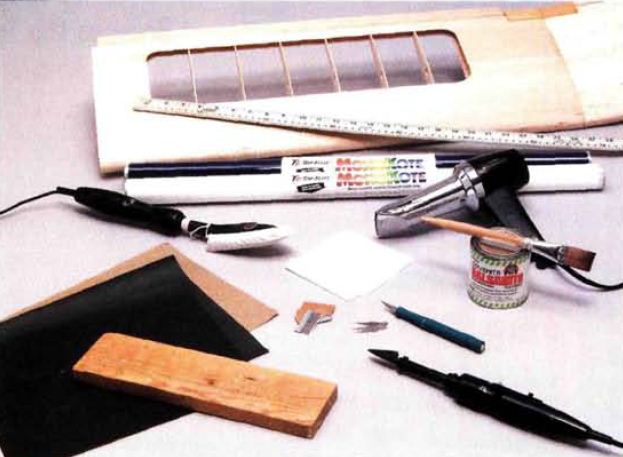
1. For this model, I chose a simple, two-color scheme and used a variety of tools: a sanding block with various grits of sandpaper and a new knife with fresh blades. Speaking of blades, always use a new one for any trimming; nothing is worse than having a dull blade snag and tear the covering. Other necessary tools are a heat gun, an iron, a trim iron, a metal straightedge, Coverite Balsarite, a tack cloth and covering material.

(Above) The basic supplies and tools needed to cover a model.
REMOVING DENTS
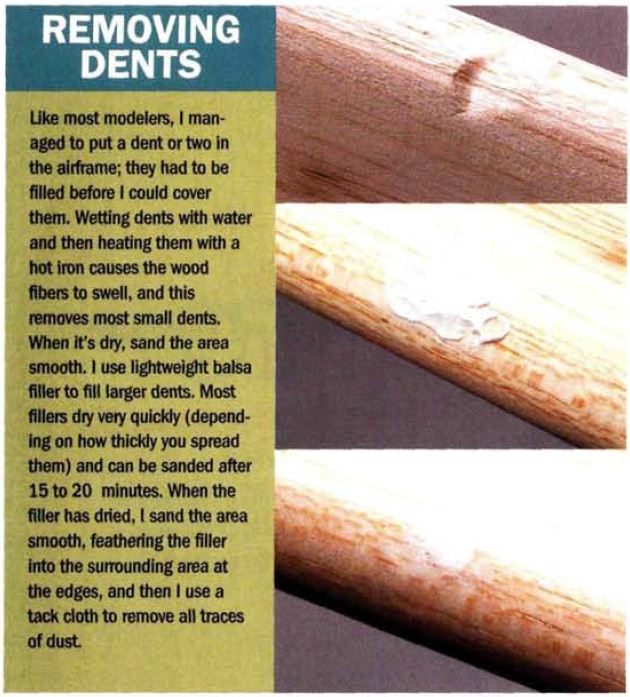
2. Before I even plug in the iron, I inspect all of the parts for any humps, bumps, dings and dents. They must all be removed because plastic film shows nearly every imperfection on the part being covered. Wherever possible, I use a sanding block. I start by sanding with 150-grit sandpaper and then progress to finer grits. I try to get the balsa as smooth as possible because the smoother the surface, the better the results.

3. Before completing the final sanding, I apply a coat of Balsarite to help seal and toughen the wood. The Balsarite also raises more wood fibers and, in my opinion, it makes final sanding easier with better results. (This is just my preference; you can skip it if you want.) For final sanding, I use a sanding block with 400-grit paper and then progress to 600-grit. I sand the entire airframe; when finished, the airframe should feel like silk when you glide your fingers over it.

4. Don’t skip this step; it’s as important as the final sanding: vacuum all the airframe’s nooks and crannies to remove all the dust and debris that always seem to collect. Now give the model a good rubdown with a tack cloth to remove any particles you missed. Remember: the better the finish underneath, the better the final result.
6. When using a heat gun, I usually wear a glove to avoid burning my fingers, as the temperatures can be quite high. I start shrinking the material in the middle of the panel and work toward each end. I also pull on the excess material on the LE and TE to prevent the seams from loosening and pulling in. Use caution with the heat gun; keep it moving, or you’ll risk burning a hole in the material.
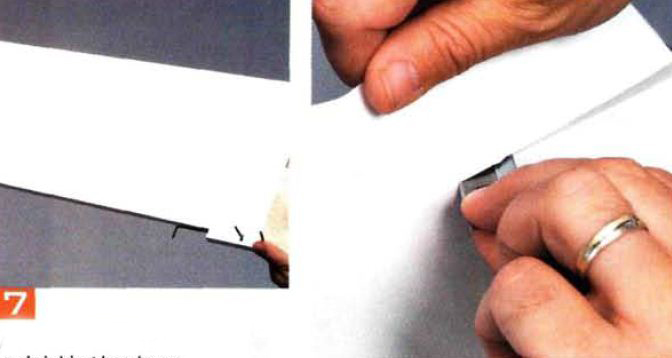
7. After the shrinking has been completed, it’s time to trim away the excess material. Be sure to use a fresh blade for trimming. For best results, I pull the excess material taut and smoothly glide the blade along the edge in one motion. For long, straight cuts, I use the metal straightedge; be certain not to cut into the wood below and possibly weaken it. Above left: here’s the completed bottom panel, tight and trimmed.
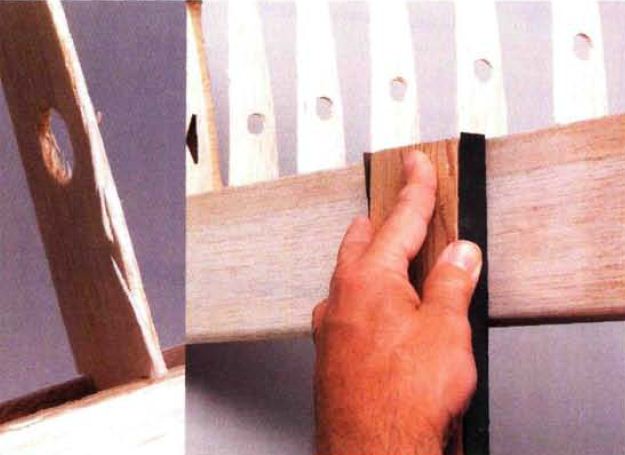
TECH TIP—COVERING CUTOUTS

On some areas (such as the aileron cutouts), it’s advantageous to cover them first with small strips of material before you cover the wing, Because the torque rods are part of the structure, it’s difficult to wrap the covering around them and achieve good results, Instead, cut a strip of covering, slide it under the torque rod and work the material into place with a trim iron, Also wrap about ¼ inch of covering onto the top and bottom of the wing. When you cover the top and bottom, it will provide a tip for the covering and make an almost invisible seam. I also cover the ends of the ailerons, elevators and rudder this way.
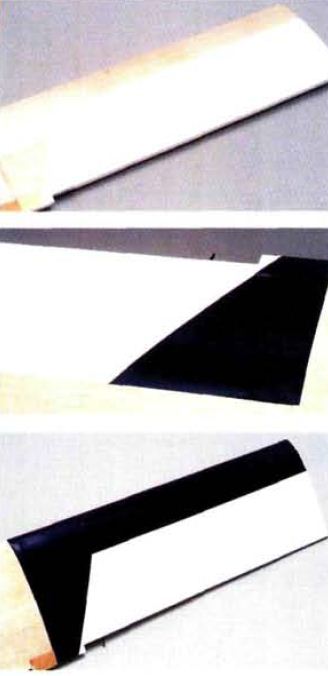
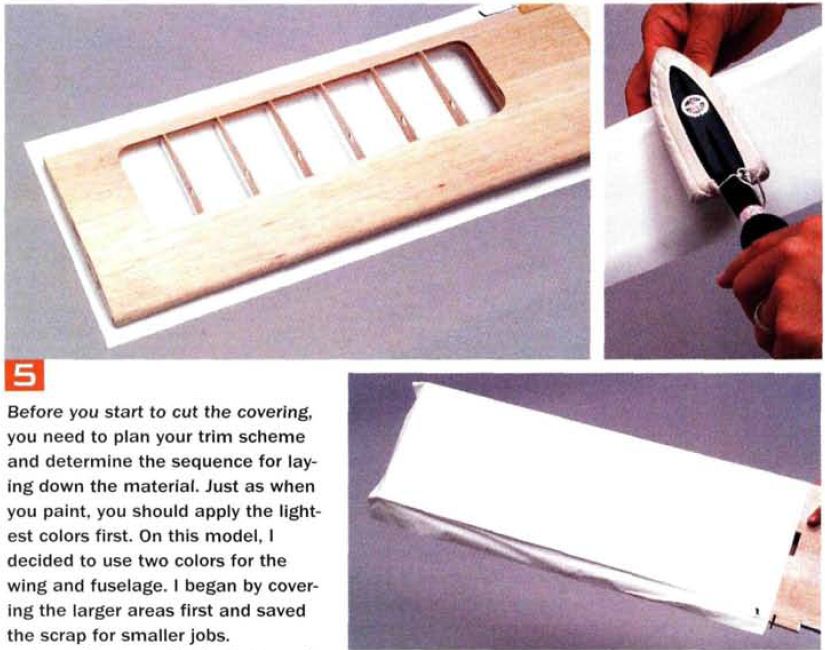
8. The two-color scheme on top of the wing is easy to do with a little planning. Instead of trying to iron film over film, I cover the wing in multiple pieces so that the covering has a wooden surface—not film—under it. This reduces waste and will help you avoid the frustration caused by trying to eliminate bubbles. I usually draw the trim scheme directly on the wing, measure and then cut the covering with about ¼ inch for overlap.
First, apply the main piece over the rib bays in the same way as you applied the bottom covering; the only difference is that the front and the root side of the covering have alre
ady been trimmed to size. The blue trim is in two pieces and is also pretrimmed to size.
Next, add the inboard piece followed by the longer LE piece. Notice the sequence for applying the covering; the lightest color first followed by the inner piece and then the LE. This places the seams downwind and prevents them from lifting.
9. For the fuselage, I added strips of balsa in the open bays where the different colors will match up. This gives the seams support and adds hardly any weight. I covered the bottom of the fuselage first, then the sides and finally the top using the heat gun to shrink the covering. The tail feathers are covered in the same way as the wing. Covering an airplane is a lot of fun, and you can amaze other fliers with your new abilities. One of the biggest benefits is that you can personalize your model to really make it stand out.
Balsarite (by Coverite); Coverite and Top Flite; distributed by Great Planes Model Distributors Co., P.O. Box 9021, Champaign, IL 61826-9021; (800) 682-8948; fax (217) 398-0008; greatplanes.com.


