
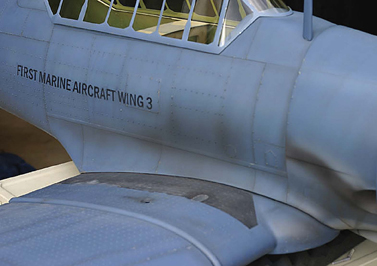
After you’ve painted your model, add some weathering to really bring a scale plane to life. Each technique by itself is very effective and, added together, really produce astonishing realism. My friend Dave Reid commissioned me to paint his giant-scale SNJ Texan, and it has been the example for these ongoing how-to articles. I weathered and detailed the Texan, which I painted with latex in early U.S. Navy markings. As I mentioned in the earlier article, a little goes a long way, so always use a light touch when dirtying up your scale models. How much weathering should you do? Always consult your reference photos, and stop when you think you’re halfway there.
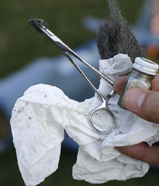
“Steel”-colored paint and coarse steel wool make great-looking “chipped” paint.
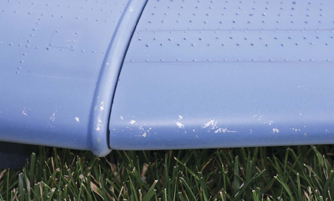
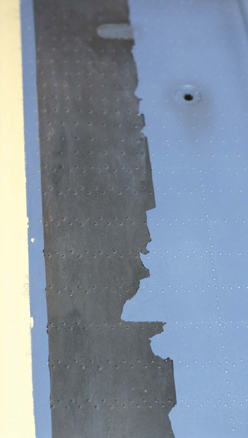
The wings take a beating. Flaking and chipped paint is a must.
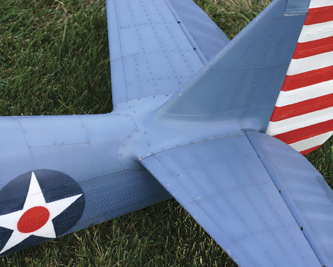
Be sure to add a small amount of chips to your tail feather’s leading edges.
After getting the base paint just right and you’ve done basic weathering, a typical worn look can be made by simulating paint chips flaking off. Getting the paint to look like it is flaking off is not very easy. Some use a silver undercoat and then sand off the paint over it to give a worn look. To me, however, aircraft paint doesn’t flake off smoothly unless there’s a consistent wearing agent such as feet on walkways and arms resting on window rails.
I think to get the most realistic paint flakes, you have to paint them on. I use two techniques. The first works well for very small chips in the paint, and it produces a very random effect. Dip plain old steel wool (I use a coarse grade) in a little puddle of steel-colored paint (not silver!). Silver is too bright; you want the chipped-off area to look like it has been there a while. Steel paint looks more like oxidized aluminum and appears more natural. After dipping the steel wool in the paint, pat it on a piece of cardboard or cloth to remove the excess. Then pat the steel wool on the surface you want to look like chipped paint. Vary your angle, and rotate the steel wool to keep it random.
The second technique is a little more time-consuming and more tedious. I use a “liner” brush and steel enamel model paint and just paint the chips on. The fine liner brush adds to the linear effect that looks scribbled along the leading edges of control and flight surfaces. Again apply the paint in a random pattern. Just keep in mind the effect that may be happening on the aircraft. On the leading edges of the cowl and wings, the paint will chip more with the airflow due to rocks, grit, bugs and so on that knock the paint loose. On fuse-lage side panels, the paint chips on edges and runs along the panel seams. Hatches get more wear, so around those edges the paint flakes, and sometimes the panels get thrown on the ground and get scratched. Also, paint peels away from rivet heads, so to get that effect, you have to paint steel around rivets too. Keep all this in mind, and apply your paint with a purpose, but also keep it random. When in doubt, check your reference.
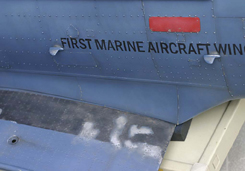
Wing walks
This color documentation photo shows how really worn out the wing walks can get.
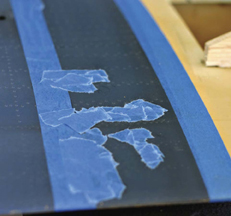
Duplicate the wing-walk pattern with bits of masking tape.
Now, to make the Texan look like it has been used by many flight cadets, you have to add some severe wear on the wing-walk areas near the fuselage and cockpit entries. On the full-size aircraft, these were coated with a nonskid coating, much like rough sandpaper, to prevent the skyward-bound aviators from slipping and falling off the wing.
I found a photo of a Texan that I thought would be very interesting to duplicate its worn wing-walk areas (see at left). Note how the nonslip coating has peeled off from use. After masking off the basic rectangle shape of the wing-walk area, I tore little bits of masking tape and placed them in a random fashion to simulate the wear patterns shown in the photo.
I mix microballoons into my “wing walk” paint to produce a convincing, non-slip surface.
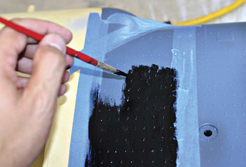
Mixed with the microballons, I use a brush to apply the Liquitex paint to the wing.
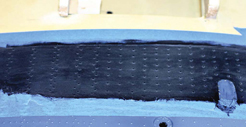
Here, the dark non-slip has been applied, but it still needs weathering.
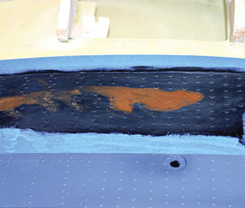
A good dose of Model Master acrylic “leather” paint has been applied.
I created a scale nonslip coating because I didn’t think sandpaper glued to the wing would look very convincing. I used Liquitex acrylic paint, which is fairly thick, and mixed it with microballoons. The microballoons give the paint a grainy texture that looks just right. Add enough microballoons so the Liquitex is saturated with them, and then just paint the mixture on with a brush. Of course, you can’t just paint the wing walk a deep rich black and leave it that way. It doesn’t look real! To weather it down a little, I airbrushed a light gray wash over the black. After that had dried, I wetted the surface down and applied a good dose of Model Master acrylic “leather” paint, rubbing it back and forth to spread the color out while the paint was still wet. I dabbed at it with a paper towel very lightly to break up the streaking and give a little “pitter-patter” effect. Mud and grime collects on the surface; it then gets ground in by people walking on the surface. Then with rain and airstream, it dissolves and flows back and against the fuselage. This subtle mottling of the various colors replicates the color and appearance of the actual wing walk. The effect is subtle, but very effective. When you’ve finished, pull away the masking tape and see how beat-up and realistic the wing walk looks! The last photo really shows the grain and peeled effect very well. The blue paint under the nonslip coating will eventually look like it has worn down to the aluminum, but that can be done later.
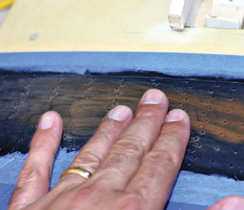
Rub the “leather” color in with your fingers and really spread it around while it’s still wet.
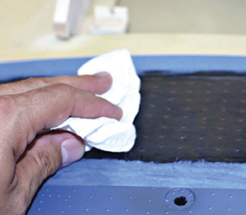
Dab with a paper towel and you now have that mud and grime look.
Here are the finished results. Pretty “beat up,” ‘eh?
A little bit of steel color makes the wear look like it has reached the aluminum wing skin.
TEXT & PHOTOS BY LYLE VASSER
About the Author
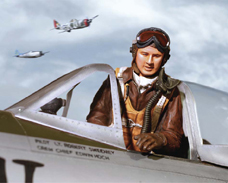
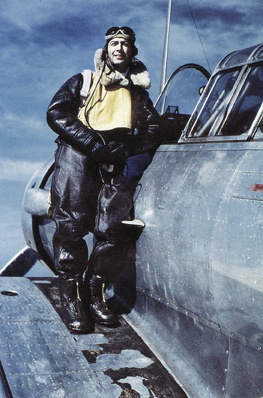
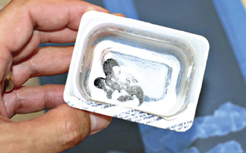
RC modeler and warbird lover Lyle Vasser has been hooked on aviation all his life. He received the “bug” from his father while watching him fly one-channel models in the 1960s. Lyle has been flying RC aircraft for over 30 years, and is also a full-scale pilot. One facet of the hobby that has always been interesting to Lyle is how to make pilot figures in scale models look lifelike. After being frustrated by the unrealistic pilot figures on the market, he decided to make his own, striving to create pilot figures that are just as detailed as the models they go in. He owns a company called Best Pilots (bestpilots.typepad.com), that arguably offer the best pilot figures in the hobby. The inset shows one of Lyle’s pilot figures in a scale P-47 Thunderbolt.


Nice work, Lyle! Your SNJ now provides a realistic home for your amazing pilots!
Put down a coat of aluminum first then “dab” grease where you want to show wear and chipping then add color……remove the grease which became a “mask” and you have chipping showing thru the top color which is MUCH more realistic….
We did this on our giant scale B-24 which won best Military Scale at the 2017 AMA West Convention……..
Thanks