
When it comes to building RC aircraft, especially WWI biplanes, it pays big dividends to keep the tail surfaces as light as possible. As a general rule, for every ounce you save in the tail, that translates to eliminating three ounces of ballast weight in the nose. A win/win for sure. One way to do this is to use thin materials and a technique called Core Sheeting. Basically, when you build this way, you cut out a core of thin balsa sheeting (1/32 inch to 1/16 inch) and then build your surface around it. Here’s how i did it for my newest project the 27.5% scale Nieuport 24.
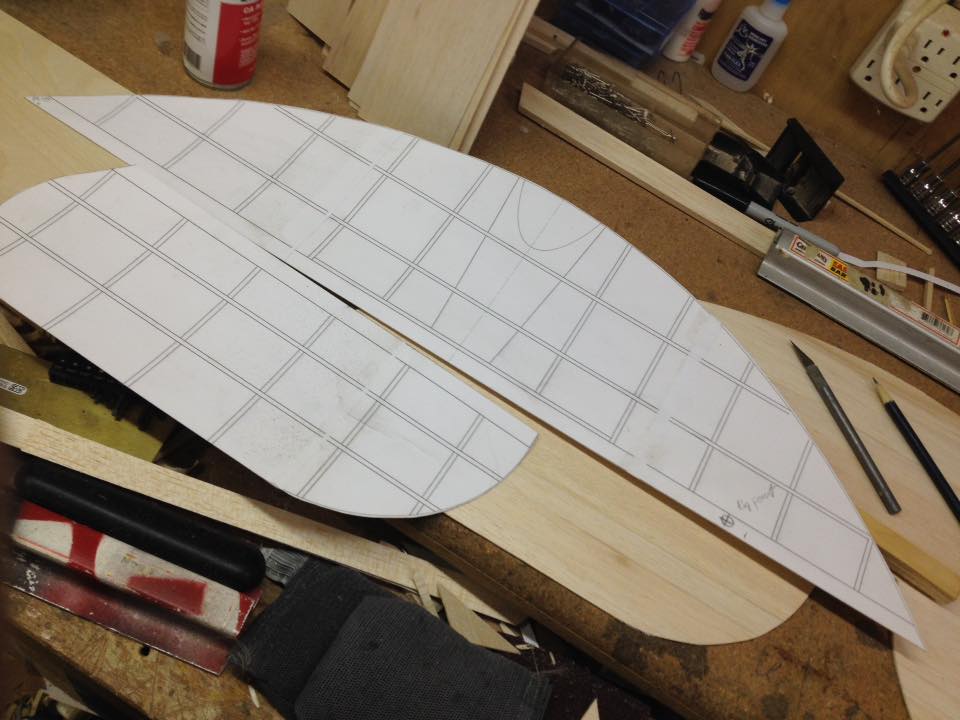
First take the top views of your control surfaces (here the stabilizer and elevator), and use spray adhesive and bond them to poster board and carefully cut them out. These will be used as templates to cut your balsa sheeting to size.
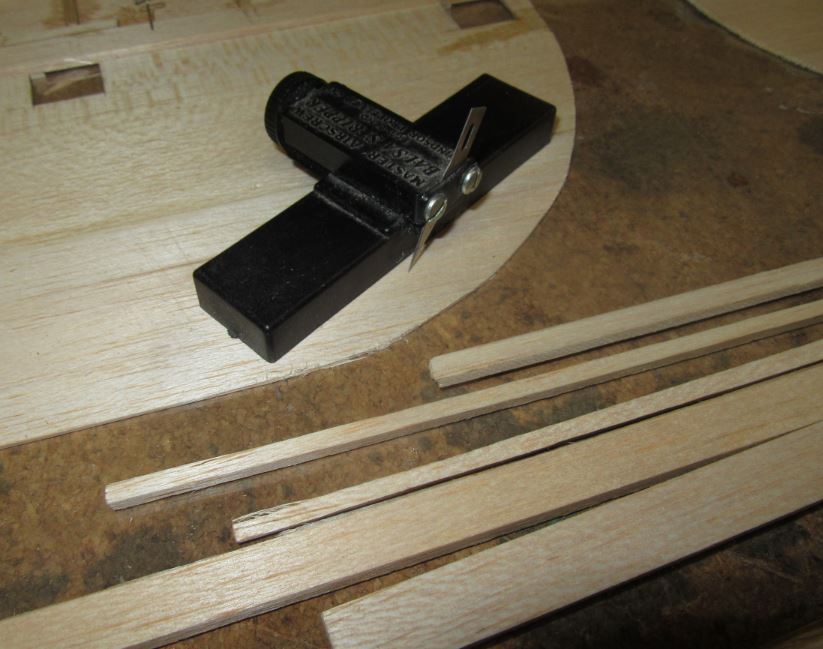
The next step is to use a balsa stripper (this one from Master Airscrew) and make all your stick stock. Use medium density wood so they are stiff yet lightweight. Do not use lightweight stick stock from the hobby shop as most of the time they will be too light and not very strong.
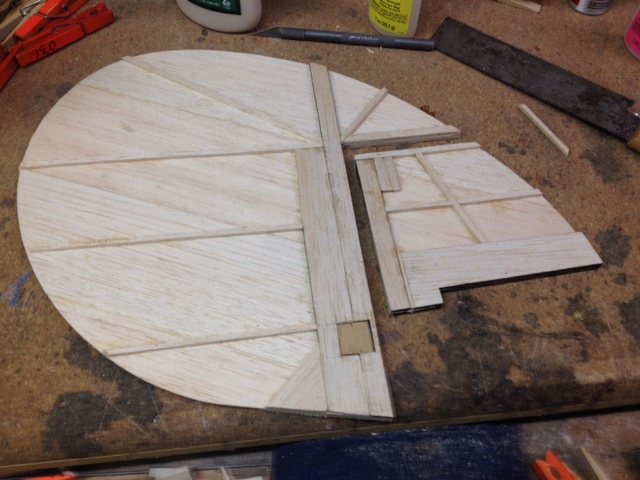
Using the templates, edge glue your balsa core sheets together and cut them to size. Here the core sheet is being made from 1/16-inch balsa. Note that I also cut out the hinge pockets at this point. When the control surfaces are completed, the hing slots will be ready for the hinges to be inserted.
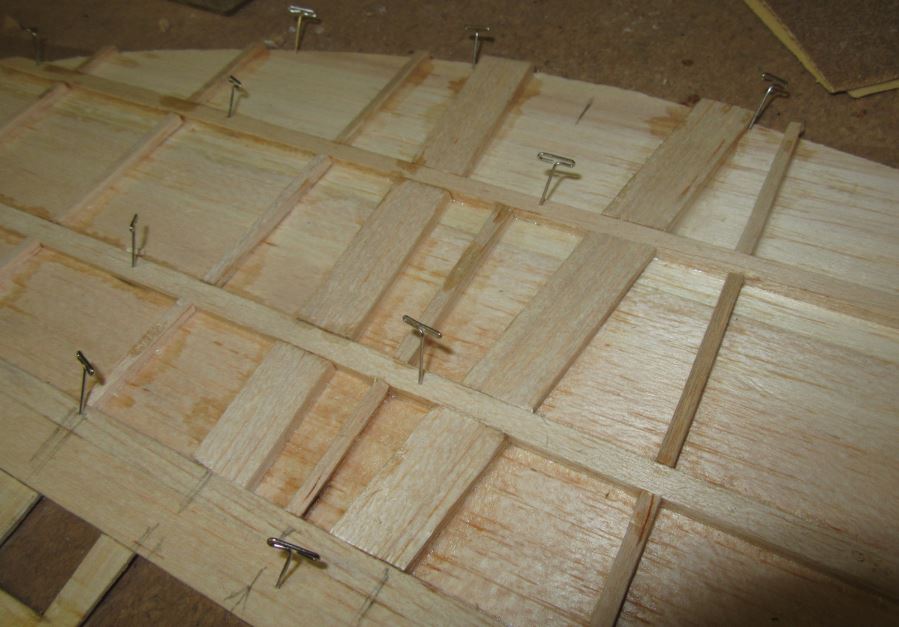
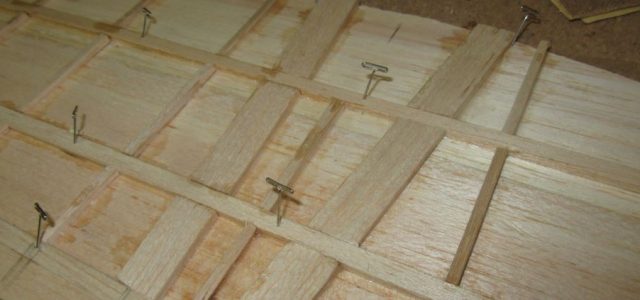
Use thin CA glue (I used Zap here) and glue the structure to the top of the core sheeting. Let it all dry, the remove the pins, lightly sand the structure flat, and turn it over so you can glue on the the structure to the other side.
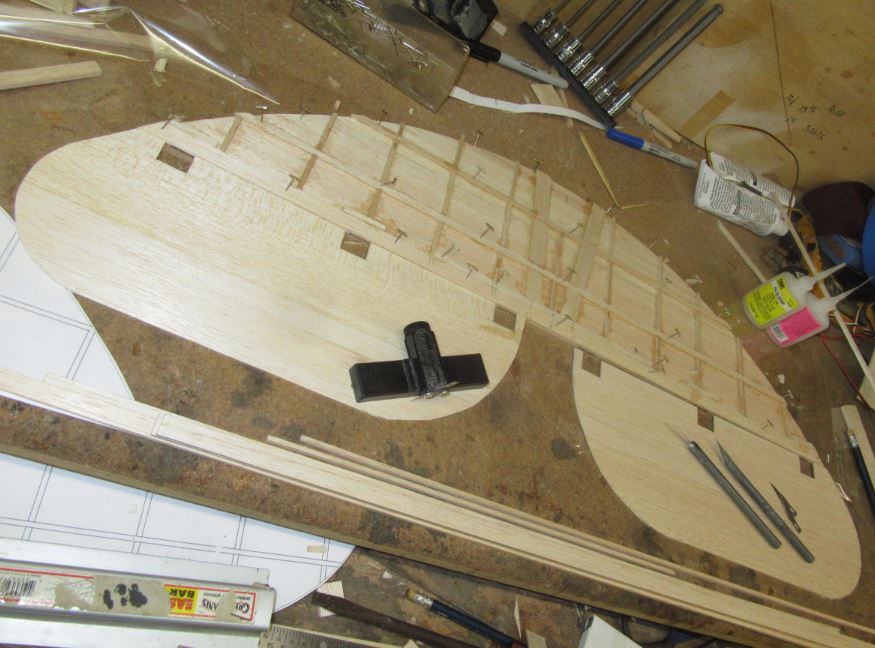
Fin and rudder with internal structure glued in place ready to sand. Note the plywood control horn hardpoint is also glued into place.
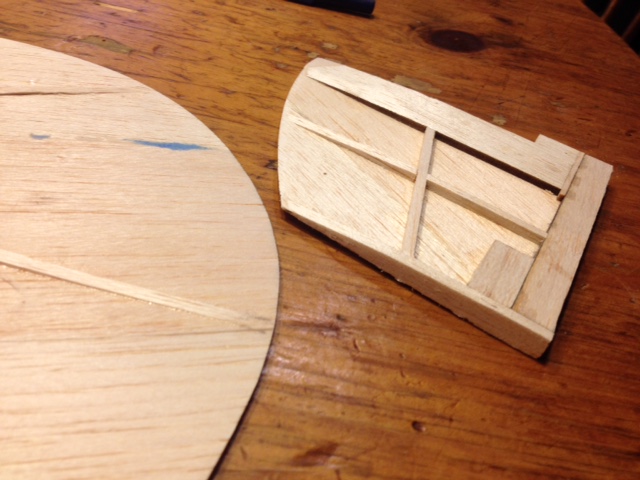
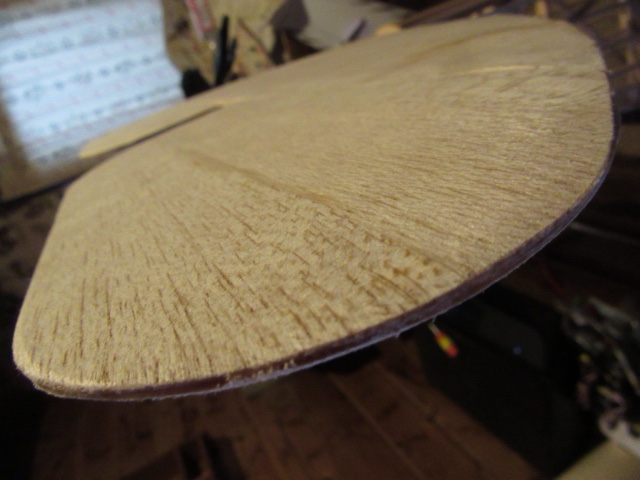
Here (above) is the vertical fin and part of the rudder structure. You see they have been sanded to the taper of the control surface.
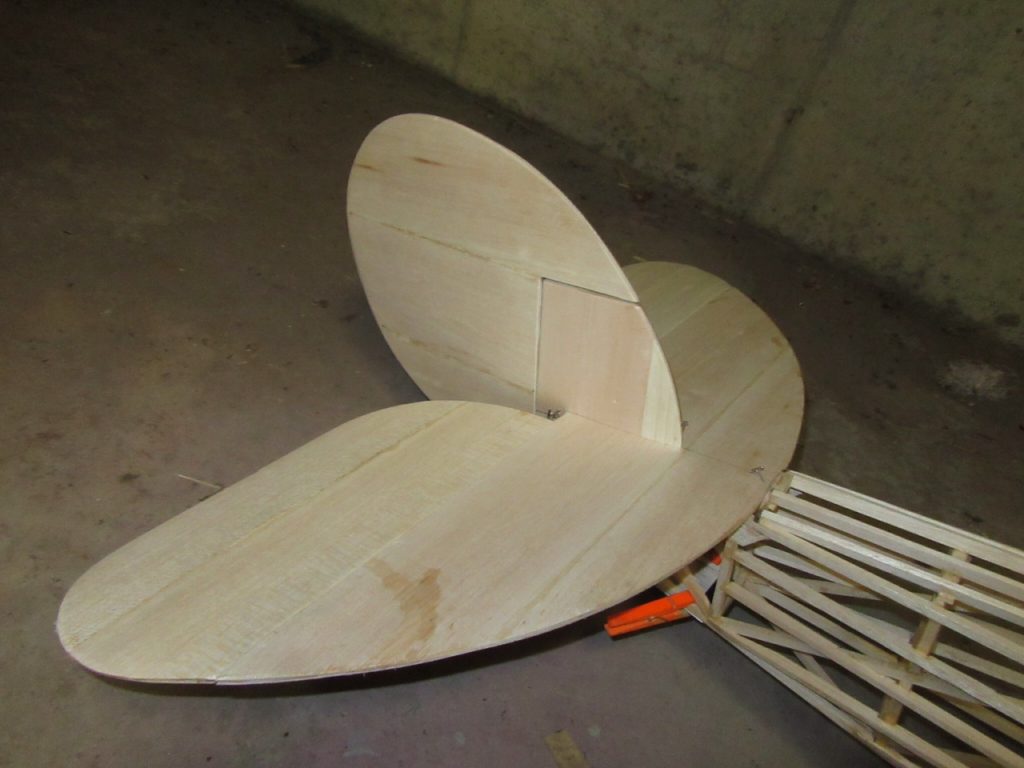
Once the two side structures have been glued in place, sand the edges to shape and then using yellow carpenter’s glue, add the first side of the final sheeting. For this stabilizer I am using 1/32 inch balsa for the outer skins.
An added bonus, to using the core sheeting technique, is that you can cut out the pockets for the hinges first, and then after the surface has been built, the slots will all be done ready for hinging and they will all be centered and aligned.
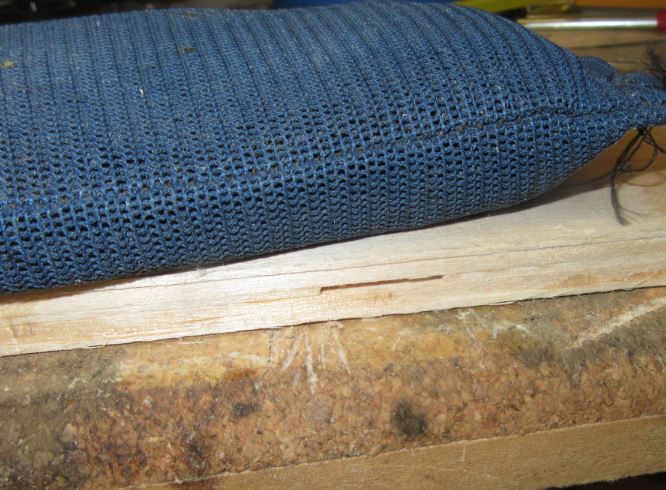
You can see the edges sanded smooth. The leading edges are about 1/8 inch thick while the trailing edges are 1/16 inch thick.
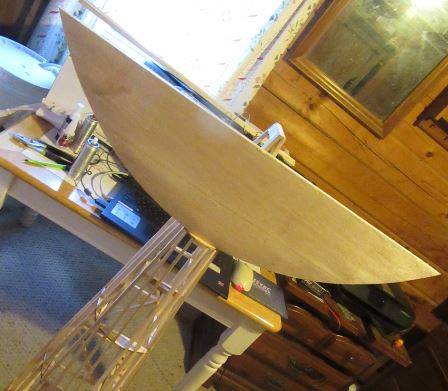
Here’s the finished horizontal stabilizer is being fitted in place on the fuselage. I light sanding of the stabilizer and it is ready for covering.
Once all the tail surfaces have been completed and sanded smooth, they will be ready to install. Here you see the fin and rudder as well as the elevators all hinged into place. The completed tail feathers are very lightweight and stiff and ridged for their all up weight.
Which ever way you decide to finish your control surfaces, this technique produces surfaces much lighter and just as strong as those made from solid balsa sheet.


I guess I am missing something. The core and the two skins (1/16″ + 1/32″ + 1/32″ = 1/8″) is 1/8″ by themselves plus 2X’s whatever the stick stock thickness of the skeleton is for each side (you did not specify the thickness of the sheet to cut the sticks from). Wouldn’t it be thinner and lighter to just build the skeleton and sheet each side with the 1/32 sheeting? Using 1/16″ stick stock + 1/32″ sheeting on each side you would have a total thickness of 1/16″ + 1/32″ + 1/32″ = 3/16″. Please point out my mistakes or wrong assumption. My thinking is that the two outer sheets act as shear webs and will provide plenty of strength.