
Many sport scale biplanes are designed with wings that are strong enough without the use of rigging wires (landing and flying wires). However, if you want to add them as a scale enhancement for its appearance or if you are building a scale multi-wing which does need them, here’s a great way to make them without expensive scale turnbuckles. Remember, even if they are not required, they do increase the strength of your model’s wings. I Here’s how it’s done using standard, readily available RC hardware.
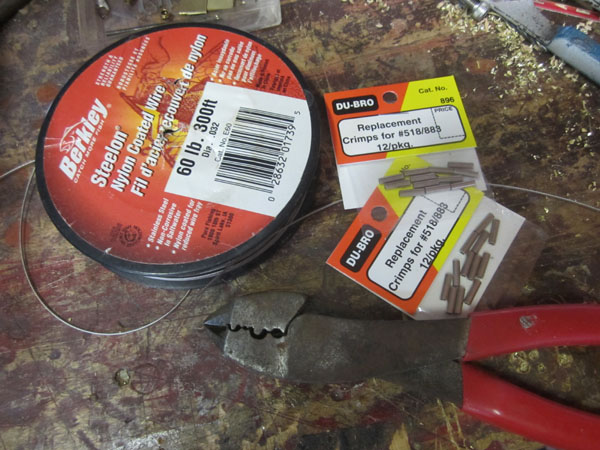
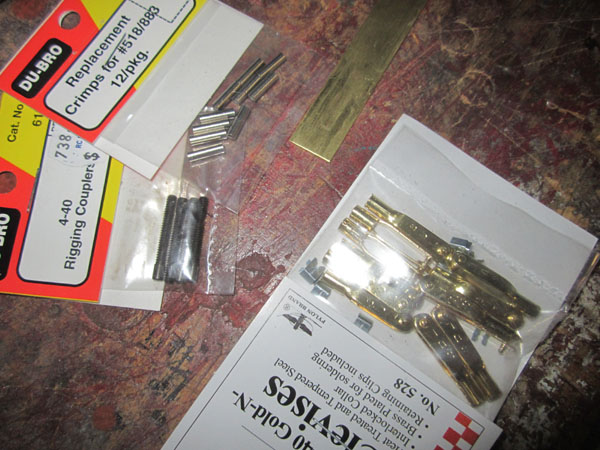
For the steel braided cable, use 60-pound test nylon coated fishing leader line available at most sporting goods outlets. It is fairly inexpensive and one 300ft roll will last for years. It is also the same cable I use for pull-pull rudder setups. The Du-Bro Crimps and threaded rigging couplers are 4-40 size and fit perfectly with the steel clevises from Sullivan Products. A standard crimping plyers from the hardware store works great.
Sullivan clevises come with small snap-on safety clips. They work great and prevent the clevises from popping open under load. You will also need some brass stock. A couple of 0.032 in. x 1/2 inch strips from the hobbyshop will do the job. The material cuts easily with tin snips.
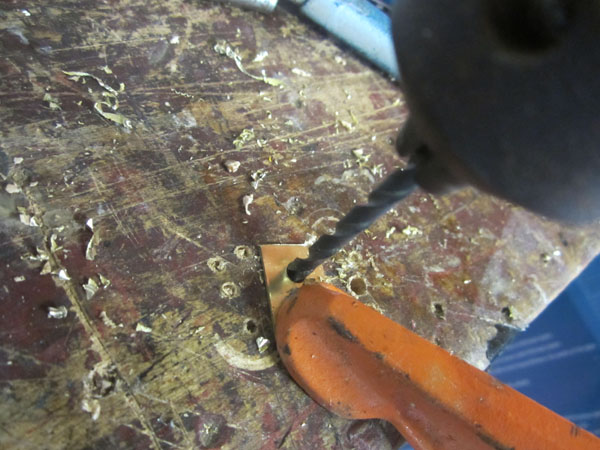
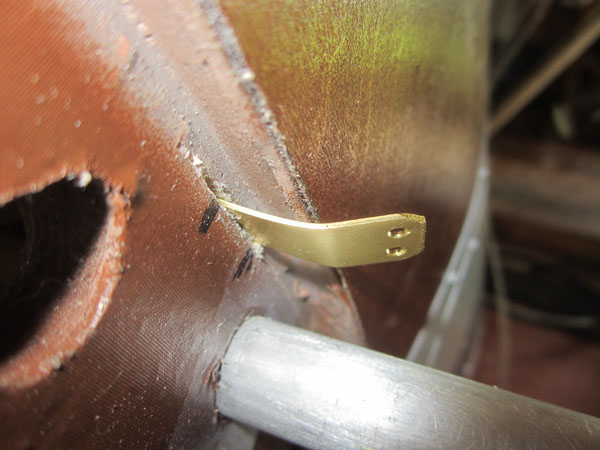
Cut out the attachment brackets from the brass strip and use a bar clamp to hold it on the workbench while drilling the holes. Cut them to a length of 3/4 inch, but any similar with will work, you need enough length to easily install the clevises. Here the 3/16 inch hole for the 6-32 strut attachment bolts is being drilled.

It is much easier to trim the brackets to size after the holes have been drilled. The smaller 1/16-inch holes are for the clevis attachment. To aid in drilling, mark the hole placement on the brackets with a Sharpie, then center punch to prevent the drill from wondering out of place. Use a larger drill bit to deburr the edges of all the holes on both sides of the bracket.
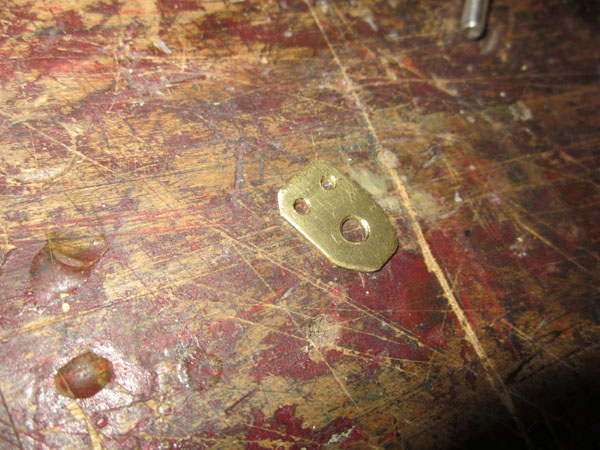
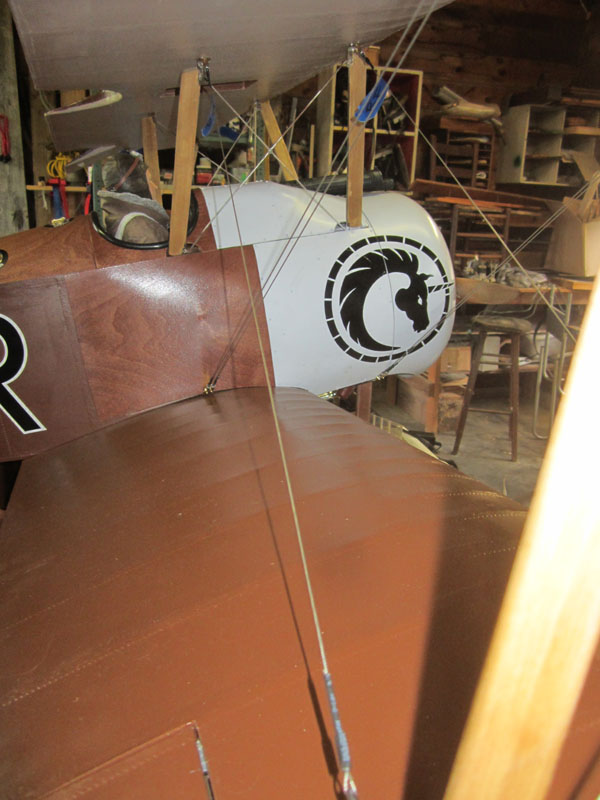
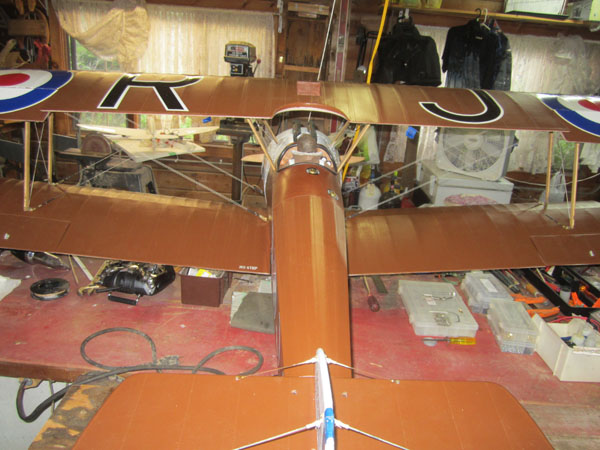
Here a finished bracket for dual rigging wire attachment. All the Flying wires (leading from the bottom of the fuselage to the tops of interplane struts are doubles. The Landing wire, (running from the tops of the Cabane struts to the bottom of the interplane struts) are singles. A total of 12 cables are required.
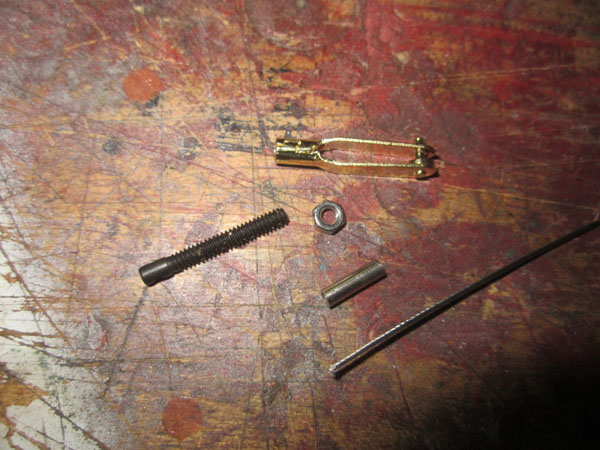
Here are the parts for a typical cable end. (Left to Right,) Du-Bro Threaded Rigging Coupler, Sullivan steel Clevis, 4-40 jam-nut, Du-Bro Crimp and the 0.032 inch steel cable.

Start by slipping the crimp onto the cable and then insert the end of the cable into the hole in the threaded coupler. You need to have about an inch to an 1 1/4 inch passing through as shown above.
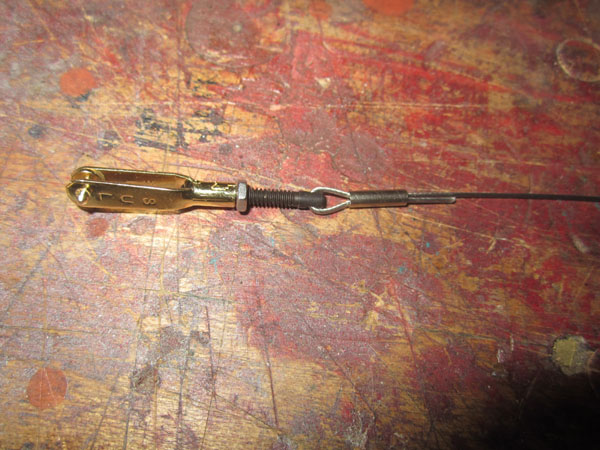
Bend the cable over onto itself and push the crimp over the end of the cable. Make the loop snug, but too tight against the coupler.
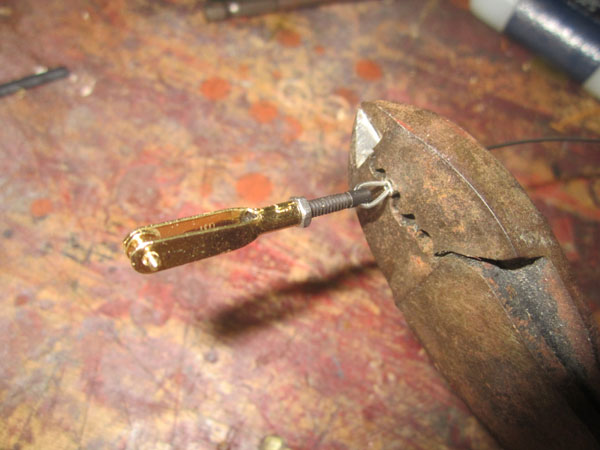
Place the crimp into the crimping jaws and squeeze. Place one of the handles on the workbench and use the extra leverage of both hands to make the crimp.
Here is a properly applied crimp. it should be straight centered on the cable and with no cracks. Now apply a drop or two of thin ZAP CA glue. This helps lock the crimp into place on the nylon coated cable.
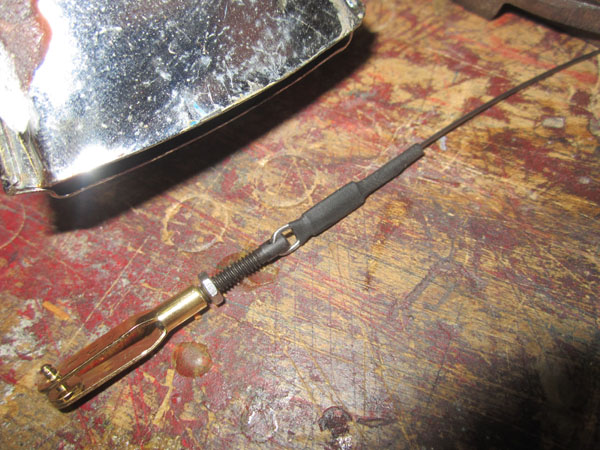
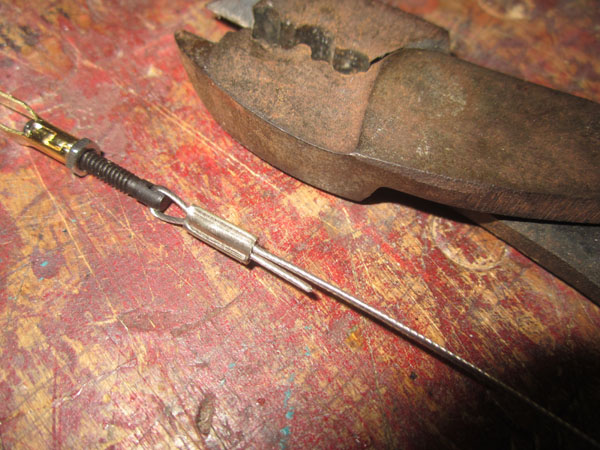
The final step is to slip a length of heat shrink tubing over the crimp and heat with a covering hot air gun. This also sets off the ZAP glue forming a very secure cable end.

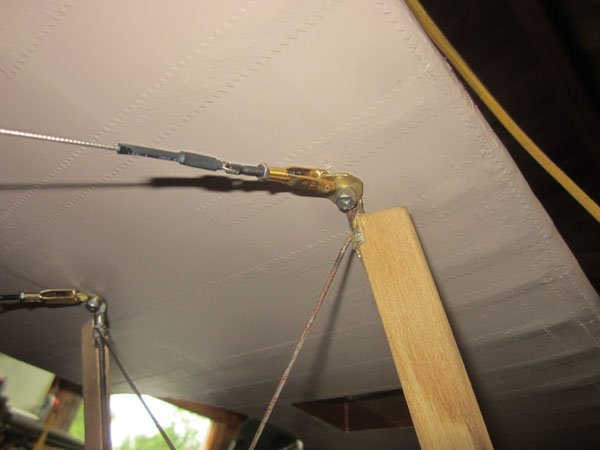
Here is the bottom end of the left landing wire attached to the bottom of the front interplane strut. The attachment brackets are held in place under the head of the 6-32 cap-head bolts used to attach all the wing struts.

And here’s the top of the front right landing wire. The attachment bracket is also held in place with the cabane’s 6-32 attachment bolt. It is important while making the second cable end, to first slide on the crimp and the heat shrink tubing before attaching the clevis and threaded coupler.
Under Tension
There is no secret formula for figuring out the length and tension of your rigging wires. Attach one end of the cable and then loop the cable though the other coupler and check the overall length. Loosen the attachment bolt which allows the bracket to hang slightly. Then through trial and error, adjust the loop until the second clevis can be attached snuggly into place. Then when retightening the strut bolt, it removes all the slack. Once you have all your cables attached, you can “pluck” the cables to judge their tightness. Loosen the jam nut and twist the cable a few turns to fine tune the tension.
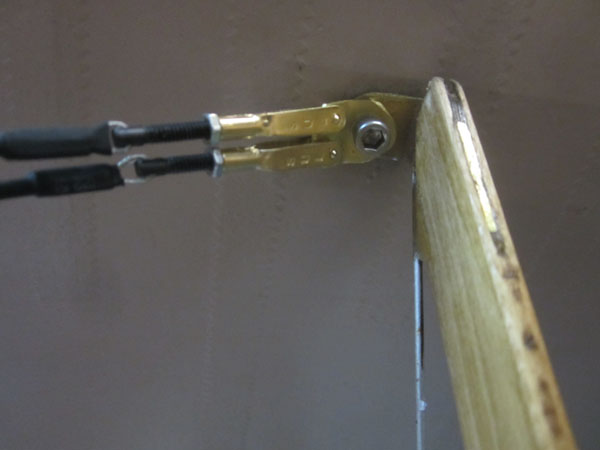
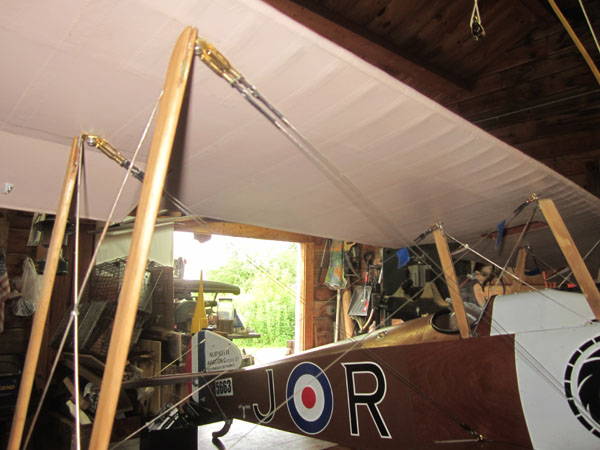
Double Cables
Here is the double cable installation. Thee effort to get both cables close to the same tension is time-consuming so work slowly and you’ll get them adjusted properly.
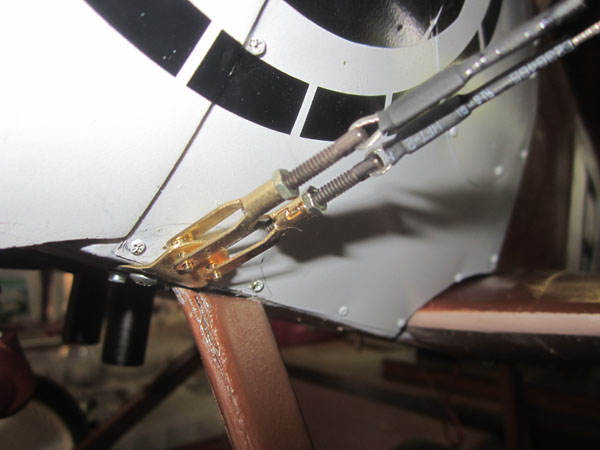
Here’s the bottom of the left front Flying wire group, attached to a single bracket. Notice it is attached to the bottom of the fuselage with a single #4 screw. The screw threads into hardwood landing gear block. The lock clips have yet to be installed on the clevis pins.
Here’s the top of the left front Flying Wire group.
This long shot shows the attachment of the aft flying wires just above the bottom wing. In the full-size aircraft, there were openings in the top and bottom of the bottom wing root that allowed the aft flying wire group to pass through and attach to the bottom of the fuselage at the aft landing gear strut attachment cluster. A bracket is installed above the bottom wing root.

Very similar to the other double cable brackets it is placed so the bottom wing can slide on and off the wing tube without disturbing the cable attachment bracket.
You can see here that a cut is slit in the fuselage in the wing root saddle area and the bracket passes through it and is anchored internally.
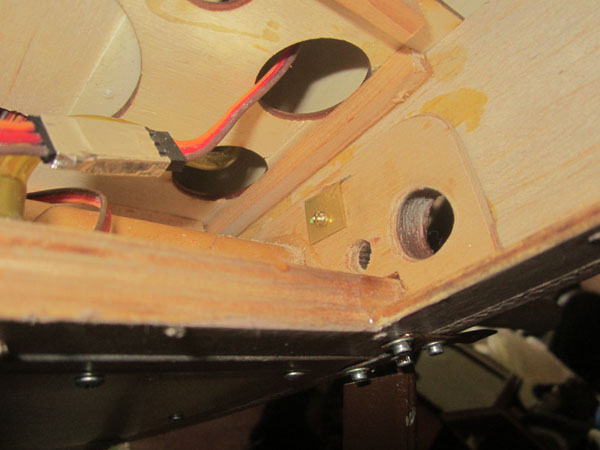
Here’s the inside view through the belly hatch. The end of the bracket is bent 90 degrees and a screw secures it to the plywood doubler supporting the aft landing gear strut. The large hole is the passage for the aileron servo leads.
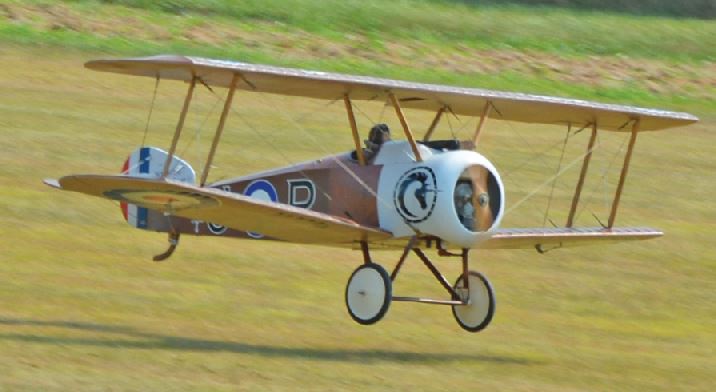
Here you see the double flying wires and the single landing wires on the right side of the Camel. Also a note here to make sure to check the tension of your rigging when you set your model up to fly for the day. After checking all the wire tensions, snug down the jam nuts, then add a drop of ZAP Formula 560 Canopy Glue to the nut and coupler. It dries quickly and acts like thread-locker but is much easier to deal with.
So that’s it. The rigging wires add both strength to the Sopwith Camel’s wings and they also add much to the model’s appearance. Stick and fork in it, this Camel is done and ready for the flying field!


ESTA GENIAL EL ARICULO
Hi hello there I have just finished a 1/4 scale balsa USA Sopworth camel In the kit it said nothing about wing rigging wires and there was also nothing in the instruction manual and there was no wire in the kit is this something I should think about adding or will the model fly safely without the wires kind regards Dominic