

KIT BUILDING 101
Article and Photos by Gerry Yarrish
Our RC hobby has been around for many decades, and it has been, for the most part, a hands-on DIY pursuit. In the beginning, all there was to choose from were builder’s kits. In recent times, the hobby has evolved to include easier-to-assemble “almost ready to fly” (ARF) planes, which greatly sped the development of experienced RC pilots. This, however, came at the cost of modelers having less workshop experience. This article highlights some of the basics of building a model airplane from a kit. Let’s get started.
Tech Tip
Rule number one for kit building: Read the instructions. Read them several times before you begin to glue things together. If you have difficulty understanding them, reach out to an experienced friend for help. You need to know what you’re doing and how to do it before you begin.
STEP 1 CREATE A HEALTHY WORK ENVIRONMENT
One of the best parts of being a model-airplane builder is putting together a specialized workshop. Most of the time, this happens in a corner of the garage or in the basement, so you can contain all the wood shavings and not get the rest of your home dirty. All you really need is a bench or two, and these can be made out of inexpensive interior-grade hollow-core doors and 2X4 lumber from a home-improvement center. Your bench needs to be straight and true, and truth be told, your workbench should be your first building project if you want to become a kit builder.
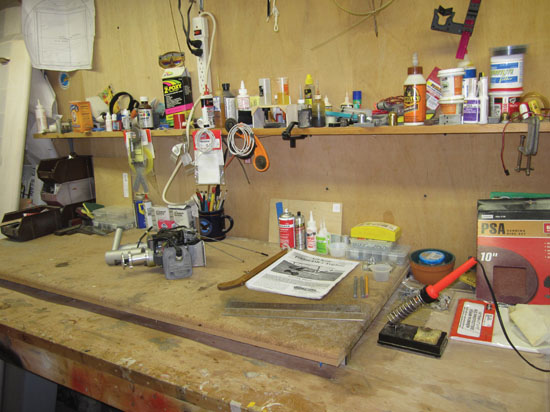
A neat workbench is a great start for any building project, whether it is a kit or an almost-ready-to-fly.
Keeping your bench clean, organized, and well lit will go a long way in speeding the model-building process. A handy shelf above your bench is good for storing often-used supplies and a roll-around toolbox/cabinet keeps tools handy and within easy reach. I have also found it handy to make a smaller work board topped with stick-on cork material for use as a secondary work surface. You can assemble and build long parts on the main workbench while assembling smaller items, like tail surfaces and wing halves, on the building board. This is more convenient if you don’t have the room for two full-size benches in your work area.
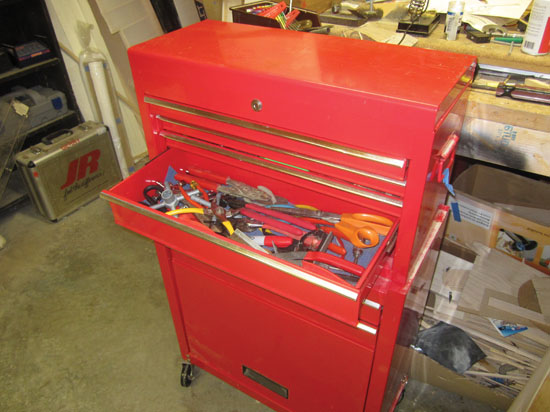
Keeping your tools handy and within easy reach with a roll-around tool cabinet speeds construction.
Good overhead lighting is a must. You will enjoy building more if you can easily see what you are doing. Ceiling shop lights—specifically, single and dual fluorescent lighting—is surprisingly inexpensive and readily available at hardware stores and home-improvement centers. Hang them over your workbench above head-banging height. While you are at it, install a couple of shop power strips so that you can easily supply power to the light fixtures and your power tools.
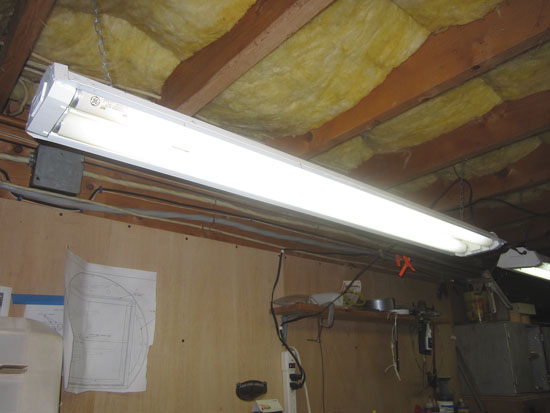
Fluorescent or LED lights are a must. You will enjoy building more if you can easily see what you are doing.
STEP 2 GENERATE A PLAN OF ATTACK
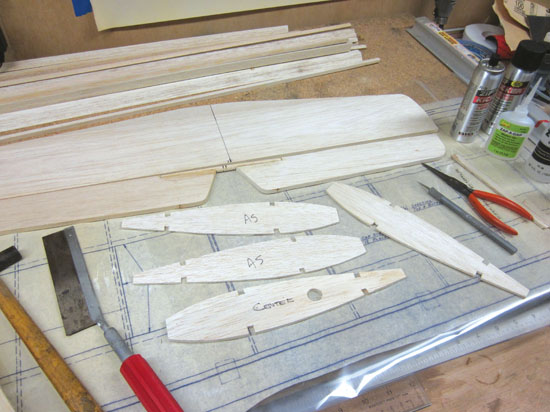
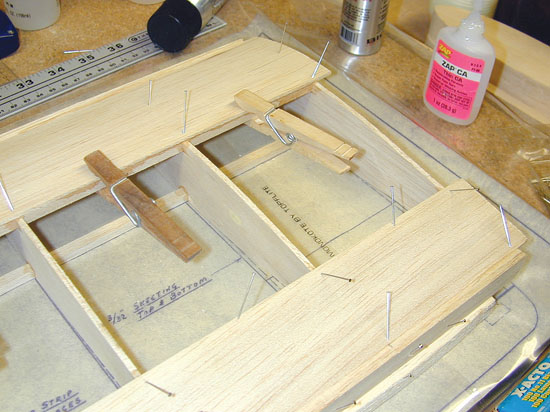
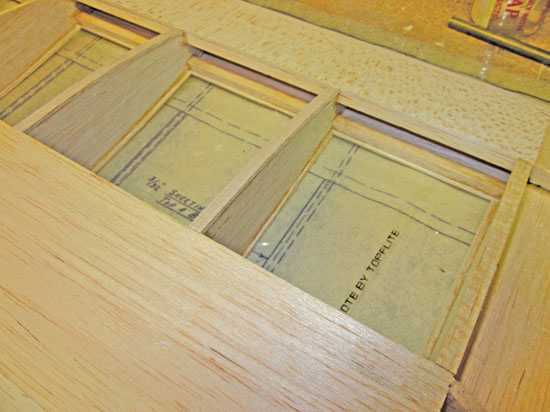
This is the main difference between kits and ARFs: You have to build the kit plane, and that requires plans, which are usually included with the kit parts. A good way to deal with the plans is to cut them apart and separate the various parts into smaller sections. Some of the drawings (cross-sections and details) show how things go together. I like to tape these to the wall so that they don’t take up room on the workbench and I can refer to them throughout the build without interruption. Place the drawings for the tail surfaces, fuselage, and wing panels on your work surface so that you can build the parts on top of them. I like to start building kits with the fuselage first since all the other parts are attached to it. If this is your first kit plane, start with the smaller tail surfaces and build them on the separate building board.
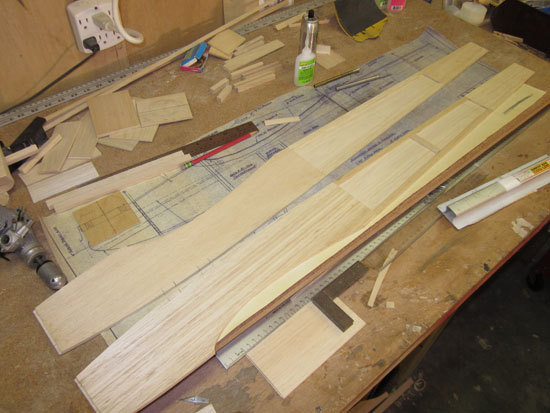
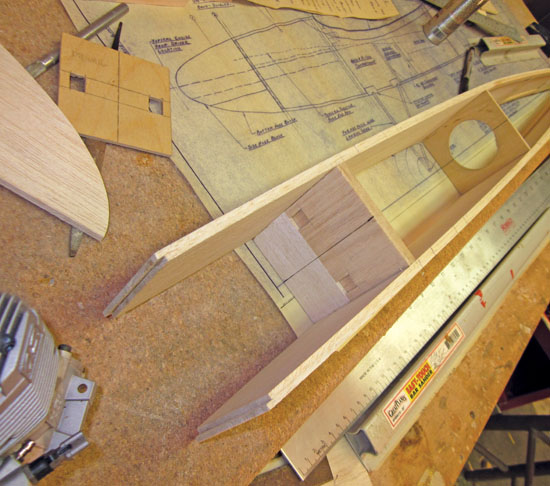
Here, the two fuselage sides are being assembled. The positions of the parts are determined by
measuring them from the plans.
Use the side-view drawing to work out the placement of the formers and doubles that the sides are made up of. When it comes to gluing the two sides of the fuselage together with the formers, use a straight reference line as a guide. Draw centerlines on all the formers and then, as you add the formers and draw the sides together at the tail, align the centerlines with the reference line. You can draw a line on the workbench or use one of the border lines that are drawn on most plans.
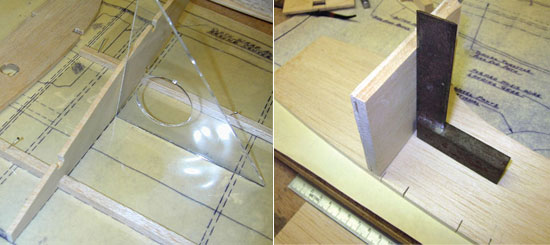
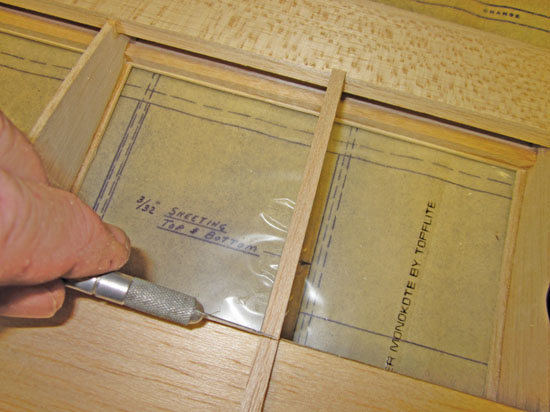
It is also important to protect your plans to prevent your parts from being stuck to the paper. I use clear plastic Plan Protector from Great Planes, but you can also use clear film covering. You can also use small sheets of wax paper or plastic food wrap placed under specific gluing points to protect your planes.
Whether you use commercial plan protectors or some plastic food wrap, preventing your parts from sticking to the paper is important.
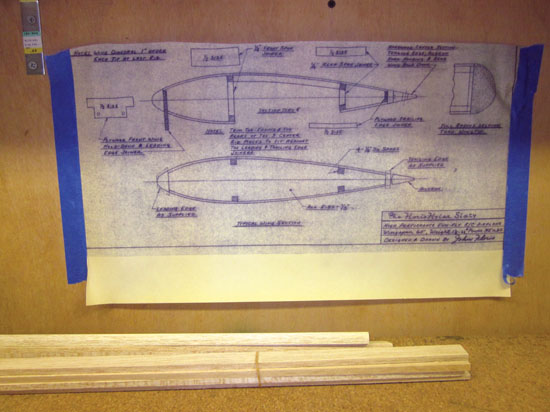
With plan details taped to the wall, you can refer to them during construction and they won’t take up room on your building surface.
STEP 3 ENSURE PROPER ALIGNMENT
As you get into the build, it is important to use squares and 90-degree triangles to help keep parts square and properly aligned as your glue joints dry. Measure your centers and draw centerlines on parts so that you can, at a glance, see if they have been installed correctly. When you build a wing panel, you first start by pinning the bottom spar securely in place over the plans. You then add the various ribs to the spar, making sure they are placed vertically using a builder’s triangle as a guide. Tack-glue each rib into place and then, after installing the top spar, finish gluing the ribs into place. Always take your time and make sure everything lines up properly before finishing the gluing.
Use squares and 90-degree triangles to help keep parts square and properly aligned as your glue joints dry. Measure your centers and draw centerlines on parts so that you can, at a glance, see if they have been installed correctly.
Tech Tip
There are plenty of glues to choose from at the hobby shops. As a general rule, CA glue comes in thin, medium, and thick viscosities. Use thin CA for tight-fitting joints and medium CA for where there might be a slight gap between parts. Thick CA glue usually takes a little longer to dry, so it’s a good choice when gluing parts together where you’ll need a little more time to get the alignment correct, such as for long pieces of wing sheeting. Straight pins, tape, and clothespins are all great for holding pieces together as the glue dries.
STEP 4 MAKE CLEAN CUTS
When it comes to cutting parts to shape or to fit, always use a sharp hobby-knife blade. As you use them, the blades will become dull, and this will affect the quality of the cut. Using dull blades also requires more cutting pressure, and this can be dangerous because you might slip when making the cut. Make your cuts, using a straightedge as guide, then make several light passes to complete the cuts in balsa sheeting. For items like leading edges, spars, and other “stick” stock, I find it helpful to cut them longer than needed. I glue them into place, then use a razor saw to cut off most of the excess length; I finish it off using a sanding block. This produces a clean and accurate finished assembly. This is especially important for the wing center ribs, where the wing panels are glued together, and for the wingtip ribs, where you’ll later attach the wingtips.
STEP 5 BUILD TO SUIT
An important part of building a kit is the planning stage. You will have to decide early on what radio gear and servos you are going to use, and what type of power system you plan to install. Having your hardware handy makes your build go smoother as you can prep various parts before they are glued into place. Take the firewall, for instance. With my latest build, I went with a Himax brushless motor from Maxx Products for power. Before gluing the firewall into place, I used the motor-mount hardware to determine where the attachment holes needed to be drilled. The same goes for the servo rails. By having the servos on hand, you can determine the servo-rail spacing. Having the battery pack and speed controller, you can also work out where everything will need to fit before gluing formers and doublers into place.
Part of this planning also includes the layout and installation of your pushrods for the elevator and rudder. You need to work this out before you finish sheeting the top and bottom of the fuselage. It is extremely difficult to install pushrods and their guide tubes after all the sheeting is in place. Also, remember to install the top and bottom sheeting so that the grain runs across the width of the fuselage. This adds more strength than if you ran the grain from nose to tail.
Glue the top and bottom fuselage sheeting (cross-grain) in place after installing the pushrods and guide tubes.
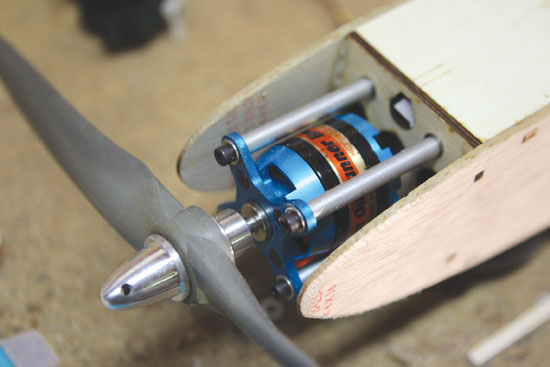
Here is the Himax motor powering my new project. I used the motor mount to determine the placement of the attachment holes.
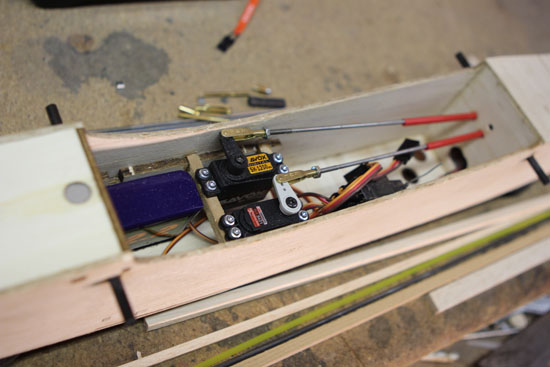
When installing your servos, make sure that the servo arms do not interfere with the sides of the fuselage or any other equipment in the radio compartment.
STEP 6 SET UP YOUR LINKAGES
Since the pushrods transfer the servo’s movement to the control surfaces, you should install the servos first and then the control surfaces before you can set up the linkages. Be sure to use hardwood, such as spruce, or even 1/2-inch-wide strips of 1/4-inch-thick plywood to make strong servo mounts and rails. Install the rubber grommets and brass inserts into the servo’s attachment tabs and then drill pilot holes through them and into the servo rails. I use cap-head screws from RTL Fasteners for all my hardware, but most servos come with servo mounting screws. Be sure to add a drop of thin CA to the screw holes to help “harden” the wood so that the screw threads won’t strip out.
You can pick your own hardware for a kit plane.
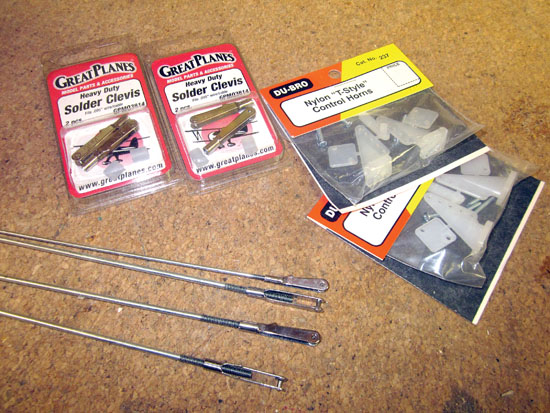
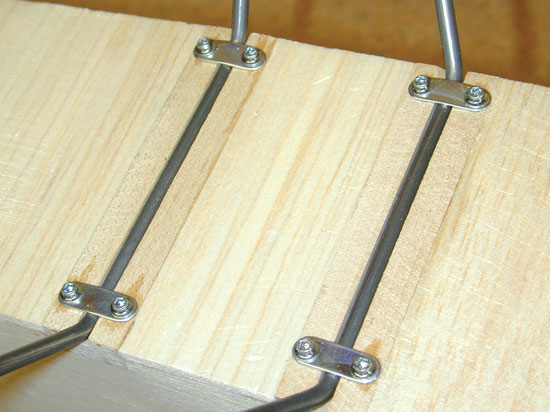
I like using a combination of Great Planes and Du-Bro Products to make up my control systems. Twelve-inch-long pushrods with threaded ends and mating clevises are available from Great Planes. It also has clevises that are soldered to the other end of the wire pushrod. This setup works well and allows for about half an inch of length adjustment. For my large 60-size Florio Flyer, I used this setup, with servos mounted just in front of the stabilizer. Make sure you install the Du-Bro control horns so that the attachment holes line up with the hinge lines of the control surfaces.

Always use hardwood for your servo rails.
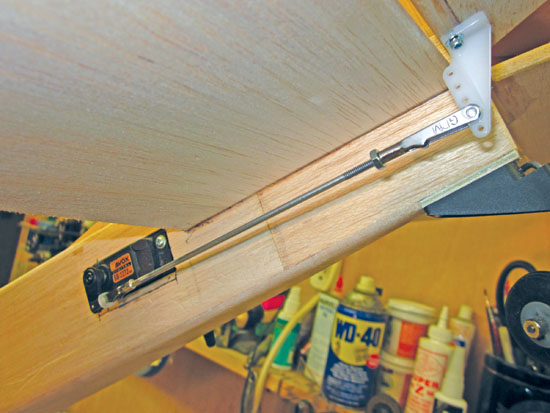
When you install your control linkage, center your control surface and attach your control horn so that the holes are lined up with the hinge line.
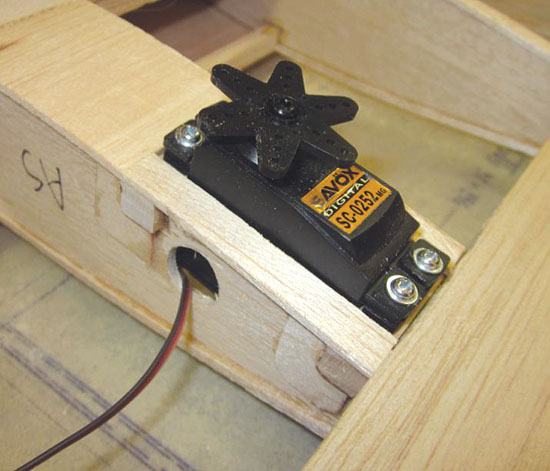
Test-fit your servo before covering your model.
STEP 7 SOLDER THE HEAVY PARTS
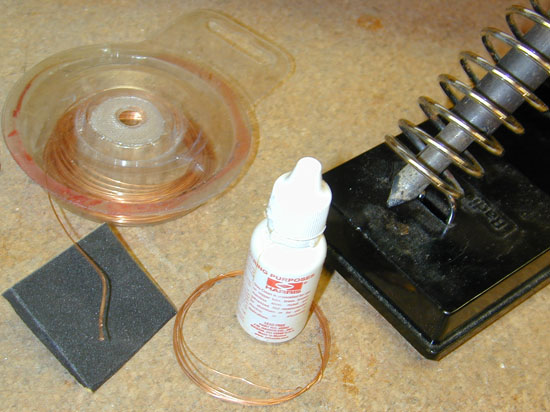
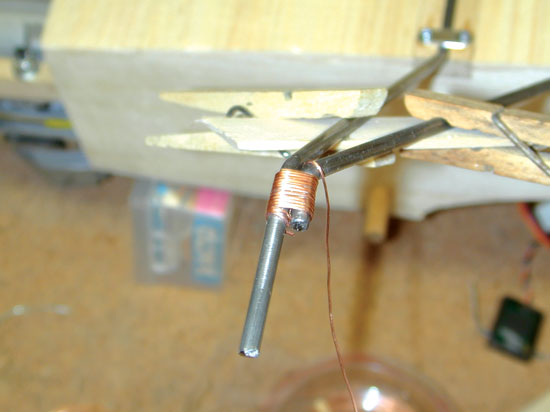
When it comes to soldering large-gauge wire, such as for pushrods and clevises, always clean the parts with sandpaper and use high-silver-content solder and proper flux. Do the same for soldering the wire landing together. I find that Stay Brite silver solder and liquid flux work great. It is important to use a lot of heat when soldering; I use an 80-watt soldering iron with excellent results.
 To end up with a straight and properly aligned landing gear, you first have to clean all the parts and then attach the base ends to the fuselage with the required straps. Next, use a length of wood and a couple of clothespins to clamp the struts into alignment so that the axles ends can be soldered together. I use thin copper wire to bind the front and rear wires together, wrapping the solder joint area tightly and neatly. Apply a few drops of flux to the wire and the gear struts and then apply heat. Place the soldering iron under the wraps, and apply the solder to the top. When the wires and gear struts are hot enough, the solder will flow smoothly into the joint area. Don’t move the gear until the solder has cooled. Check the alignment of the second side, and repeat the process to complete the job. After the solder has cooled, remove the gear from the fuselage and clean the solder joints using a wire brush and some solvent, such as rubbing alcohol, to remove the leftover flux. Install the wheel and reattach the landing gear after you’ve covered the fuselage.
Before soldering your gear, attach them to the bottom of the fuselage.
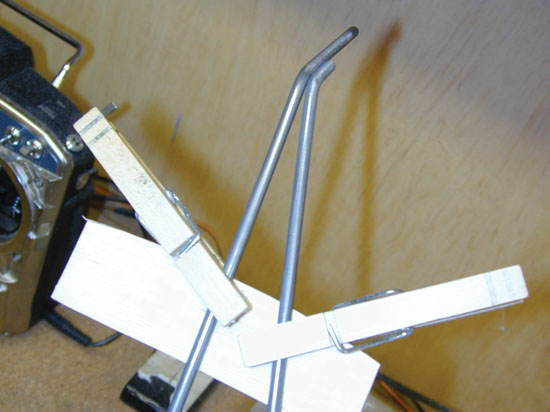
Clamp the landing gear so that the solder joints are held in alignment.
Use thin copper wire to wrap the solder joint area.
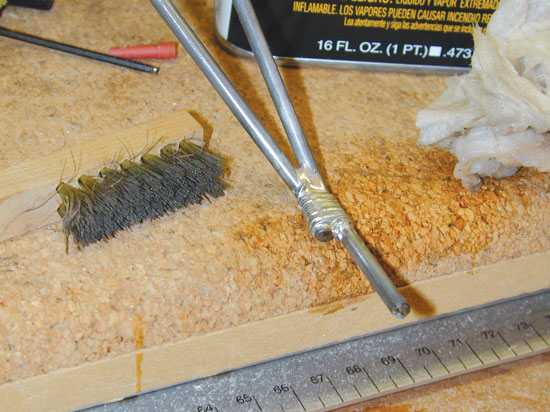
A good solder joint will be smooth and shiny.
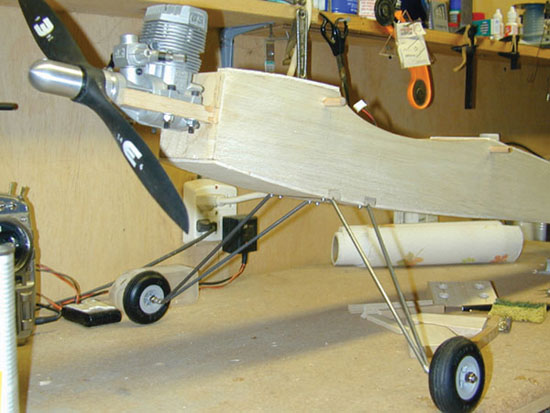
Add your wheels and lock collars to complete the gear.
STEP 8 JOIN THE PANELS
To strengthen the center section where the two wing panels are glued together, you have to wrap the center seam with some fiberglass tape and glue it into place with slow-setting epoxy resin. To make the job a bit easier, install the fiberglass tape to the top and bottom surfaces separately and overlap the pieces at the leading and trailing edges. To make the epoxy resin easier to apply, I use equal parts of part A and B and then some denatured alcohol so that it is all mixed together in thirds. Lay the tape into place, dribble the resin on top of the fiberglass, then place some of the clear plastic plan protector over the joint. Using some scraps of balsa sheets, squeegee the resin under the clear plastic so that it completely fills the weave of the reinforcement tape. Tape the clear plastic in place until the resin sets up completely. Then remove the plastic sheet, and repeat on the other side of the wing. When the job is done, you will have a very smooth surface produced from the plastic sheet and the overlapped sections of tape will be properly bonded together and flattened out. No sanding is required, and the covering material will stick nicely to the smooth epoxy surface.
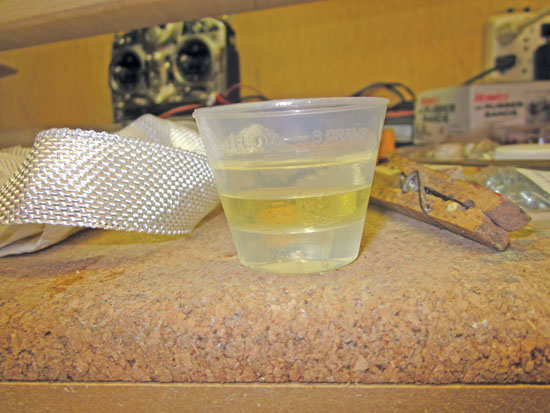
Using a graduated mixing cup allows you to precisely measure and mix the epoxy and the alcohol
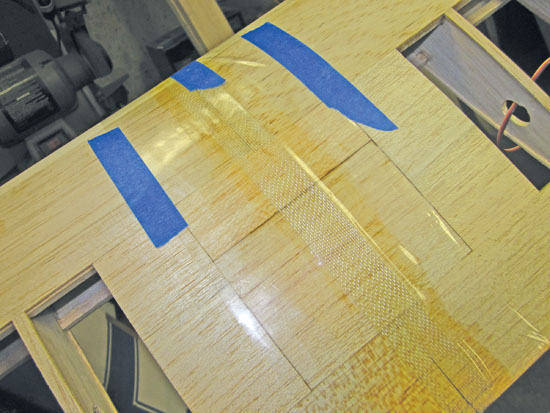
Here, the fiberglass tape and epoxy have been covered with the clear plastic. Left: After removing the plas
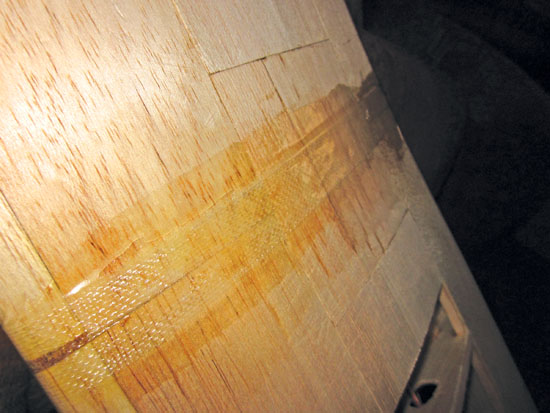
After removing the plastic sheet, the finish of the epoxy is smooth and does not require any sanding.
STEP 9 FIT THE HINGES
Once all your parts are built and assembled, you have to fit all the hinges (but don’t glue them into place until after the model has been covered). Du-Bro Products makes great plastic pinned hinges, and you can get CA glue–style hinges from Radio South. It’s up to you which one to use.
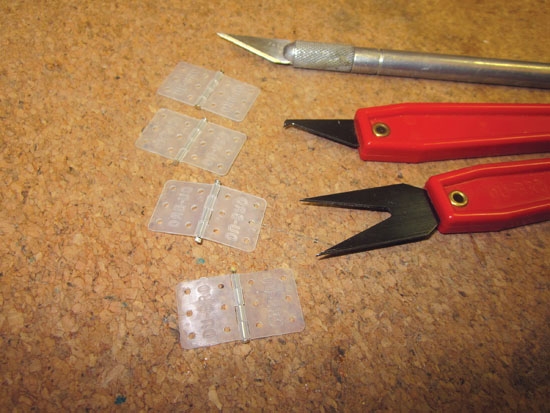
Properly installed plastic pinned hinges will provide smooth, bind-free control response. Du-Bro has a hinge-slotting tool set that makes the installation easy.
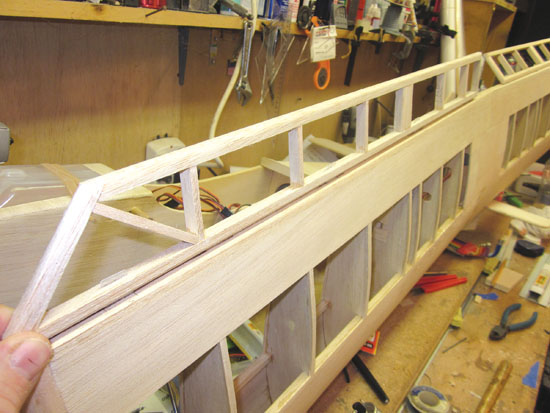
For long control surfaces, like the ailerons, it is important to install all the hinges so that they are in alignment with each other.
STEP 10 COVER AND FINISH IT
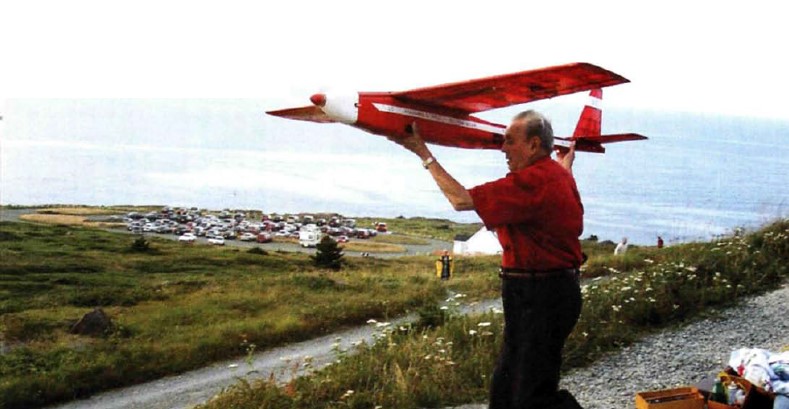
Ready for takeoff? Almost! Before you can fly your new kit-built model airplane, you will have to cover it. There are several brands of coverings available including plastic films, such as Hangar 9’s UltraCote and Top Flite’s MonoKote, as well as painted cloth fabric, such as Solartex from Balsa USA and SIG Mfg.’s Koverall. Each brand comes with detailed instructions, but if you need help, ask an experienced friend for assistance. It’s the covering and finishing that truly sets your kit-built model apart from the rest.
For a smooth covering job, you have to sand all your airplane’s parts smooth. There should be no gaps or uneven glue joints. Using a sanding block is the best method to produce an even surface.


Some good tips. Although I have built a few aircraft from plan, I like to see how others approach their build projects. Earlier this year I wanted to improve the lighting in my garage / RC workshop and installed a high lumen twin 5 ft double LED baton light from Screwfix (UK). This has made a tremendous improvement and uses only 28W.
Great article and brings back many memories of the building process. There’s something special in building it yourself that makes it even more special. I’d like to find a good source to obtain the MonoKote that I grew up with.
Since I seem to be the only member left in my club that actually “builds” their models, all the other guys donated their left over covering materials to me. I used to be a die hard Monokote guy, but now, costs included, Lustercote is my choice hands down
And use a heat gun and cloth rag for the final shrink!
All great tips!
Great article, always something new to learn or try. Top tip on adding denatured alcohol to the epoxy resin and covering the whole joint with plastic sheeting, to give a smooth even finish. It’s a proper fav having to sand and fill if you get it wrong.
Now, just have to find the article on filling the pin holes on a glassed cowl or the likes. I have used car filler but it isn’t ideal.
New article?