
In a recent issue of MAN, long time contributor and Scale expert Martin Irvine showed us how he paints scale markings using vinyl painting masks (December 2020 issue), but he hasn’t stopped working on his 1/3 scale Thomas Morse S4B “Tommy”. His next step was filling out the engine cowling with a scale rotary engine to cover up his RC engine installation. Here’s what he’s done so far.
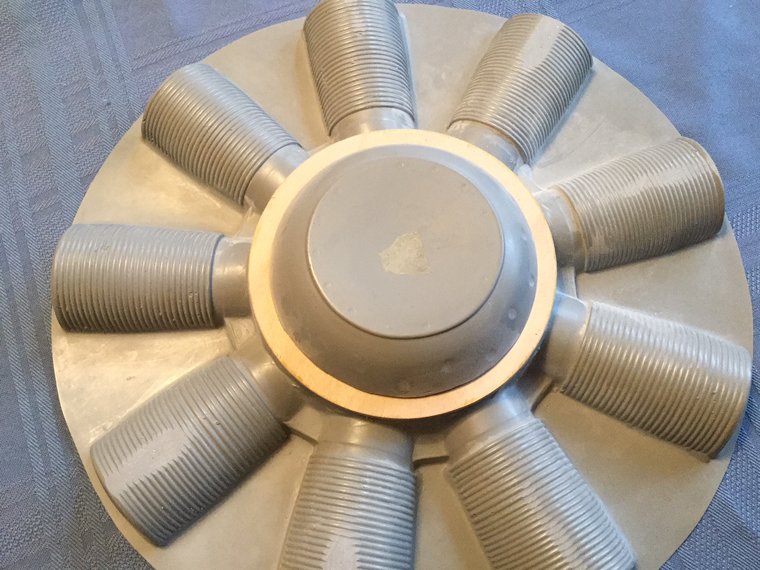
As the base for this project, I used a molded fiberglass engine available from Balsa USA. This generic 9-cylinder rotary, most closely represents a Clerget. So to duplicate the LeRhone used in the Tommy, it will require some modifying, especially for an 80hp version with its front intakes. I chose to do a Gnome 100hp Monosoupape.
The first production Tommys used the Gnome but they were usually swapped out after a while, as the LeRhone was a smoother, more reliable and easier to use. I’ve done a LeRhone or two, but never a Gnome, so it is a fun challenge.
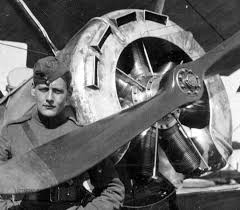
Here is the original, from the net.
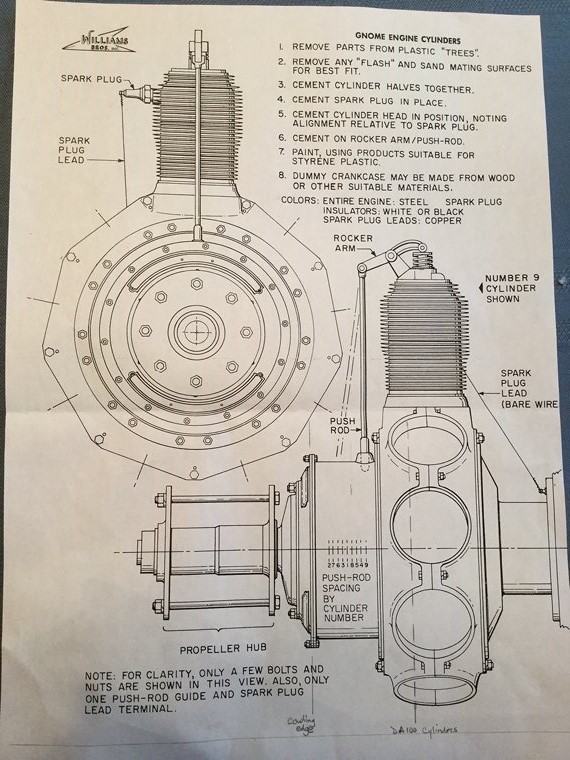
And here is the Williams Bros. drawing I am using as a reference.
So, first off was removing the forward dome of the Balsa USA moulding. I then added a bolted on flange for the cam housing.
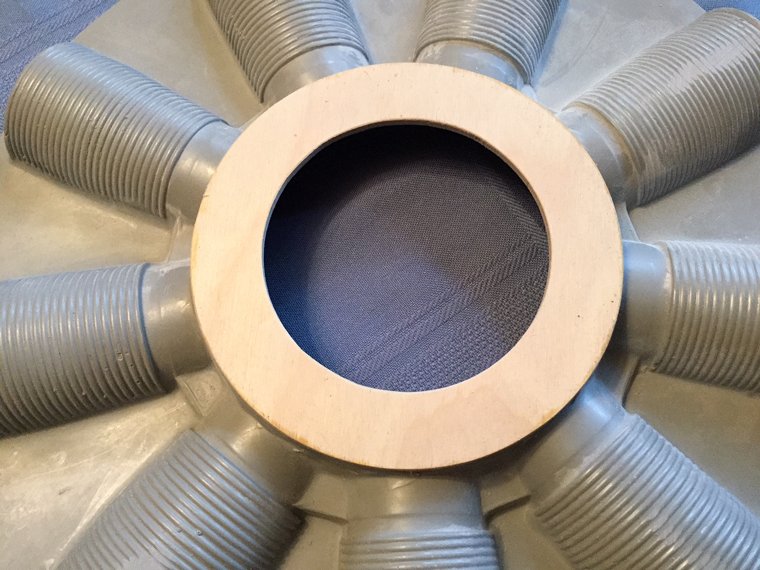
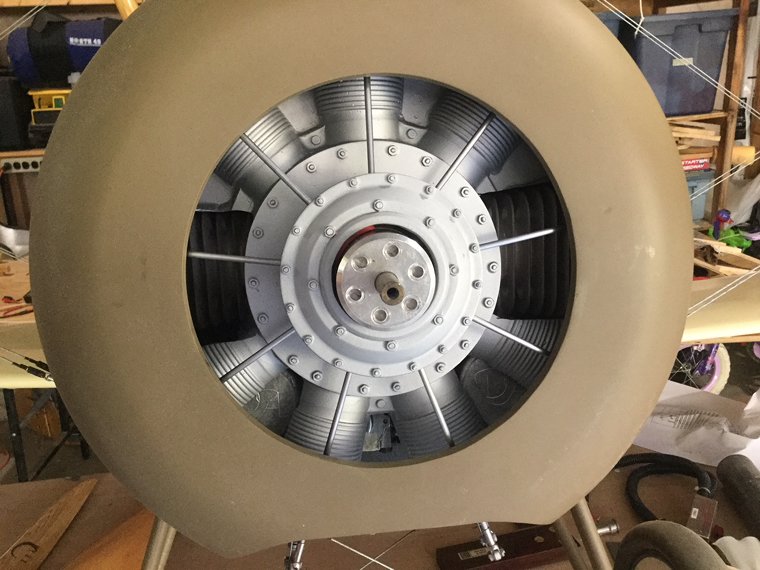
Here it is with the dome just placed on to give an idea of what the basic engine looks like from BUSA. (Note that I managed to scuff up some of the fins with an over enthusiastic application of the sander.) So here is the basic ring glued to the moulding.
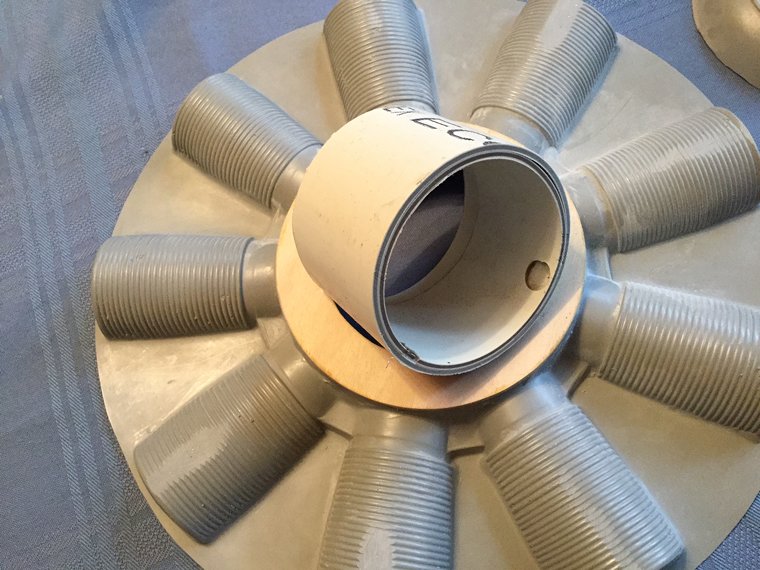
Then I cut a length of plumbing pipe and squared off the ends. This was going to be shorter than scale as the scale location is further back than my engine will allow.
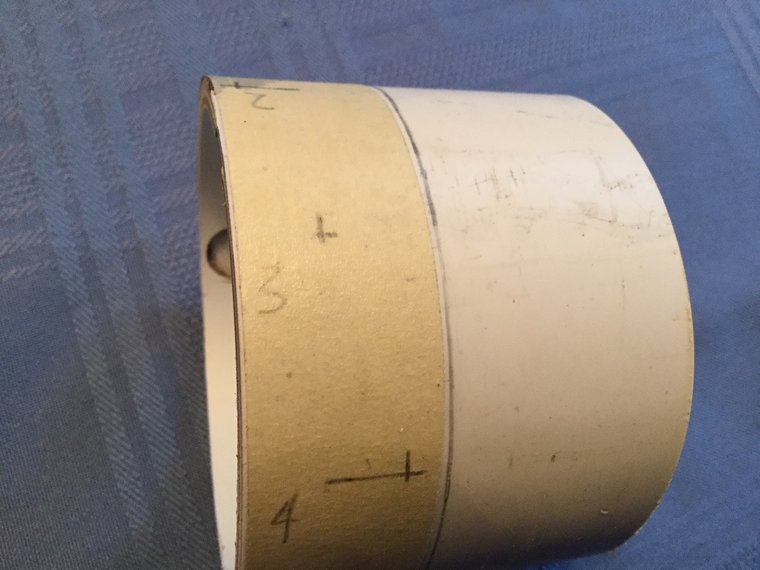
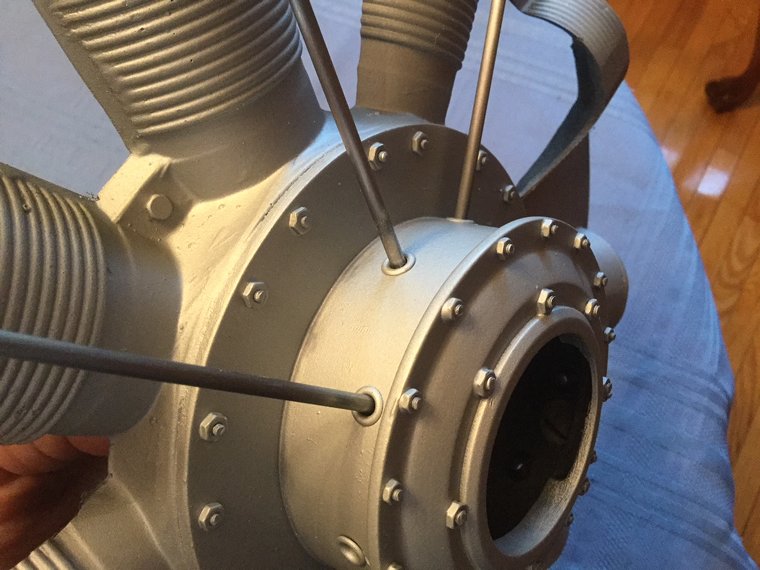
I used a strip of tape divided into 9 for the pushrod holes with fore and aft spacing from the drawing.
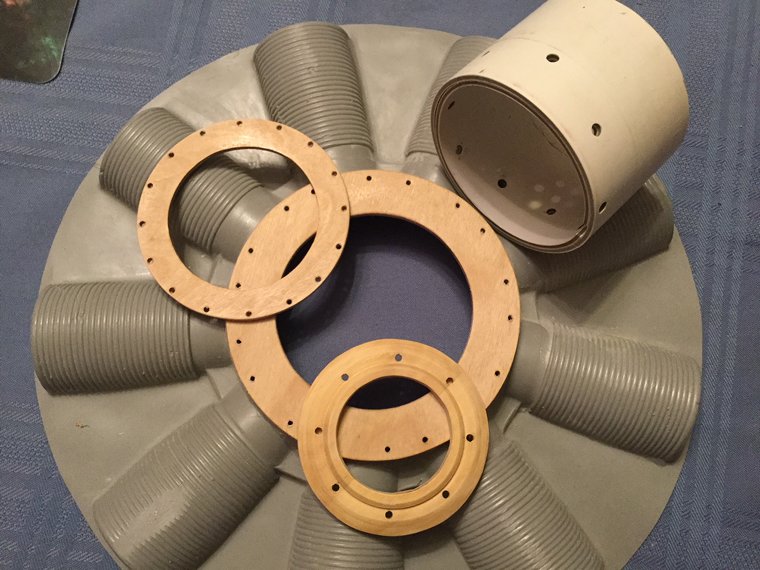
Holes are drilled for the pushrods, and other rings made from plywood and basswood. Holes are for assembly nuts and bolts, spaced according to the drawing.
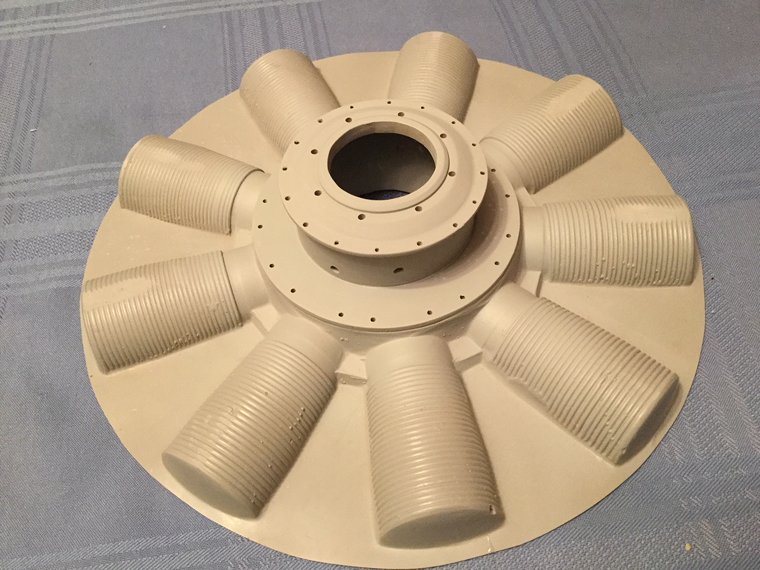
And here is the whole thing glued and primed. Next is to fit it to the cowling and start trimming cooling holes.
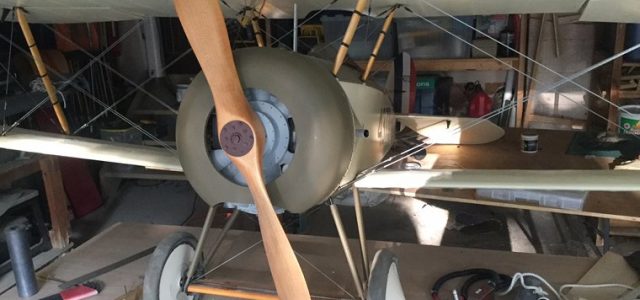
Here, 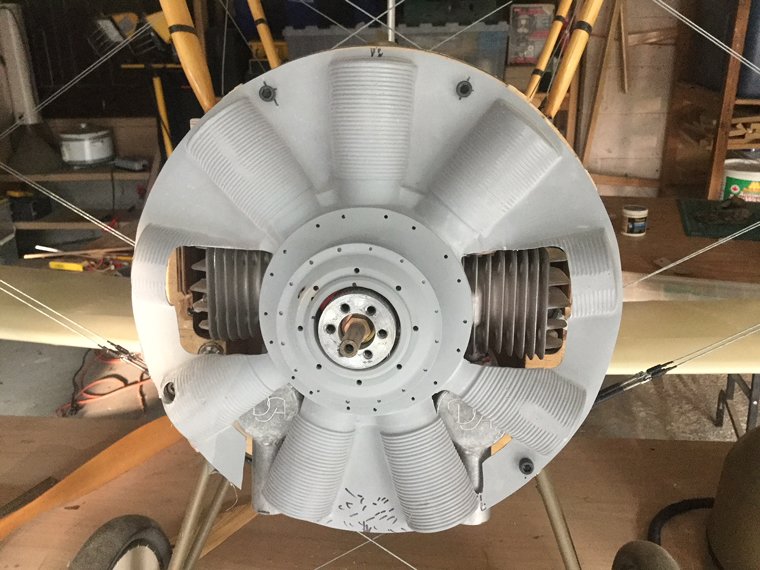 I have the Gnome engine mounted. In the past, I usually mounted the fake engine in the cowling, but it makes spacing and centering a royal pain.
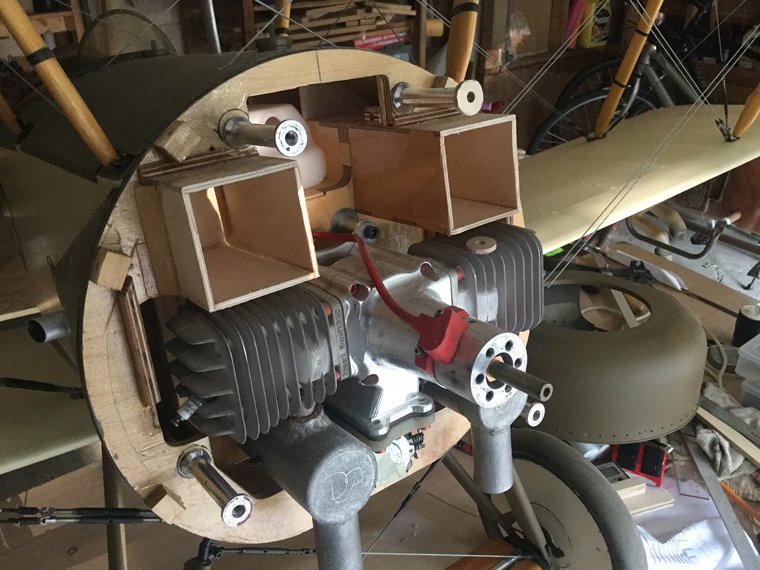
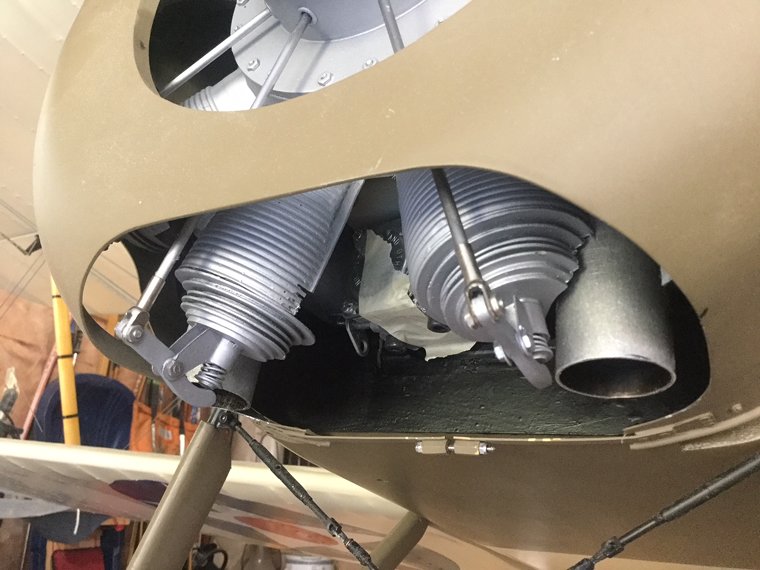
I used 4 X 3 inch stand-offs and the whole thing was (relatively) simple. I was limited in how far back I could mount it. There is a compromise between where it should be for scale, (quite far back), and how much of the fake engine I wanted to cut away. Also, the pick-up on the DA is pretty big, (why?) so any further back would need a cutout in the Gnome. The mufflers will be painted with a heat resistant flat black. The engine cylinders will remain unpainted.
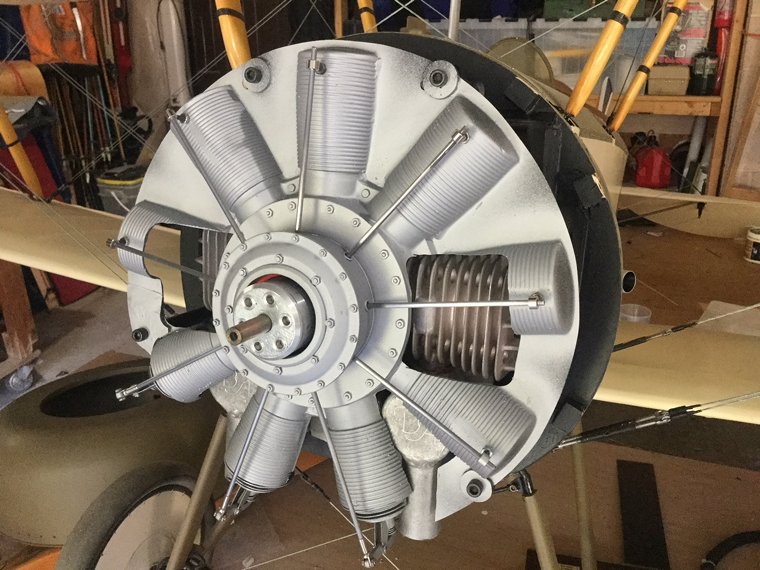
You can see how much of the engine is covered by the cowling.
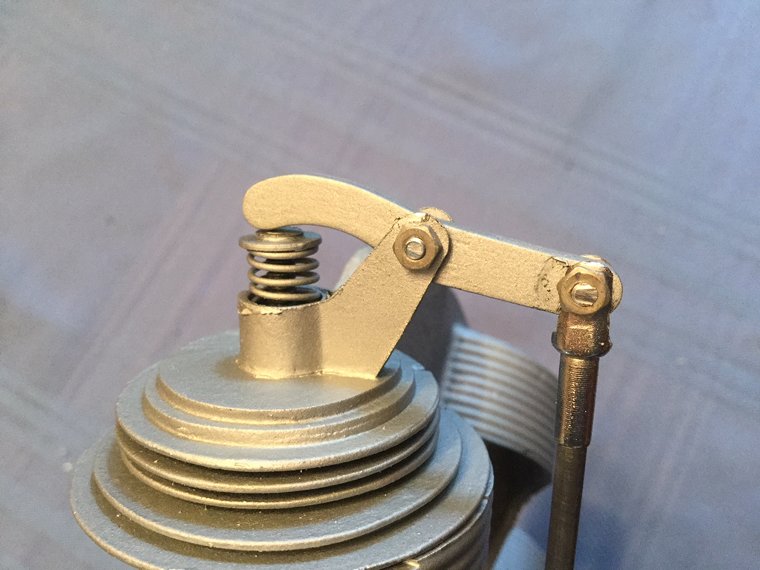
There are three cylinder heads that are visible – the two bottom ones and the third through the exhaust venting hole on the side of the cowl. I cut the tops of the 3 glass cylinders in question and added the Gnome cooling fins from 1/32″ ply and .040 basswood (for the spacers).
The rocker arms are from 1/8″ basswood with brass eyelets for spacers, mounted in the sheet aluminum mount. The spring is wound household wire with a washer on top, held in place with a 6-32 bolt holding it all together. The head on the bolt was ground down to a minimum.
The pushrod is 1/8″ spring steel with a Dubro rigging end, (much drilled and ground away).
The pushrods slide into the eyelets in the main crankcase . The various sized nuts and bolts are just epoxied in. Surprisingly, I spent about 2 hours on them! I kept looking at how I was doing it and wondering why it was taking so long. Anyway, I’m happy with the results.
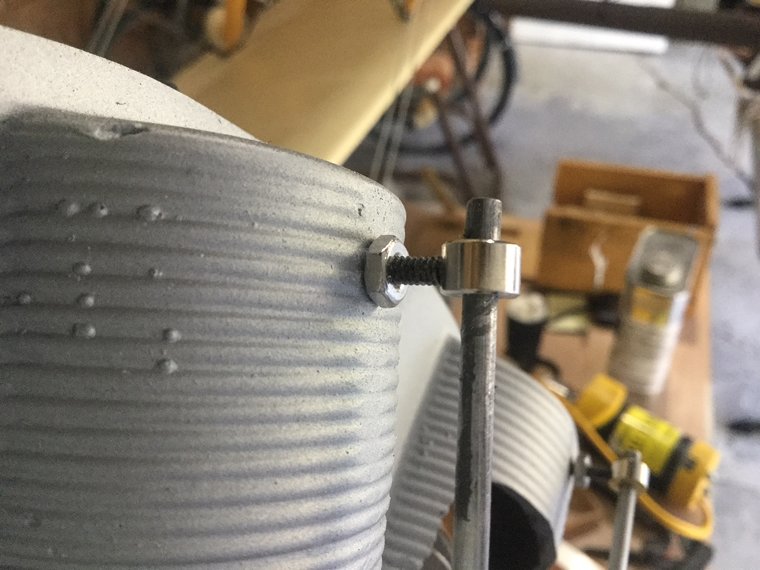
For the 6 pushrods for which I don’t need a valve system, I used a 4-40 bolt and a wheel collar to give me an adjustable end. Here it is on the plane.
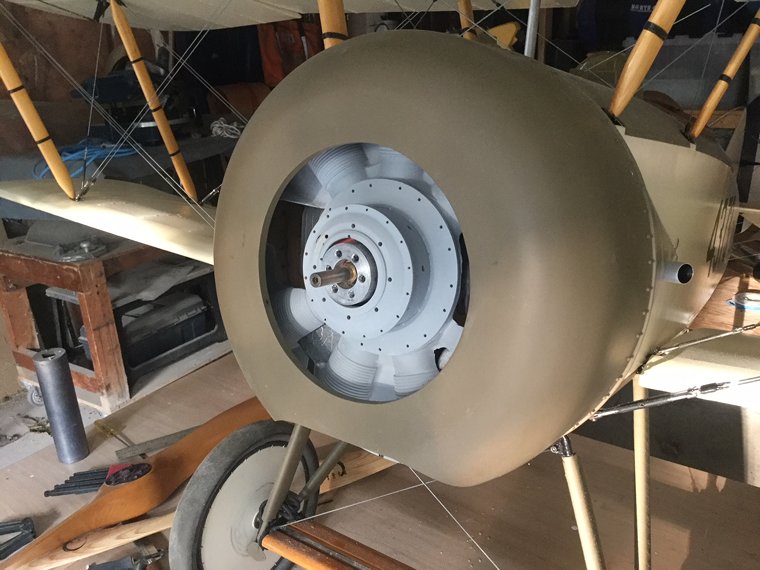
And with the cowling.
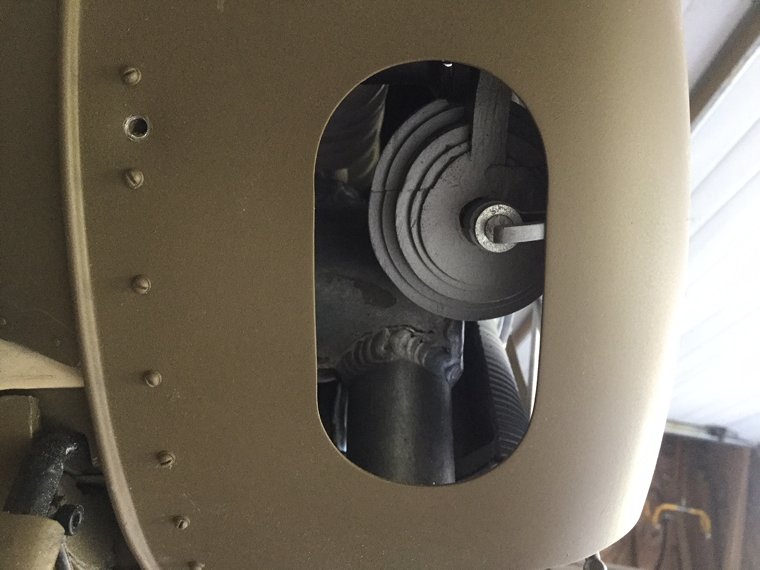
And here is the exhaust vent. The cylinder is too far forward for scale, as is the whole engine, but that is because of the model engine. Still, I’m happy to have something visible.
The seam is due to having to replace a portion of the cylinder after having cut it away for mounting, and then changing the mount and needing to do a repair.
The engine is dirtied up and aged. I started with a wash of black with the cooling fins wiped clean afterwards. Then a wash with burnt umber, and another with brown, wiping each with a paper towel to leave just a bit of muck around the nuts and bolts.Then a coat of yellow varnish to approximate oil, with the majority on the crankcase dabbed off, while the lower cylinder heads got some extra as that’s where the castor oil accumulates.
Then the baffle areas were painted flat black and the pushrods glued in wth JB Weld. I also gave all the bolts on the inside a coat of JB Weld.
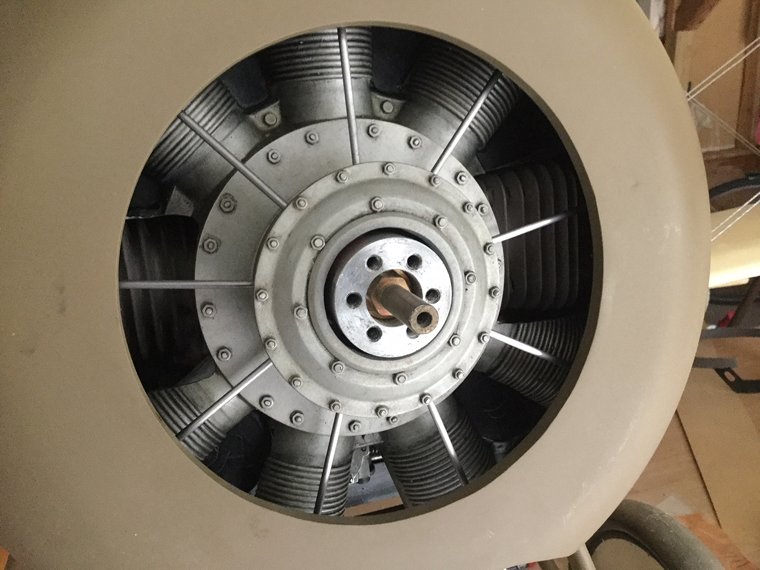
The overall effect is pretty muted, but I can add some more if needed, (easier than removing it if too much.)
Text and Photos by Martin Irvine, courtesy of RCScaleBuilder.com


