
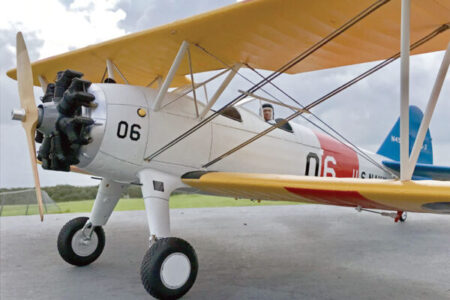
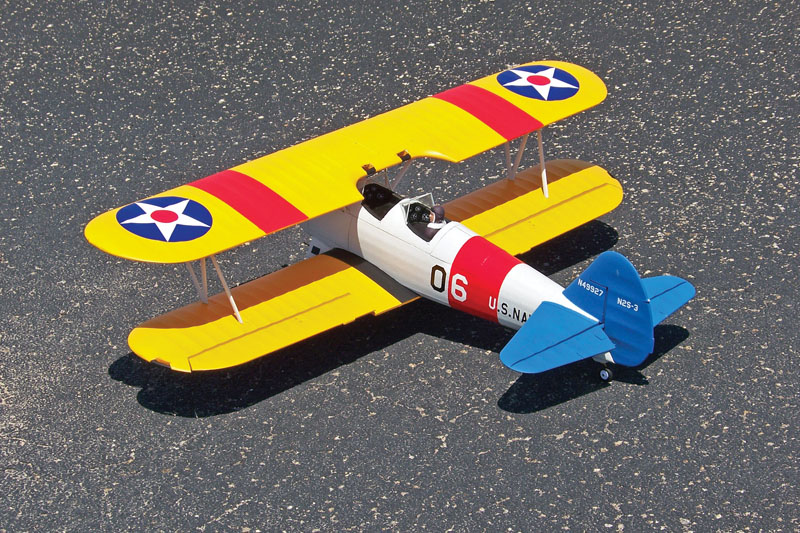
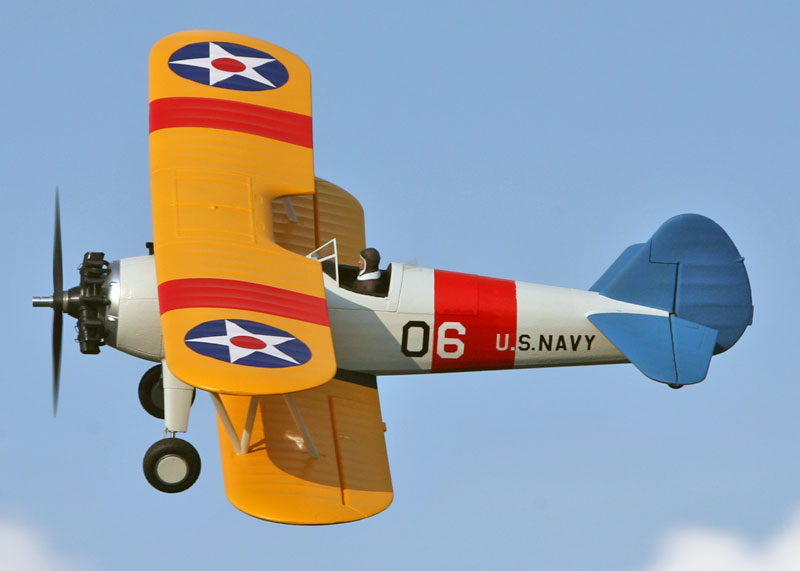
When I saw the yellow E-flite Stearman from Horizon Hobby, all I could think of was repainting it in the marking of my son Nick Jr.’s full-size Stearman. I knew that, because it was molded out of Z-Foam, this ARF remake would be fairly easy to accomplish. First off, the wings have the exact same color and markings as Nick’s Stearman, so this would save a lot of time. I would normally use an airbrush for a project like this, but to save masking and prep time, I used a brush to apply all the paint.
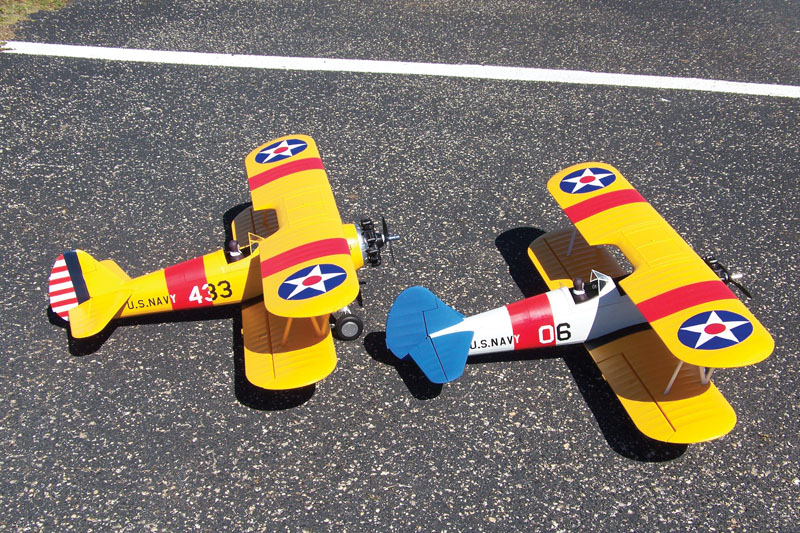
Here are some “before” and “after” photos. With a bit of work, the result is amazing.
To start, I removed the pilot bust for better access while painting the inside front of the cockpit. The pilot was held in place with two screws and glue, but after removing the screws, it easily broke free. I then prepared the windshields. The frames, like the rest of the fuselage, needed to be painted light gray. I covered the outside glass surfaces with masking tape, rubbing the tape tightly into the corners of the glass and frames with a chisel-shaped mixing stick. I then cut away the excess tape with a sharp hobby knife to expose the framework. I then sanded the outside of the frames.
PREP WORK
Before painting the fuselage, I needed to peel off the numbers and letter decals. I carefully lifted a corner of each item and peeled it off, pulling it back over itself. Much of the paint came off with the decals, but the foam wasn’t damaged. The yellow coating of paint on this model was rather heavy, so I sanded all the surfaces to be painted (except the wings) with 240-grit wet sandpaper; you could also use dry sandpaper used dry. The sandpaper was used to help smooth the areas where the decals were. I used 1-inch-wide strips of the sandpaper looped over my fingertip. I didn’t sand through the paint—just enough to dull the surface so that the new paint would have better adhesion. I didn’t use a sanding block as there were very few flat surfaces and I would have sanded away the molded-in details.
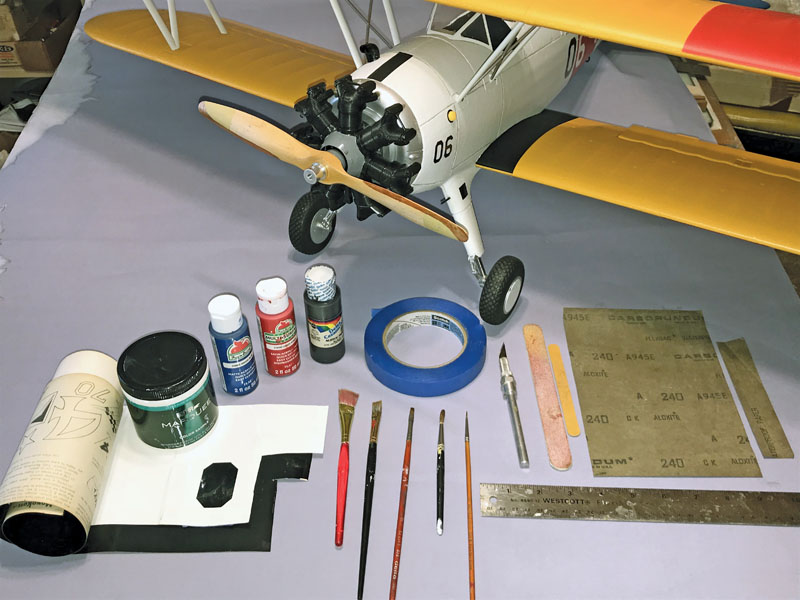
The supplies for doing this makeover are available at most home-improvement stores and craft shops.
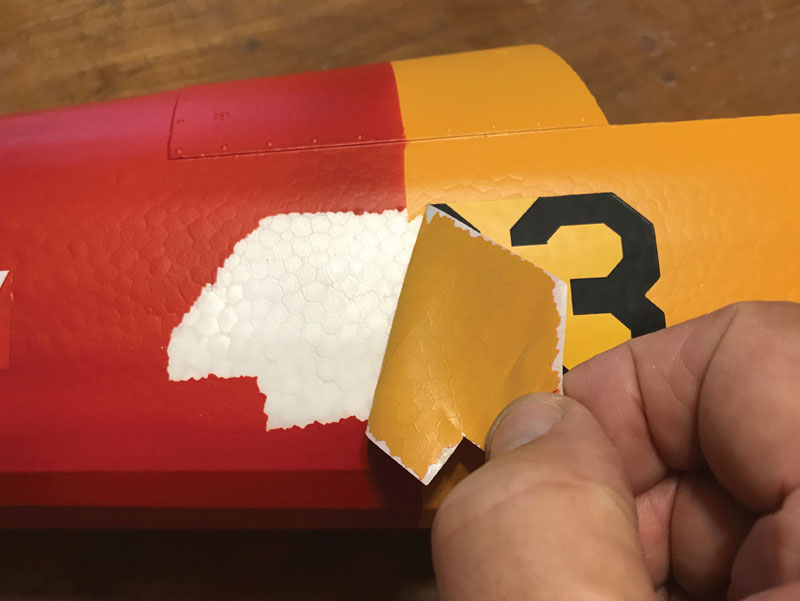
When you remove the decals, a lot of paint will also come off. Treat these areas with some primer and extra paint to fill in the foam surface.
| Tech Tip Before painting or priming a model, check any questionable paints by applying a little paint on the inside of a hatch cover to see if it will react with the surface. Also, check the paint adhesion with a piece of masking tape. |
PAINTING
Before applying the paint, I used a primer to cover over the bare foam from the decal areas. Kilz primer and Minwax Polycrylic semigloss helped cover the foam, but I had to be careful while masking. For the main scheme, I used inexpensive sample jars of Behr Ultra Satin water-based enamel; these are available in most home-care stores. I used the Misty Coast color, which was a good match for the full-size Stearman; it adhered pretty well to the yellow paint. I used a 5/8-inch-wide flat artist brush and applied the paint to the areas where the decals were to help fill in the surface. I let this area dry and then sanded lightly to blend it in before applying the rest of the paint to the fuselage. I made sure the paint was completely dry before sanding. I used smaller brushes while painting the struts, windshield frames, and other small areas.
Once the base coat of paint had dried, I needed to mask off the edges of the red band. I cut some 1/4-inch-wide strips of masking tape and rubbed the adhesive side with my fingers to detack it a little and then applied the tape. This helped prevent the tape from lifting the new paint. Don’t rub the tape down too hard. While painting the band area, I applied a number of coats along the tape edge, using a rather dry brush, so that the paint did not run under the tape. (This is good practice to follow any time you paint along masked edges.) I next masked off the fin and rudder blue in the same way. For the tail, I used artist Matte Acrylic Award Blue paint; these paints are inexpensive and come in 2-ounce bottles. The blue was a little too dark, so I added a little bit of white to lighten it up. The horizontal stabilizer and elevators were painted with the same color.
If any paint gets in the alignment hole for the bottom wing, the attachment pin may not fit. So I let the paint dry and then used a no. 6 drill bit to clean out the paint. With the wing in place, I masked off the bottom of the wing and painted the belly area to match the fuselage. As before, I used narrow strips of detacked tape.
I painted the cabane struts and the interplane N struts in the same way. To paint the diagonal braces between the cabane struts, I masked off the cabane struts and sprayed on chrome silver before brushing the gray paint on the struts. The bottom mounting tabs for the N struts were a little long and needed to be trimmed to fit into the wing sockets. I made sure not to force them into the plastic sockets because they might have broken off from the wing. The struts were secured once they were attached and fastened to the top wing, and the N struts were secured to the top wing by four slide-in wire rods. I found that tapering the ends of the rods made it easier to align them in the holes in the struts.

Mask off and paint the bottom center of the lower wing to match the fuselage.
| Tech Tip Don’t use more paint on the model than necessary. Paint adds weight to the aft end and will require the addition of nose weight to rebalance the model. |
NEW MARKINGS
I cut my new markings from some black-and-white MonoKote trim sheets I had on hand. To make the new numbers and letters roughly the same size as those on the stock model, I stacked and taped a piece of white and black trim sheet together. I then used the stock number “3” (from the old decals) as a pattern since I could easily make the “0” and the “6” from the basic shape of the “3.” I used a sharp model knife to cut out the numbers, using a straightedge to guide me. The U.S. Navy markings were done the same way.
To place the new markings, I used the top of the fuselage hatch edge as an alignment guide. For reference, the large numbers were 3/8 inch below this edge, and the U.S. Navy letters were 7/8 inch below it. I applied the new markings using the wet technique, applying glass cleaner to the surface and then sliding the markings around to the correct place. When satisfied, I pat and squeegeed the letters down, and let it dry in the sun for a couple of hours so that they were bonded tight.
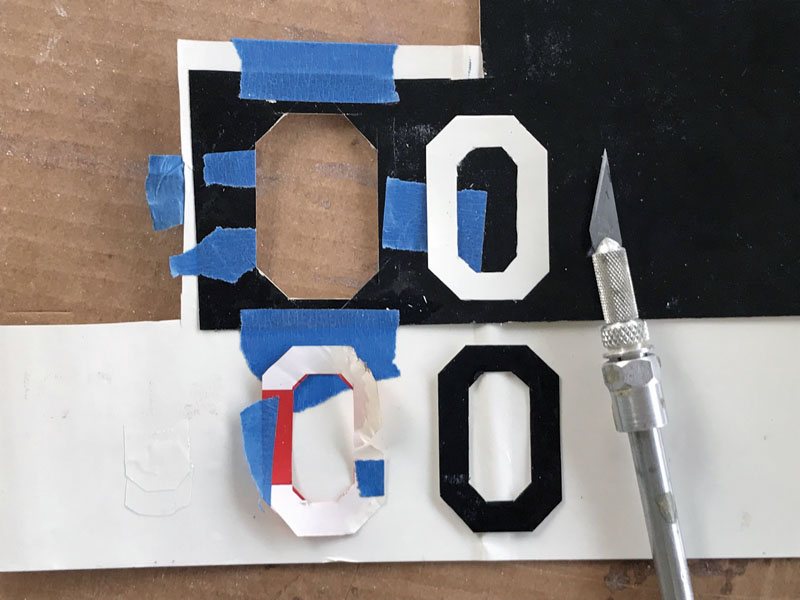
After painting the fuselage, set it aside and start cutting out your new markings. Here, I am using the stock no. 3 decal as a guide to form the new numbers.
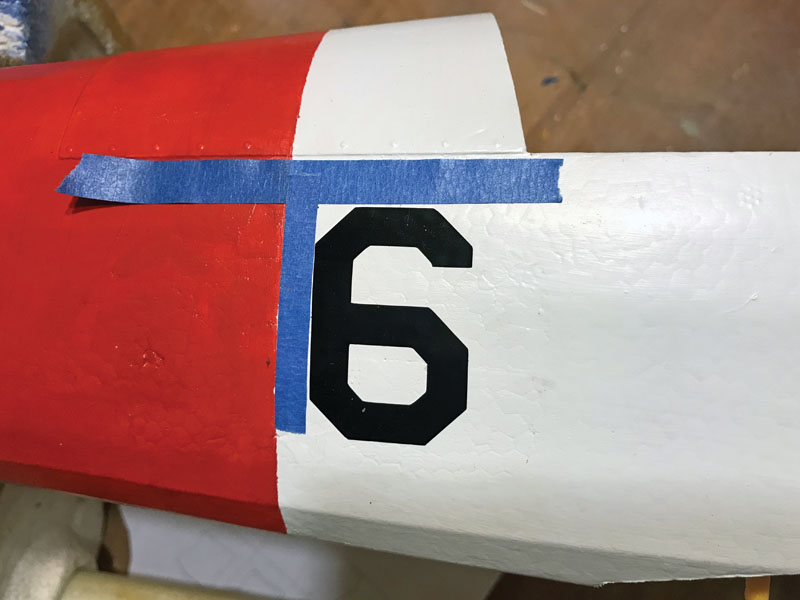
I used the flat edge of the battery compartment as an alignment guide and then used strips of tape to help position the new markings.
ADDED DETAILING
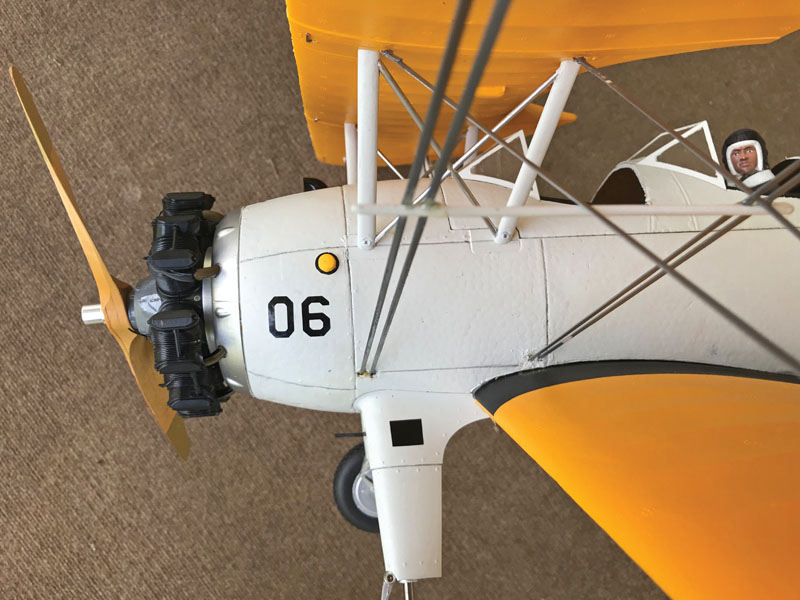
I cut out the section hand holds at the wingtips and center section. A sharp knife blade was required. The 5/8-inch-long rear fuselage hand holds were formed from 1/16-inch-diameter aluminum tubing and glued into holes in the fuselage. This was also done for the footsteps that project from the front of the upper landing-gear fairings. I painted the engine crankcase gray and the exhaust stacks a rusty brown color. The fueling foot pad on top of the nose was simulated with a 1/2-inch-wide strip of black trim sheet sanded to dull the finish. There is a small black spec plate on the left landing gear fairing that was made out of a piece of trim sheet. The oil-fill cap in the upper rear corner of the left nose side panel was made out of a 1/2-inch-diameter disc of black trim sheet and a piece of 3/8-inch dowel painted yellow and glued in place. I made the static scale propeller from an old Zinger 11x7W propeller. The outer tip was painted a dark tan color, and the leading edge was painted brass. I did not add any weathering to the model, as Nick’s full-size Stearman looks factory fresh!
Being neat while you do the masking, add small details, and paint the cockpit coaming contributes much to the look of the plane. Taking your time makes a big difference. For the small tail-number markings, I had a friend cut them out for me using his desktop vinyl cutter.
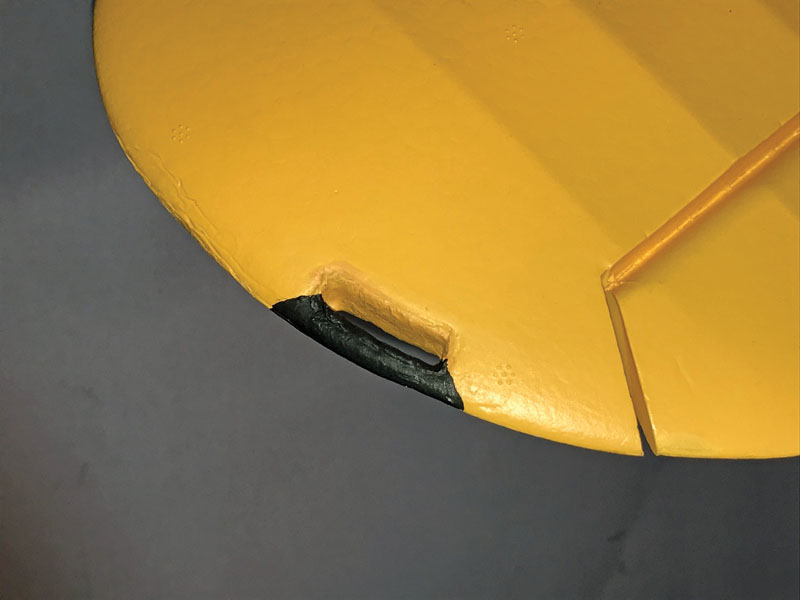
Small details, like the wing hand holds, can be cut out and painted to improve the model’s scale looks.
WIND RIGGING
I decided that the Stearman would look better with flying and landing wires. I replicated these using semiflat plastic Creatology lacing material from the local craft store. If you are lucky, you can find the material in chrome, silver, and gray.
I used white lacing and then painted it with Krylon gloss smoke gray paint. Before painting, I formed a loop in one end of an 18-inch length of the lacing for the wing clips. The lacing material is flat on one side and slightly oval on the other. For better glue adhesion, I sanded the flat surface using 220-grit sandpaper. I folded the sanded end over a length of paper-clip wire, applied some Zap medium CA, held it together using small-nose pliers, and then
applied some Zip Kicker. I made sure the wire clip was free to move, then coated the entire overlapped section with CA and removed the wire; I didn’t let the glue fill the wire hole. I then pinned the wing rigging between two wood blocks to paint.
Make the wire clips from a paper-clip and bent to shape as shown. My clips formed easily and are plenty strong for securing the rigging in place. Make two clips wide enough to fit two rigging lines. Assemble the clips to the rigging line loops and drill 1/16-inch holes in the bottom of the top wing at the cabane struts and the N struts. These should be located about 1/8-inch outboard of the cabane struts and centered on the front struts. The rear should be drilled after all the other rigging is in place. Check the photos to see where the rigging lines are attached.
The double flying-wire lines were epoxied into 1/8-inch holes formed into the sides of the fuselage. I made these by pushing a small screwdriver 3/4 inch into the foam. (You need to remove the bottom wing for this. The holes are located at the bottom corners of the outlined panel on the sides of the fuselage.) With the top wing and rigging wires hooked into place, I pushed the inboard ends into the holes. I did one set at a time, wiping off the excess epoxy. My goal was to have the rigging be about 1/2 inch short. When the epoxy had cured, I stretched the rear flying wires and connected them to the holes at the rear N strut. I attached the bottom wing and connected the double landing-wire lines to the lower N-strut holes. I repeated the process until all the wires were in place.
You might want to consider adding 3/32-inch-diameter tie bars at the rigging crossovers. To do this, use a dowel or a rounded length of hard balsa.
All the wing-rigging wires are now in place. I also added the wire-spreader rod at the crossover section for an added bit of detail.
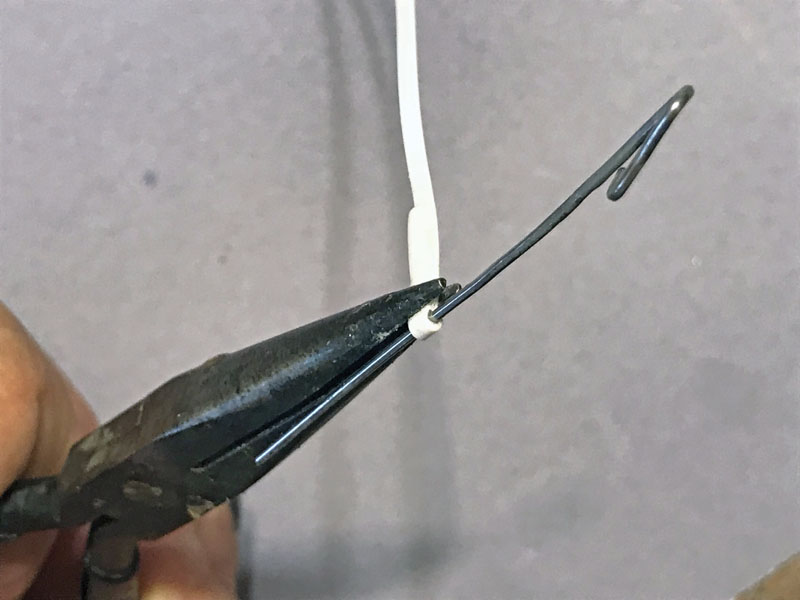
You can add scale wing rigging to the model with plastic lacing material. Here, I am gluing the end loop using a paper clip in the loop and holding the material together while the Zap glue dries.
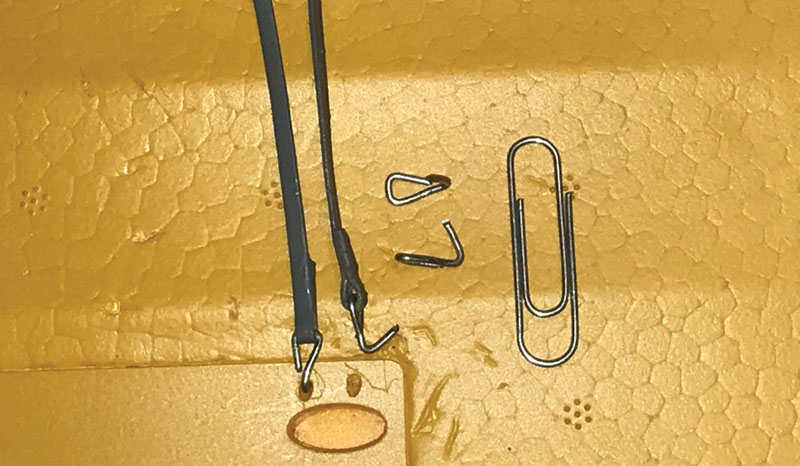
I bent the wire attachment clips to shape from a paper clip, and drilled holes in the plastic plates around the
strut sockets.
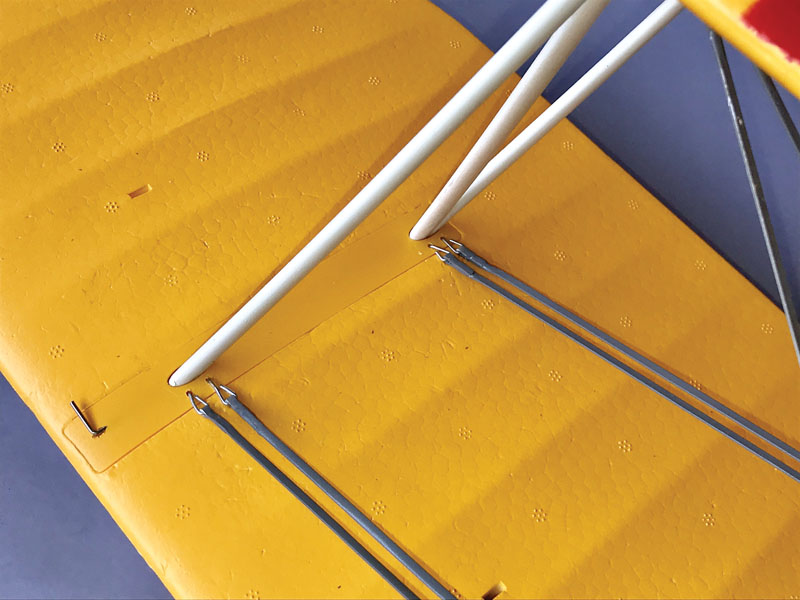
Here, you see the double flying wires attached at the N-strut location.
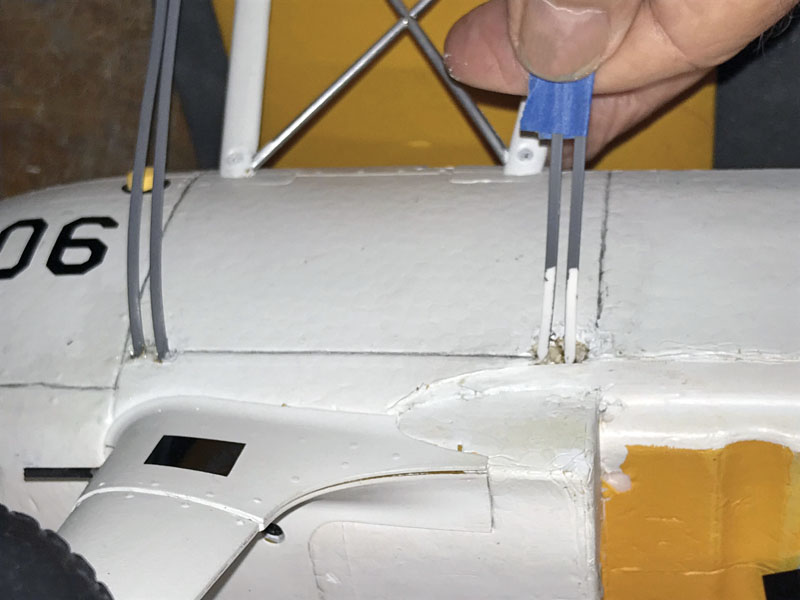
Here, I am epoxying the ends of the flying wires into the holes in the fuselage.
BOTTOM LINE
All this was a bit of work, but the added details really made a big difference. If you take your time and use these techniques, you can reproduce a scale version of your own favorite Stearman biplane
|
With the makeover painting complete, I rebalanced the model. It flew great, but it is still a little plain Jane. The King of the Limo Planes |
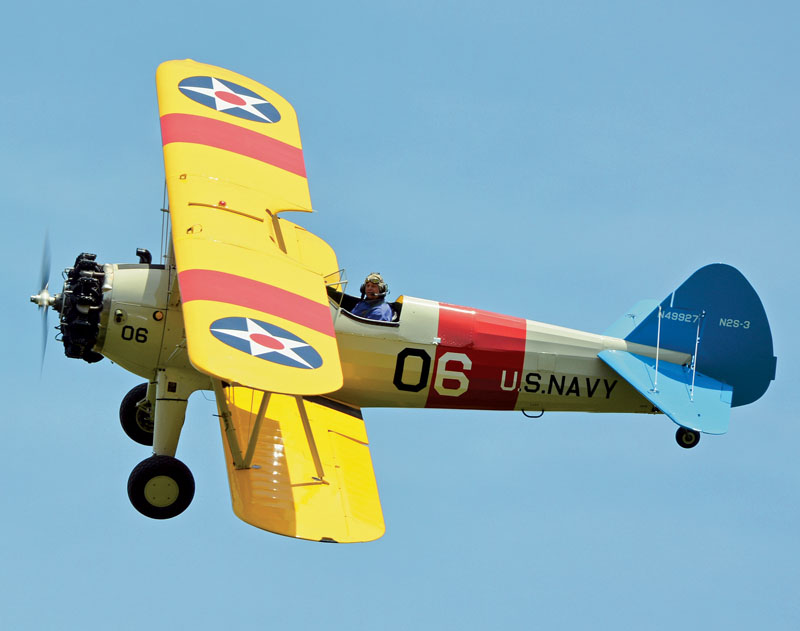 Nick’s Full-Size Ride The Stearman PT-17/N2S has always been one of my favorite biplanes. The primary trainer has a long history, going back to 1935. The U.S. Army ordered its first 26 Model 75 Stearmans in 1936, and the rest is history. I have designed and built three different RC versions, including a 51-inch-span model published in Flying Models in 1973; the second and third plan versions were 77- and 87-inch spans, respectively. Span models are available from son’s company, Nick Ziroli Plans (ziroligiantscaleplans.com).My son owns and flies a beautifully restored 1942 Navy N2S-3 Stearman, which was the winner for Best WW II Trainer in Oshkosh. The best part for me is that, when I visit his family on Long Island, I always get some stick time in his Stearman. It is a joy to fly and great fun. |
Text & photos by Nick Ziroli Sr.


The Master! Enough said.
It has always been one of my favorite bipes and in fact, I have a Chuck Gill short kit of Mr. Z’s 77″ version in my basement right now. One day maybe.
I have followed your modeling career since our days of the model airplane club at Roger Ludlowe HS and working at Blinn’s atore. I’m 88 and was in the class after you at RLHS. After my 22 months in Korea as a flying Chinese linguist on the eariest comm-int (spy) flights with USAFINTE-’55 – -57 and a year with NSA, I used my GI bill and went to college. I later taught at RLHS from 1963-1968 where I brought the rebirth of the model plane club with 1/2 CL stuff. We have met at vaious meets over the last 50 years and I built some of your designs – though not the giant scale. After finishing my Ph.D I spent Im 88 and am retired
after teaching Chinese and Asian history at university. I thank you and your son for yourcontributions to modeling and to Jr. for helping to preserve the real aircraft of yesteryear. Th PT-17 will always be held as a classic design and its role in training pilots for WWII.
I stsrted a flying Aces type group at the Faifield Senior Centerin 2006 and it continue flying indoor micro electrics. This will be myseconf year o9f missing the Neat fly since the years in Penn. Health prevents mefrom attending meets and flying langer planes outdoors. Can’t walk ANY distance.
Keep em flying
Rick DeAngelis