
When it comes to flying RC airplanes, the chances are that your beautiful molded ARF is going to suffer some damage. There’s no reason, however, to trash your crash. With a little time and effort, you can get back into the air, and you also can save some bucks by repairing your bent bird instead of buying new parts or an entirely new airplane.
What’s Needed
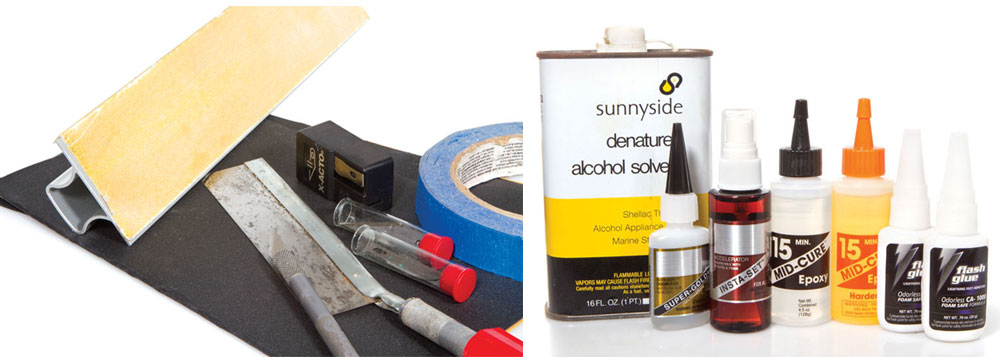
The supplies needed for any model repair are a hobby knife with sharp replacement blades, some masking tape, a sanding bar with medium sandpaper (100 to 150 grit), and some fine 220-grit sandpaper. The glue needed is 15-minute two-part epoxy, foam-safe CA adhesive, and foam-safe accelerator. Denatured alcohol is good for cleaning the surface of the foam and for cleaning up excess epoxy from repairs. We used an assortment of glue, including those by Bob Smith Industries and Flash Adhesives.
Removing Dents
Step 1: The leading edge of a foam wing can really take a beating, but dents are really only cosmetic issues. If you have a minor dent, simply apply a wet paper towel to it and heat with a covering iron. Most of the time, the steam will expand the foam and your dent will disappear.
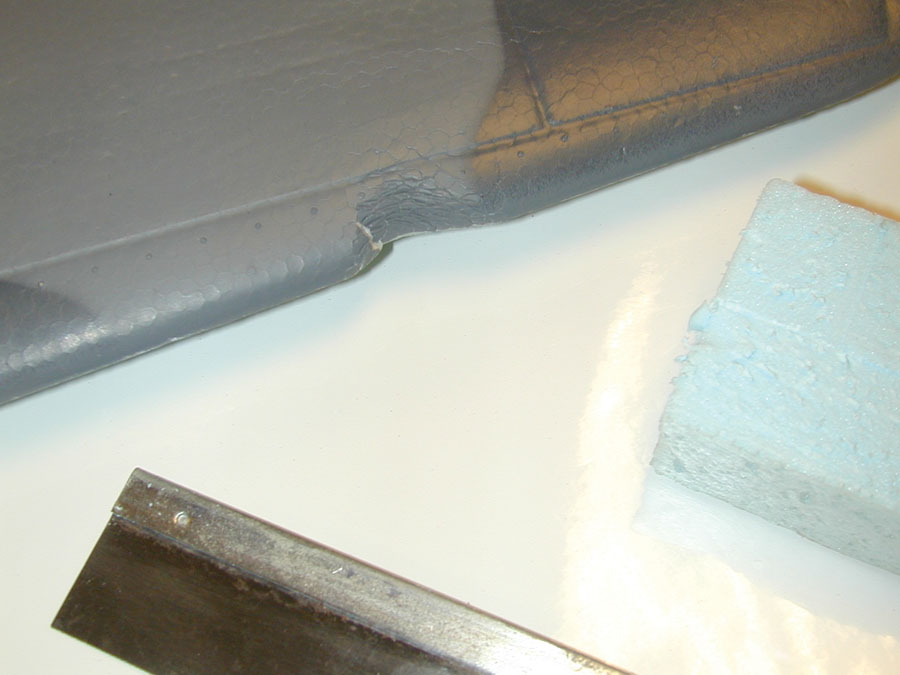
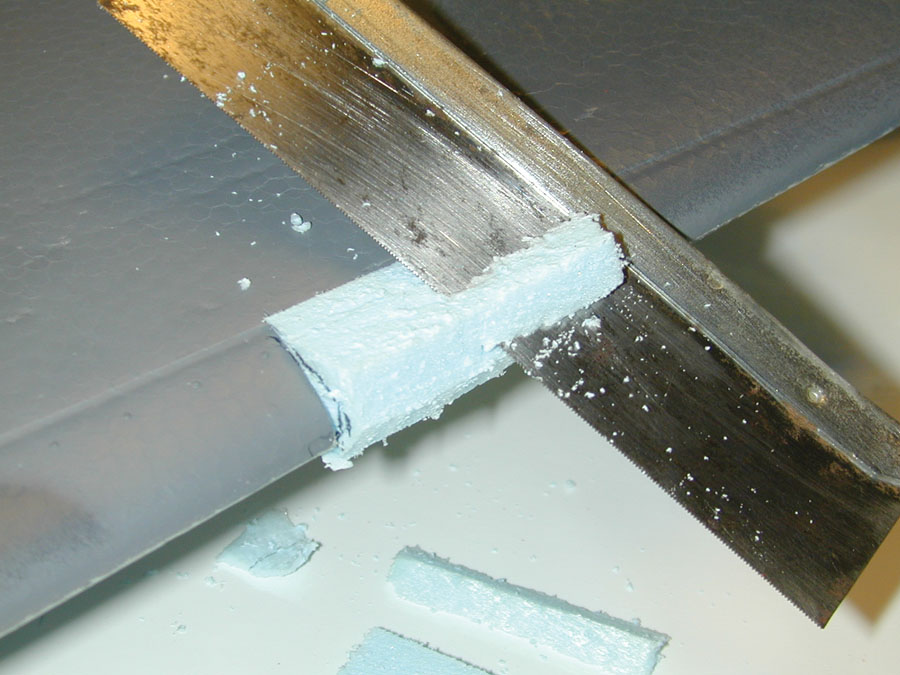
Step 2: If the dent is more pronounced, you can quickly cut away a section of the damaged material with a razor saw and glue in some new foam.
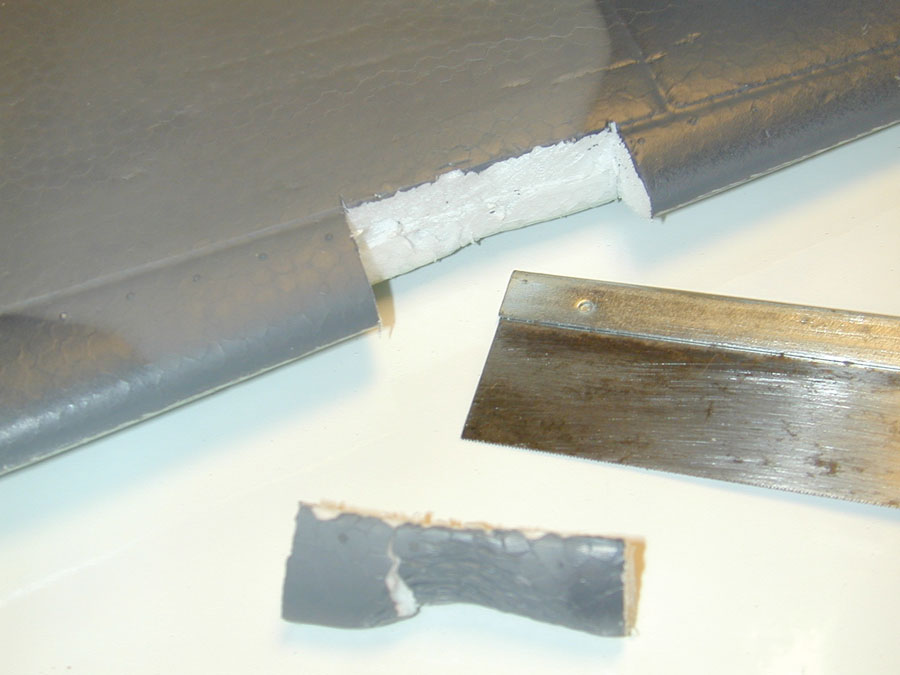
Step 3: Cut some new foam to length, and glue it in place with foam-safe CA. The best way to do this is to cut the foam a bit oversize, and spray foam-safe accelerator to the new material. Apply the CA glue to the cutout area, and insert the repair piece. Hold it in place until the glue sets. Use your saw to remove most of the unwanted material, then use a sanding block to smooth the replacement piece.
Step 4: Apply a little hobby filler around the edges to fill in any gaps (Hobbico HobbyLite Filler is great for this).
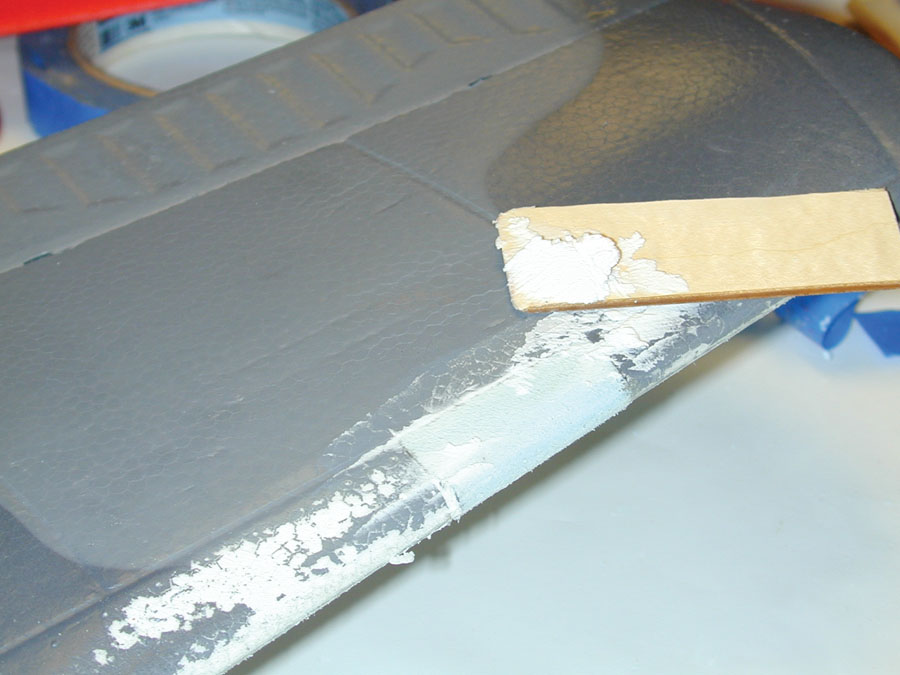
Step 5: Once the filler has dried, use fine sandpaper to smooth the repair. If you need to, apply more filler around the repair area to feather out the repair area.

Step 6: Apply some matching foam-safe paint to complete the leading-edge wing repair. The hardest part of this repair really is finding matching paint. Usually, the instructions that come with your airplane will call out the colors used. If not, go to the hobby shop and check out the Master Modeler and Tamiya brands of acrylic foam-safe paints. You’ll be able to match the color chips and then lighten or darken the colors slightly to match. In real life, warbird repairs seldom matched the rest of the airframe, so welcome to scale weathering!
Mending Broken Wings
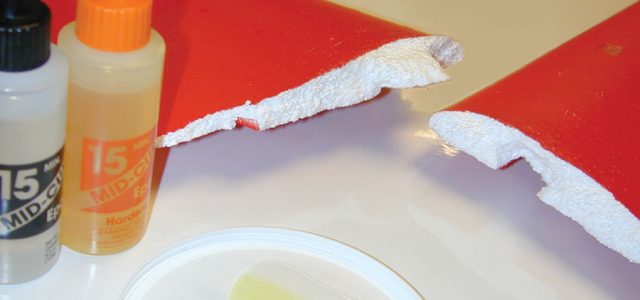
Step 1: In extreme cases, you might break a foam wing in two (or more!) pieces. A great trait of foam is that it is usually very easy to piece back together. Mix up a small batch of 15-minute epoxy on a plastic can lid. Run two or three lengths of each part as shown and then mix together.

Step 2: Place some waxed paper or food wrap under the wing pieces and then apply just enough mixed epoxy to cover the exposed ends of the break. Use some masking tape to hold the parts together while they rest flat against your work surface. Be sure to wipe away any excess epoxy that oozes from the repair using a paper towel and some
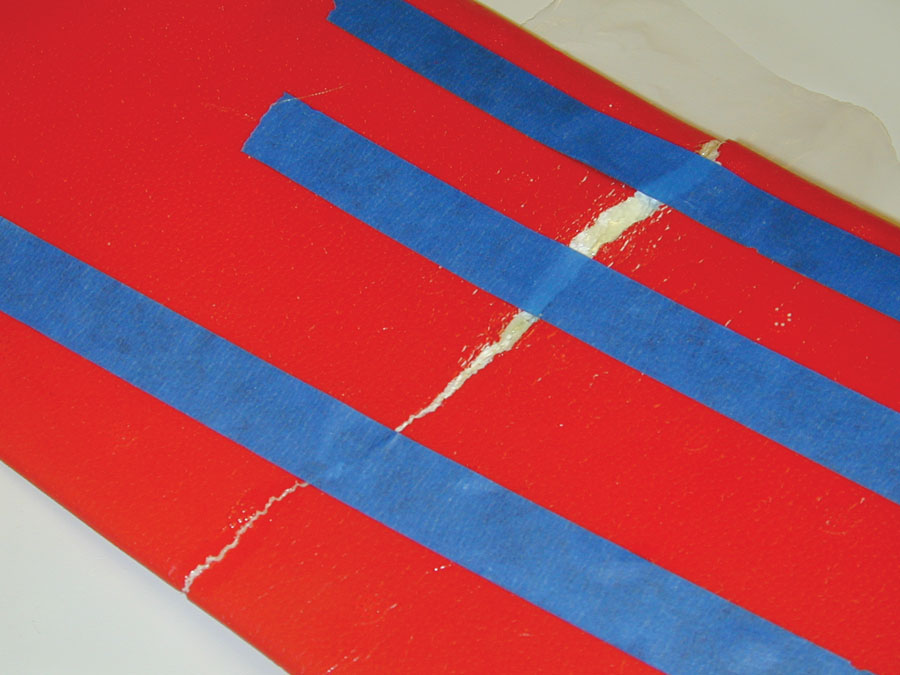
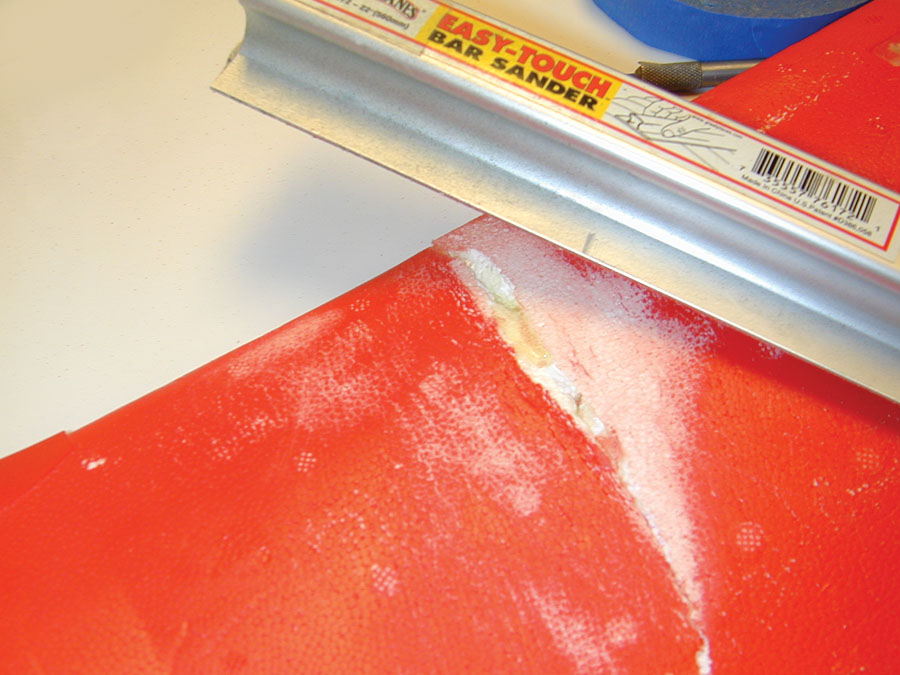
Step 3: After the epoxy has set, remove the tape. Using a sanding bar, smooth out the repair area.
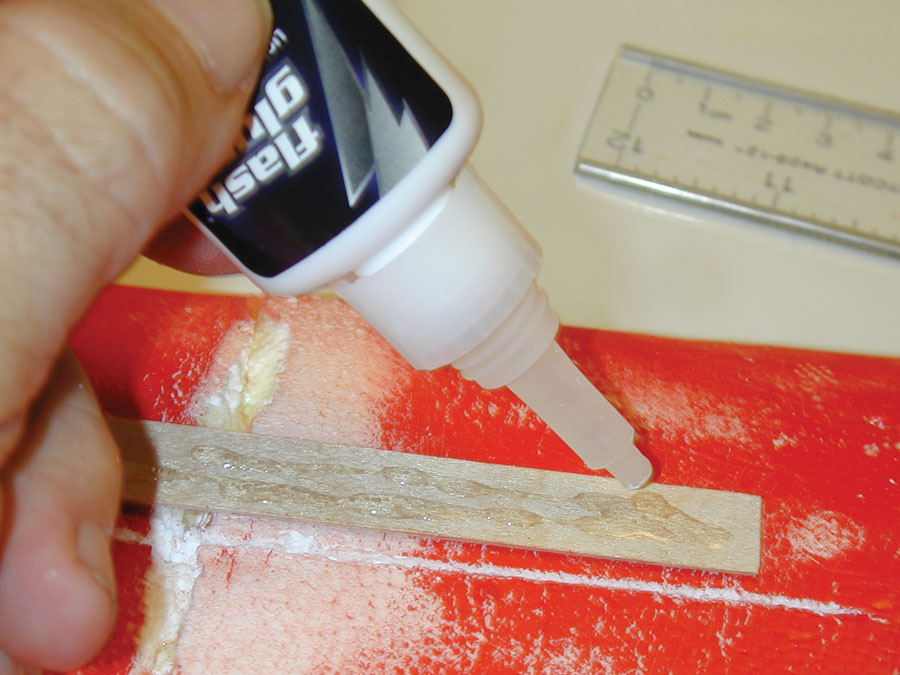
Step 4: If your wing is more than 36 inches in span, use a piece of thin plywood that is 4 to 6 inches long and 1/2 inch wide as an internal brace. Using a hobby knife and a razor saw, cut a straight line all the way through the wing, as shown. Test-fit the plywood, then apply foam-safe CA and insert it into the wing. Apply some accelerator, and let the glue set.
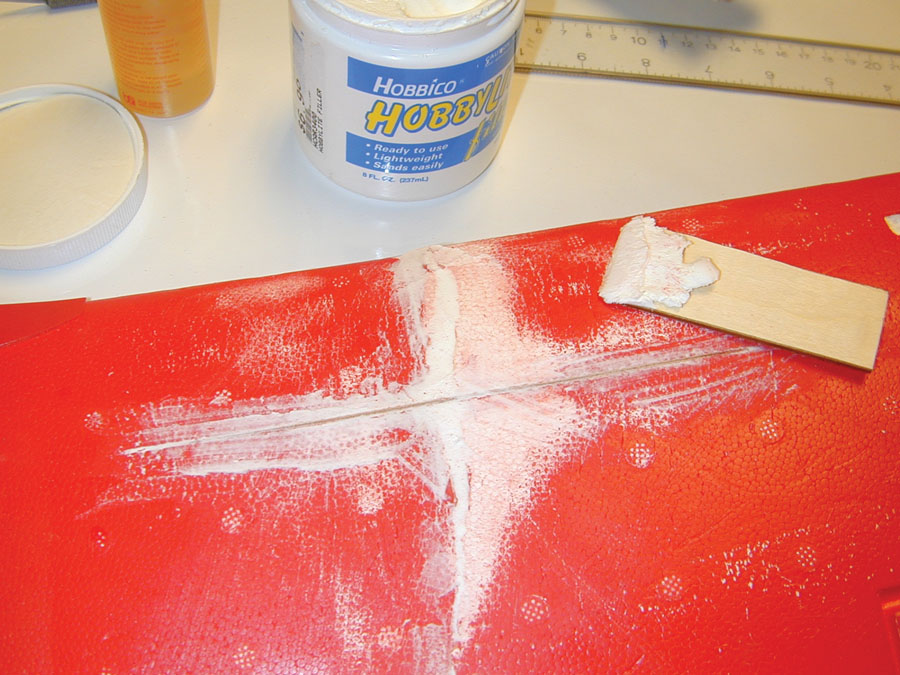
Step 5: After the glue sets, apply model filler to the repair and let the filler dry.
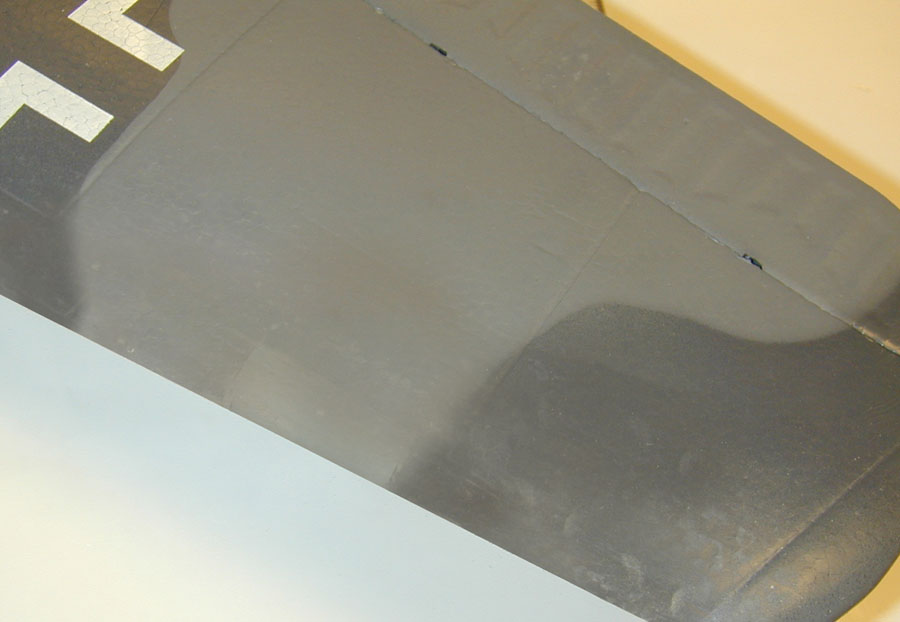
Step 6: Using fine sandpaper, sand the filler smooth and flush with the rest of the wing surface.
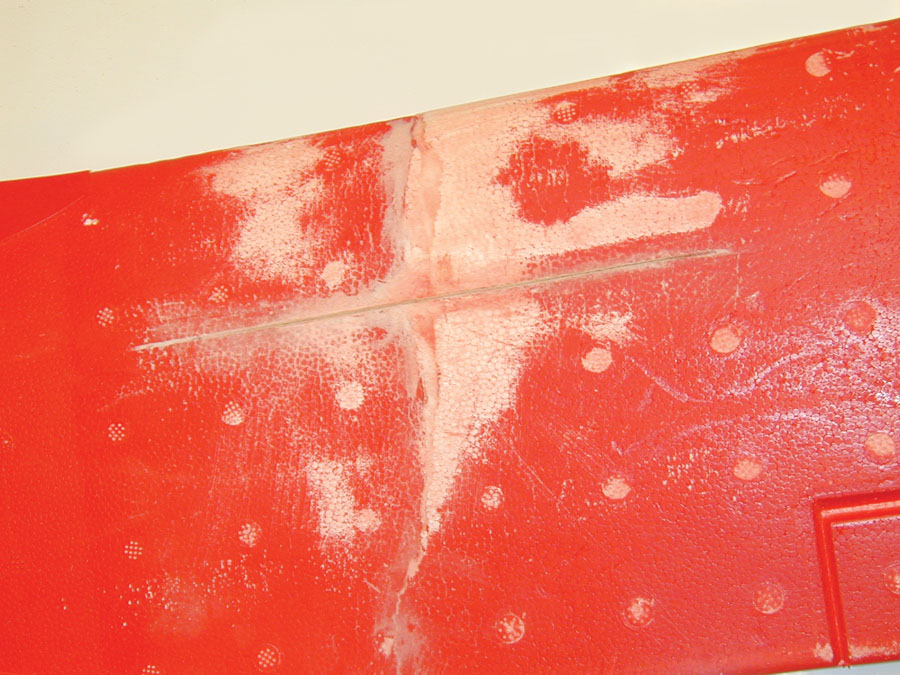
Step 7: Apply matching foam-safe paint, and let it dry. The repair is complete, but you can also apply some decals over the repair area, if you like, to completely cover the mended area.

Repairing Foam Hinges
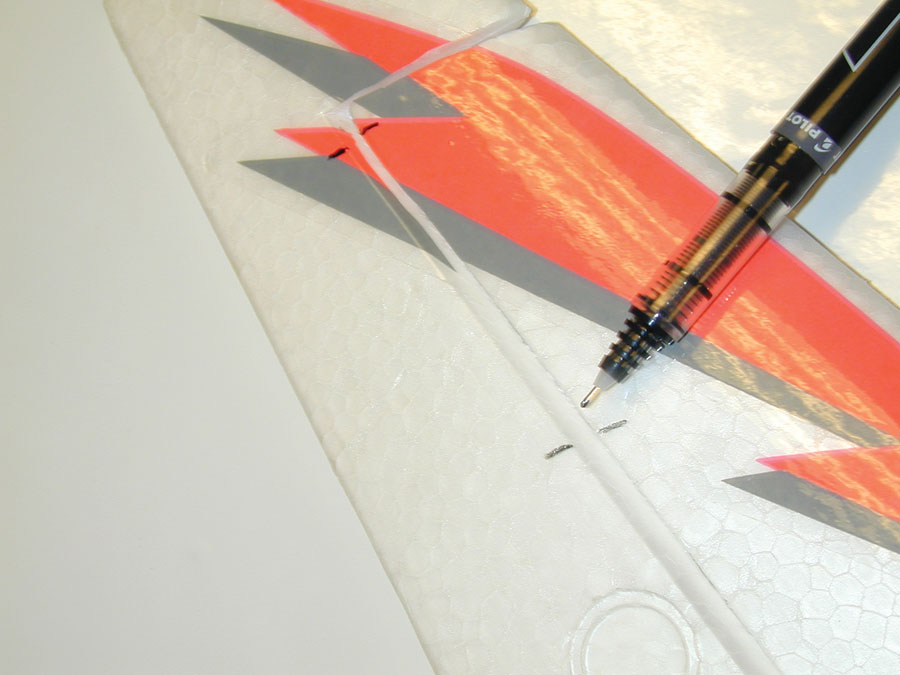
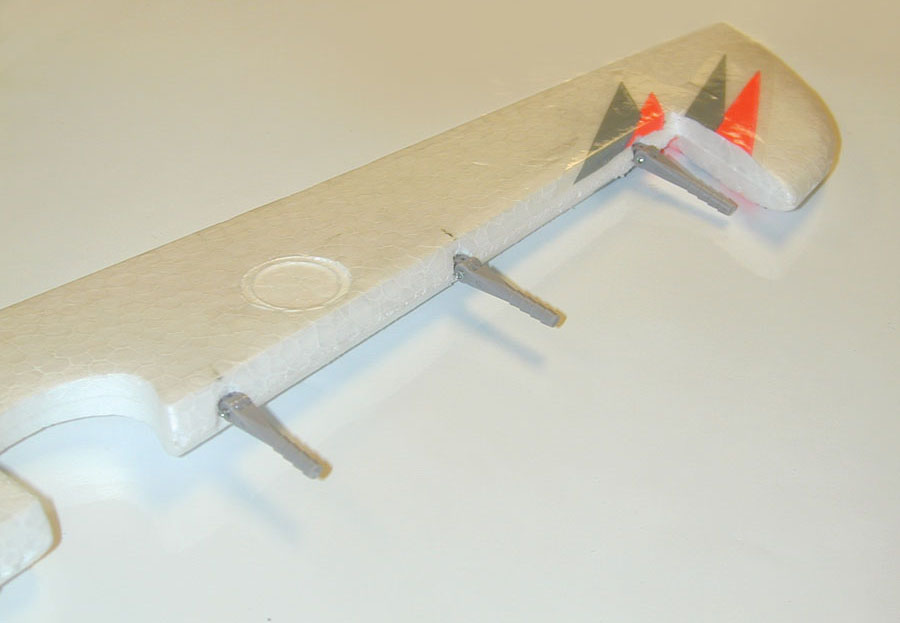
Step 1: It is not possible to repair a live-foam hinge, where the hinge is molded in as part of the control surface. It is best to install new hinges in the damaged surfaces. Before removing the surface, mark the locations for the new hinges. For this rudder, three 1/8-inch Robart Hinge Points will be installed.
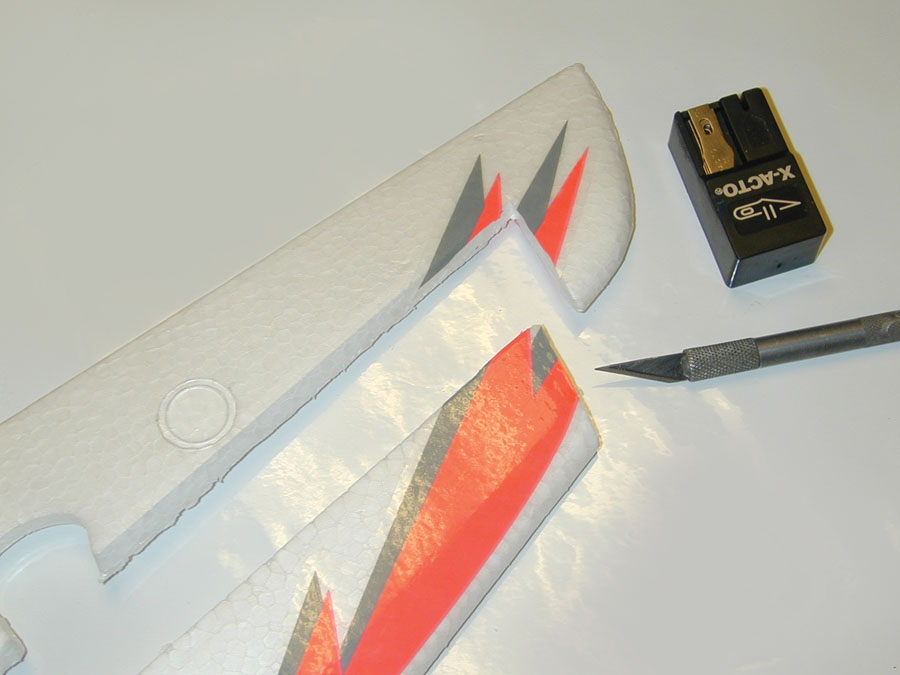
Step 2: After marking the hinge locations, take a sharp hobby knife and slice through the molded hinge to separate the rudder from the fin. Use some sandpaper to smooth the mating surfaces.
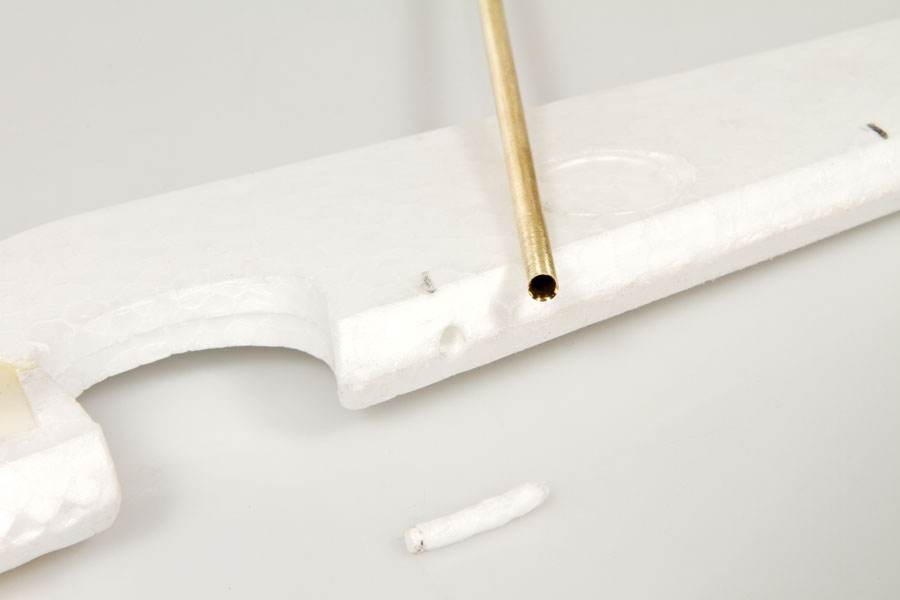
Step 3: Sharpen the end of a 1/8-inch brass tube, and use it as a drill to produce the holes for the Hinge Points. This produces much neater holes than a wood drill bit.
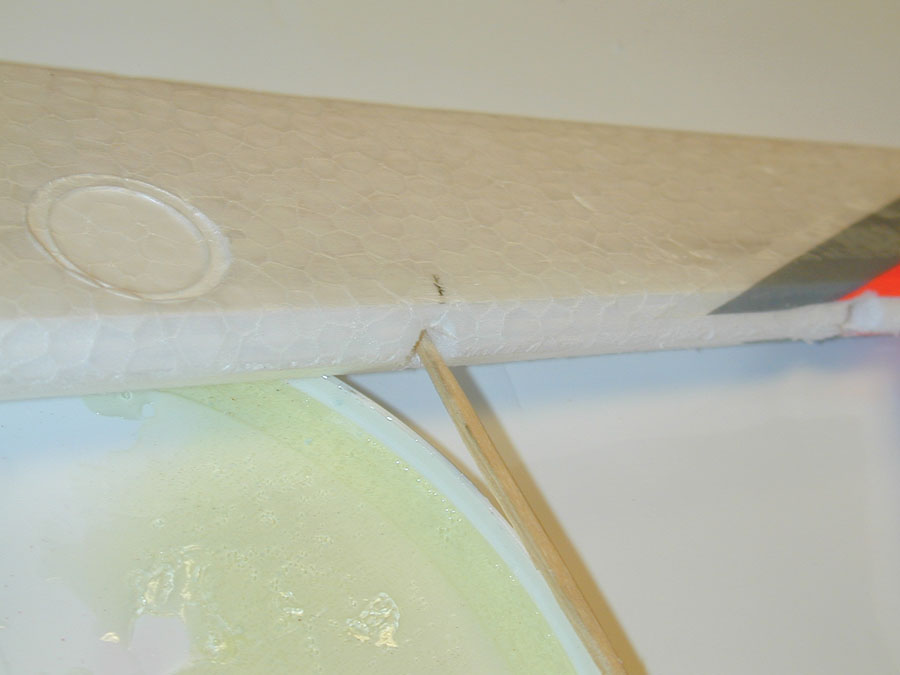
Step 4: Mix up some 15-minute epoxy, and use a toothpick to apply the adhesive into each of the holes in the rudder.
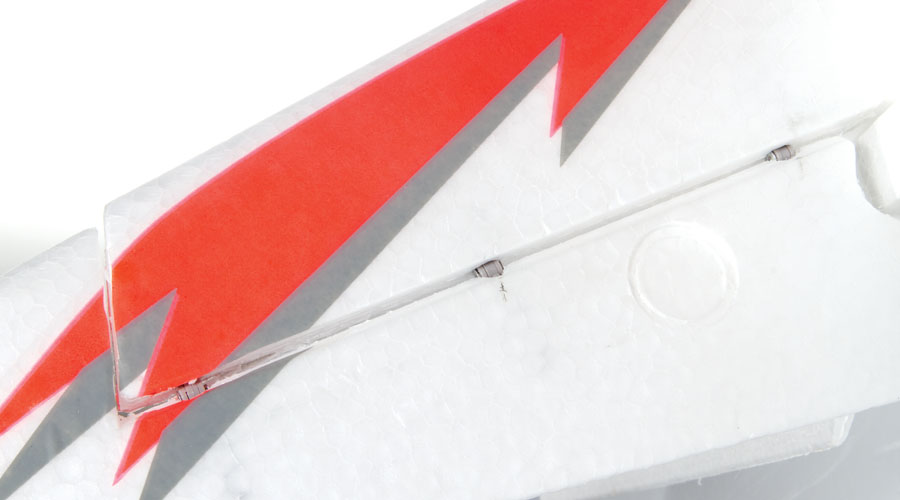
Step 5: Insert the Hinge Points into the holes, and set aside until the epoxy cures. Make sure that no epoxy gets into the pivot pins. If it does, quickly remove the hinge and install a new one. You have about 20 minutes before the epoxy starts to thicken and set.
Step 6: Apply more glue inside the holes in the vertical fin, and slide the hinges in the rudder into place. Again, wipe away any adhesive that oozes out of the holes with paper towels and alcohol. Set aside until the epoxy sets.
By the Model Airplane News Crew


Very precise, simple, easy to follow and apply, practical instructions. The author is not lost in insignificant details, difficult to memorize and follow during a crisis situation, like repairing the most beloved crazy toys of the old grumpy and crazy boys.
Repairing Foam Hinges
Step 1: It is not possible to repair a live-foam hinge,
Not so, Zap/Pacer Canopy cement will glue this back together. Just enough to cover the edge will make as it originally was. Don’t over do it as it will hinder the flexibility of the hinge area. If you do use to much, you may have to cut some of the joint away as it will not be as flexible.
Zap/Pacer Canopy will also butt glue any parts, put on plenty, fit the parts, slosh it around, then I use blue masking to pull the parts/joint on each side. You can clean up the extra cement with water and a paper towel. The repair will have a flexible joint instead of a brittle joint.