
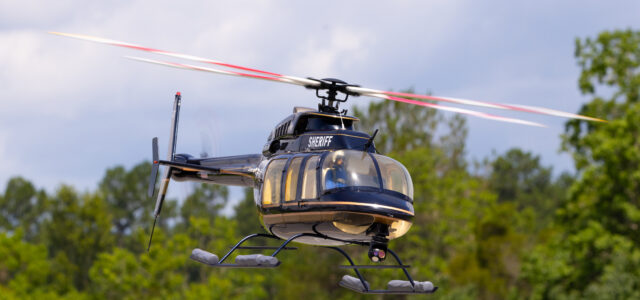
Every RC model helicopter pilot started somewhere, and no matter what your experience level, there is always something new and exciting to learn. Piloting a heli can be a lot of fun and very rewarding, but without proper training and knowledge, it can be very frustrating (and expensive). Of all RC activities, helicopters have the longest and steepest learning curve. The tips and techniques in this article will help shorten the curve and are also good reminders for experienced pilots as well.
1. Pick the Right Helicopter
The popularity of RC helis has resulted from the variety of models in all sizes from tiny electrics to big nitro and gasoline-powered models. Often this can be bewildering for the novice to decide on a first heli. Many pilots start with a coaxial rotor model, which is very stable and helps with hover orientation. They are relatively inexpensive and durable, which makes them good for novices. The small fixed-pitch models have a lot more maneuverability than the coaxial models and present a little more of a challenge. These models are a great introduction to forward flight and are a great orientation aid that will help in the next step. These are also ideal for the RC airplane pilot who wants a heli to change things up a bit without investing a lot.
Most heli pilots aspire to mastering the collective pitch equipped helis due to the unsurpassed maneuverability and aerobatic capabilities they possess. These are the most complex and challenging of all the RC helis. For the pilot with previous RC experience who is willing to learn about the correct setup, a collective pitch model makes sense. The choices here are wide and the first question is what size is best to learn on. There is no correct answer and each pilot will have to decide which is best for him. The small 450-size models made popular by such models as the Align T-Rex 450 are relatively inexpensive, easy to assemble (and repair) and fly well. Larger helis, electric (500, 550, 600 or 700 class) or nitro (30, 50, 60 or 90 class) are more expensive to fly and maintain, but are easier to fly. Their larger size and mass make them more stable, able to handle more wind and make for easier orientation. For learning, the basic model will keep you challenged and save a bundle of money. On the other hand, if you need to buy a transmitter, buy the best you can afford since it will last through many helis and its features will allow you to progress to higher levels.
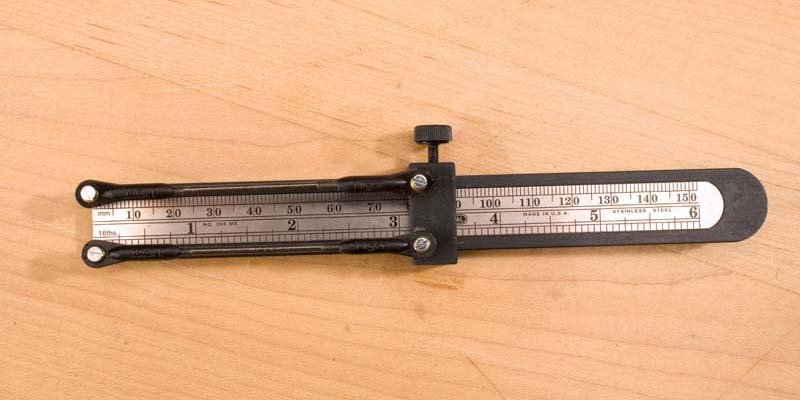
A control rod-length gauge makes it easy to produce identical linkages.
2. CCPM vs. Mechanical Mixing
Conventional collective pitch helis with mechanical mixing, use three servos to operate the primary flight controls; elevator (fore and aft cyclic), aileron (left and right cyclic) and pitch. The servos move the swashplate through a system of pushrods and levers and works very well. Cyclic-Collective Pitch Mixing (CCPM) also uses three servos for the flight controls, but they are directly linked to the swashplate usually arranged at 120-degree intervals. The radio, which must be capable of CCPM, uses software to move the three servos in the appropriate direction. This system requires fewer parts than the conventional system and since all three servos are used to move the swashplate simultaneously, there is more control authority.
Good-quality digital servos are recommended. The servos need to have their control throws matched so that there is no unwanted control input. For instance, if a collective input is given and one servo has a lesser or greater throw than the others, the swashplate will tilt as it rises or lowers introducing an unwanted cyclic input. Both systems work very well for both the novice and expert.
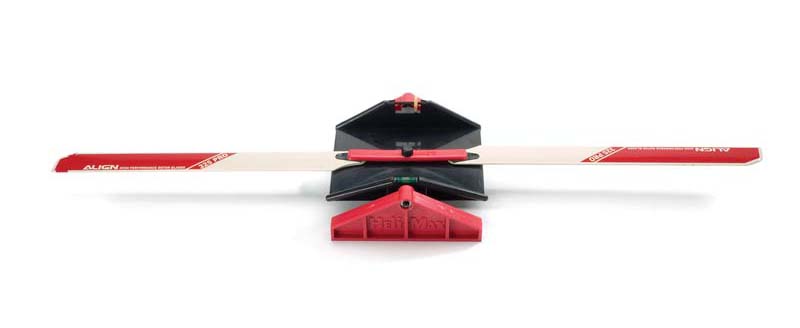
For your heli to operate smoothly, you have to use a balancer to make sure the rotor blades don’t cause vibration.
3. Essential tools
Here are some essential tools that you may need to buy in addition to the usual assortment of screwdrivers and pliers.
● Good-quality metric hex drivers. Don’t skimp here as cheap hex wrenches can strip bolt heads leading to frustration.
● Ball-link pliers to prevent damage to the links during installation and removal. The curved variety is the most useful.
● Pitch gauge for setting the collective pitch. Some kits include a template you can use, but you will eventually need one.
● Blade balancer to balance the main rotor blades. All helis benefit from balanced blades which reduces vibration.
● Soldering iron for electric helis for attaching connectors.
4. Throttle and Pitch Curves
Ask 10 experienced heli pilots and you will probably get 10 different answers as to the best setup. The objective of a properly setup collective is to maintain a constant head speed throughout the collective range when in idle-up or stunt mode. A linear pitch curve typically used in 3D aerobatics will have about 10 degrees of negative pitch with the left stick lowered, 0 degrees at center stick and about 10 degrees at full throttle. This results in hovering with the stick at about 3/4. Some pilots prefer to flatten the curve the curve around the hover to make the collective inputs less sensitive.
Throttle curves work hand in hand with the pitch curve to hold a constant rotor speed. A typical radio will have a three-position switch known as “idle up” switch. The “normal” position is used for engine start and hovering. The engine is at idle when the throttle stick is fully lowered and usually about 90 percent for full throttle. For the 3D setup, full throttle is set at full negative and full positive pitch settings using a “V” shaped curve. The bottom of the curve is the lowest throttle setting. A third curve normally employed is for traditional aerobatics such as loops and rolls. For this curve, the throttle is set so that the pitch range is from about -5 to +10 degrees. Last is the throttle hold switch which allows the engine to go to idle while the collective pitch is controlled by its curve. This is for practicing auto-rotations.
By using a pitch gauge and the radio’s programming the initial values are set up. These will need to fine tuned in the air. For example, if the rotor “bogs” or slows down at full collective, then the maximum pitch setting is too high. Beginners only need to concern themselves with the “normal” throttle and pitch curves. A throttle governor or rev limiter will automatically hold the desired rotor speed for you, but you should still know the basics of setting throttle curves.
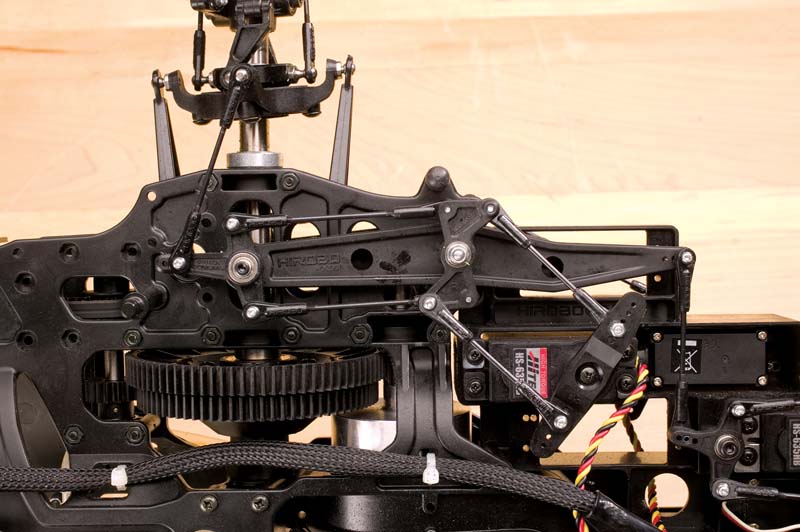
Conventional mechanical mixing for collective-pitch helis must be set up properly for maximum performance.
5. Set it up Right
If you’ve chosen a ready-to-fly model there is usually little or no setup involved. A kit-built heli will need to be set up properly and it helps if you have an experienced heli pilot look it over and help you. Most collective pitch models can be set up to be docile or aggressive depending on the collective and cyclic pitch range. For those just starting out limiting the collective from 0- to about 5-degrees will help tame the model down and prevent uncontrolled climbs and descents. As you get better, just increase the pitch range incrementally until the full value is obtained. Check the controls for proper direction. Moving the cyclic stick right should tilt the swashplate to the right and moving the stick forward should make it tilt forward. The tail rotor and direction and gyro function also need to be checked. Getting the correct control directions for a CCPM heli can be a challenge the first time, but if you study the heli and radio manual it will become clear. Use extreme care when setting up an electric heli. Should the motor start unexpectedly injury can result as well as damage to the heli and surrounding objects. I like to use a separate battery pack and disconnect the speed control to prevent this. Disconnecting the motor pinion is also effective.
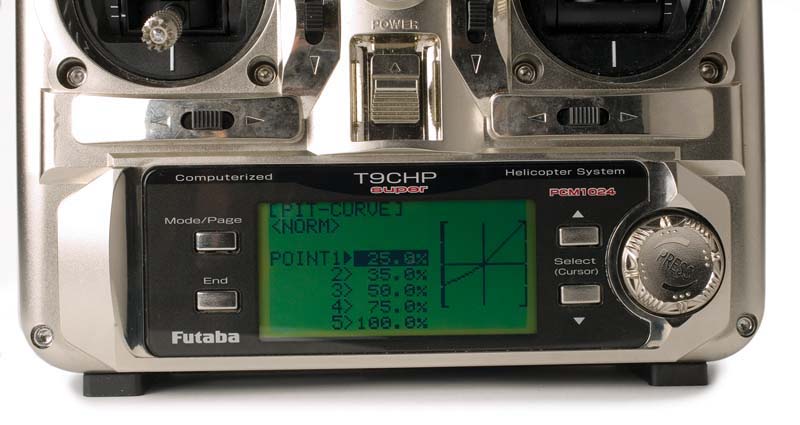
Modern programming makes setting up (and adjusting) pitch and throttle curves a lot quicker than before.
6. Use a Simulator
Simulators are great learning tools if used properly. Since you will be able to use it from initial hovering to the most advanced 3D moves, sims are an excellent investment. A flight sim will pay for itself in reduced crash parts. RealFlight (towerhobbies.com) features several helis to choose from. It has realistic scenery and flight characteristics. Not only can you choose from among a wide variety of helis, but you can also change the setups to see what the effects on the heli are. Sims should be used in conjunction with real-life flying for best results. Practice and perfect the maneuver you are working on with the sim and then go out to the field. This will help you get the stick patterns in your memory and help your motor skills. While we all like to go wild on the sim, practice like it was a real model and do your best to avoid crashing.
7. Master the hover
Learning to hover is similar to learning how to ride a bike—seemingly impossible at first but easy once learned. Just as most of us started with training wheels, training gear for helis serves the same purpose. You may not think you need them, but they will save your heli from a tip-over which will cause damage and slow your progress while you fix your heli. Here are a few tips to speed your progress:
● Position the heli about 15 feet from you with the tail toward you. This way, the cyclic inputs will match the stick movements in relation to you. For instance, a left cyclic input will bank the heli left and a forward input will tilt it forward.
● For the first attempts, just get the heli light on the skids and give gentle inputs to move the heli around.
● Practice short hops of a few seconds close to the ground and ease the heli back down. Increase the time as your skills increase.
● Continue practicing at a low altitude of under a foot until you can keep the heli in one spot without major deviations for several minutes.
● Increase the altitude in one-foot increments and land if you feel the heli is getting out of control.
● Once you can hover comfortably at eye level it is time to take of the training gear. The training gear adds stability so you will want to start at a low altitude to get the feel of the added responsiveness.
● Practice other orientations such as side-in and nose-in. These are challenging but required for advanced flight.
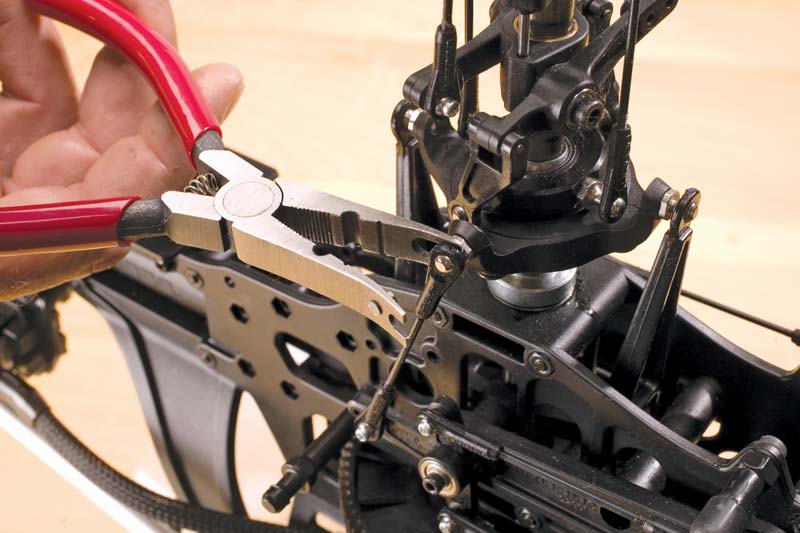
Using the proper tools makes setting up your heli’s linkages easier and more precise.
8. Preflight Checks
A helicopter has many moving parts that can loosen or break without you knowing it. Before the first flight of the day, a thorough preflight similar to what a full-scale pilot does can prevent a crash or incident.
Here is a minimum of what to check:
● Make sure the correct model is activated in the radio’s model memory.
● Make sure all batteries are fully charged.
● Do a range check if it is the model’s first flight or hasn’t been flown in a while.
● Check for proper control direction and no binding.
● Check all ball links for security.
● Check for proper tail drive belt tension.
● Check main and tail blades for proper tightness and no damage.
● The main rotor should spin without binding.
● Check canopy for security.
9. Proper Maintenance
Regular maintenance will increase the heli’s lifespan and it will run like the proverbial well-oiled machine.
Here is what should be done on a routine basis:
● Lubricate the swashplate and ball bearings with a good-quality lubricant such as Tri-Flow lube available at bicycle shops.
● The main rotor blade thrust bearings should be cleaned and greased at least at the beginning or end of the season. If you do a lot of flying, it should be done every 50 flights or so.
● Check all the fasteners for tightness. Remove, clean and add thread locker to all those that are loose.
● Thoroughly clean the entire heli including the gears.
● Look closely for small cracks, especially on graphite or carbon-fiber models that could progress.
● On nitro models, replace the gyro tape if it came in contact with nitro fuel or exhaust.
● Check ball links to make sure they are not too loose. Replace any that are.
● Put after-run oil into the engine’s intake or exhaust.
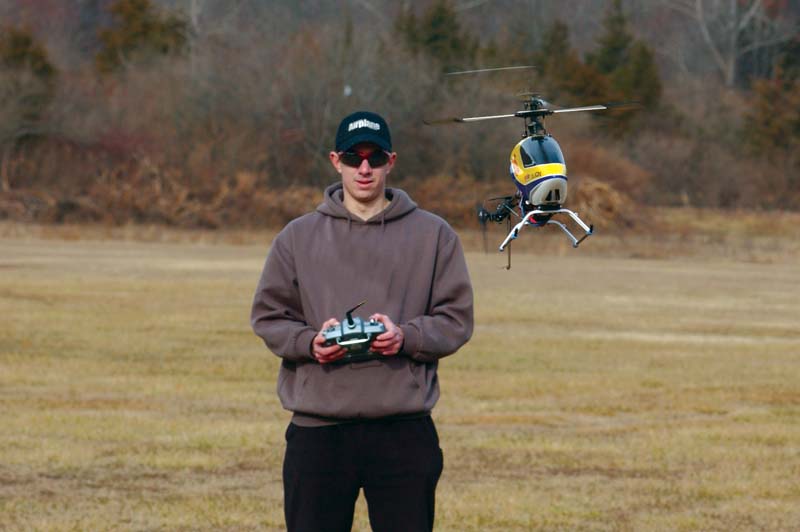
Learning how to hover is one of the most important things to do. Each flight begins and ends in a hover.
10. After a Crash
Crashes can be caused by pilot error, mechanical or radio problems. A good habit to get into is to hit the throttle hold switch to lower the motor or engine rpm before impact. Having a set of spare parts on hand is also a good idea. Helis are known to do the “Funky Chicken” if the engine (or motor) is still running and can’t be shit down with the radio. For nitro helis, the best approach is to grab the head and pull the fuel line. Electric helis present a more serious threat if the LiPo flight pack becomes overheated and catches on fire. Here the best thing to do is pull the battery connector if you feel it is safe to do so. Next, turn off the radio to prevent further damage to the servos.
At this point, carefully pick up all the pieces which sometimes can be quite a distance from the crash site and take inventory of the major items. This is not the time to troubleshoot the radio since you could do more damage if something is bound up. When you get back to your workshop, thoroughly clean the model and assess the damage. If you are in doubt about any of the parts, replace them. Check the operation of all the servos and listen for unusual noises which could indicate a stripped gear. Be sure to check the rest of the radio system as well. Often the damage is not as bad as it initially looked and once repaired, will fly just as well as it did before!
BY KLAUS RONGE


You make two references to “training gear” but you neglect to explain just what exactly that might be. Since this is supposed to be an informative introduction into how to get started in flying helicopters, it might have been beneficial to go into that part as well.