A flybar on the main rotor head of a helicopter imparts stability in the rotor head system and helps the main rotor blades change pitch (a sort of power steering mechanism, if you will). Removing the flybar makes it more aerobatic because there is less inertia in the rotor system, which is awesome for 3D flying but more importantly for my purposes, it makes the helicopter look scale. I can remember as a kid watching Towering Inferno and Capricorn One and seeing the flybars in the slow-motion movie scenes and knowing they were model helicopters.
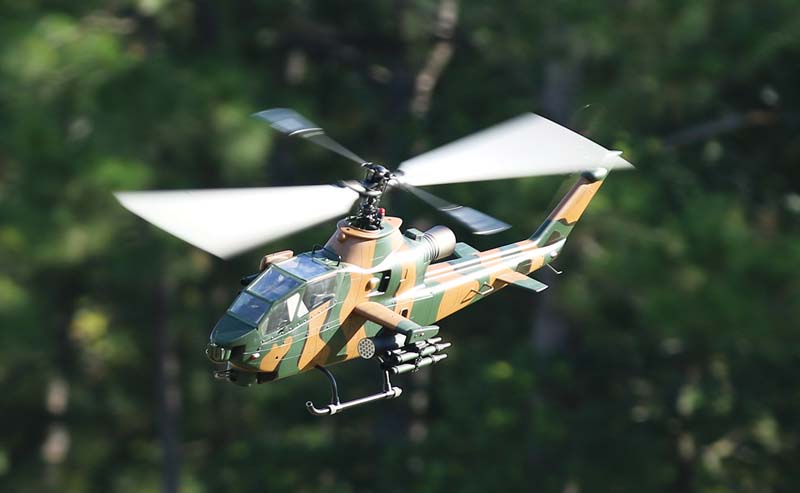
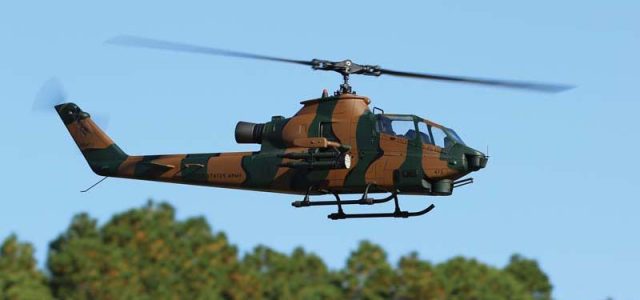
The Cobra looks mean, but the flybar was just bugging me every time I looked at it.
After years of wanting one, I recently stumbled on an estate sale deal on a Hirobo TOW Cobra. They are no longer generally available, and they cost near about as much as a turbine jet when they were. Powered by a glow engine with an optional onboard starter, they are what we term today as 700 size; big enough to be cool but not so large as to be obnoxious to transport and store.
After an electric conversion using a Scorpion motor, 10S battery setup, and a Kontronic 80-amp speed control, I had the Cobra flying extremely well. The trouble was every time I looked at it the flybar bugged me because the full-size Cobra uses a 2-blade rotor head. I knew I was going to have to do some custom modifications to the rotor head to achieve this so I started looking at what parts I would need.
The first thing I did was contact Danny at AeroPanda and ordered a BavarianDemon Axon controller ($349.99) and a B-Modul wireless Bluetooth interface ($79.99). The B-Modul isn’t strictly necessary but it’s nice to be able to get into the programming interface at the field without toting my laptop.
Next, I looked over the rotor head and considered my options. I dismantled the flybar and removed the mixing linkages. The mixing levers would have to stay to drive the inner ring of the swashplate, but I simply used a Dremel and removed the unused half of the mixing levers. The head block had the flybar bearing supports remaining, so I dropped it off at a shop that fellow RC’er and master machinist Mike Speckhahn owns. In the time it took to go to lunch, he had the supports removed and a nice smooth curve on the top of the head block that looked factory stock.
The blade grips needed to be modified so that the ball link was centered on the shaft. Fortunately, there is a set of linkages for the TRex 700 that have balls with a 24mm offset which work perfectly. They also have a set of linkage rods that include two of the perfect length. The grips had to be drilled out and tapped for the Align parts and the inner swashplate ring needed TRex balls to mate up with the ball links. Everything on the outer swashplate ring and down to the mechanics remained stock Hirobo parts.
The helicopter came with a Futaba 401 tail gyro that needed to be removed as the Cobra would no longer require a separate tail rotor gyro and the rudder servo wire extended to the receiver.
Using the software for the Axon it can be mounted in nearly any configuration. I had plenty of room right behind the cockpit compartment to mount the Axon on a nice flat crossmember tray. I cleaned the mounting surfaces with alcohol and used the supplied double-side mounting pad to mount the sensor.
The Axon is capable of binding to Spektrum satellite receivers but with the Cobra being the equivalent of a 700-size model, I wanted to install a separate receiver for maximum reliability. I also wanted some flexibility to add lights and maybe a servo to operate the front gun turret at some point so I would need the extra channels anyway.
The Axon comes with a wire loom that uses an all-in-one plug into the Axon with inputs for all the servos and gain controls to the receiver. Several of the controls contain a single wire but everything works because it gets a common ground from the servo bus on both the sensor and receiver though the wire loom. When the loom is installed, you then use the BavarianDemon software to begin your configuration. Only when the proper servo output refresh rate is selected for the servos you’re using do you plug the servos into the Axon. (Note: Pay attention to this because if it’s wrong, you can burn up your servos!)
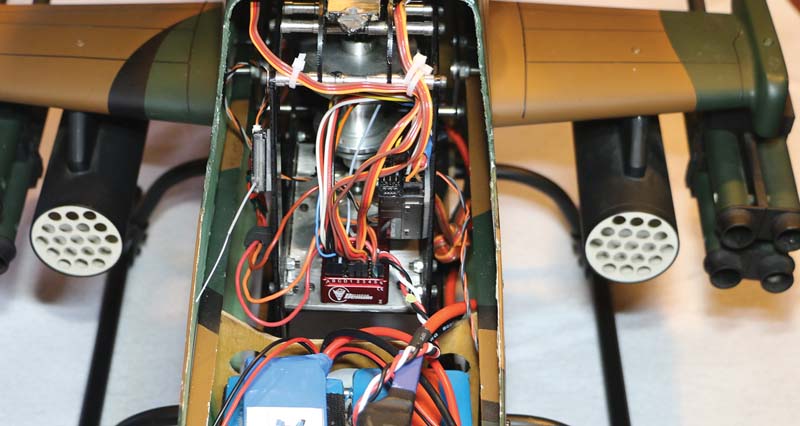
Installation with the wire loom between the Axon and my Spektrum AR9020. The convenient flat location in the frame made mounting easy and access for programming convenience.
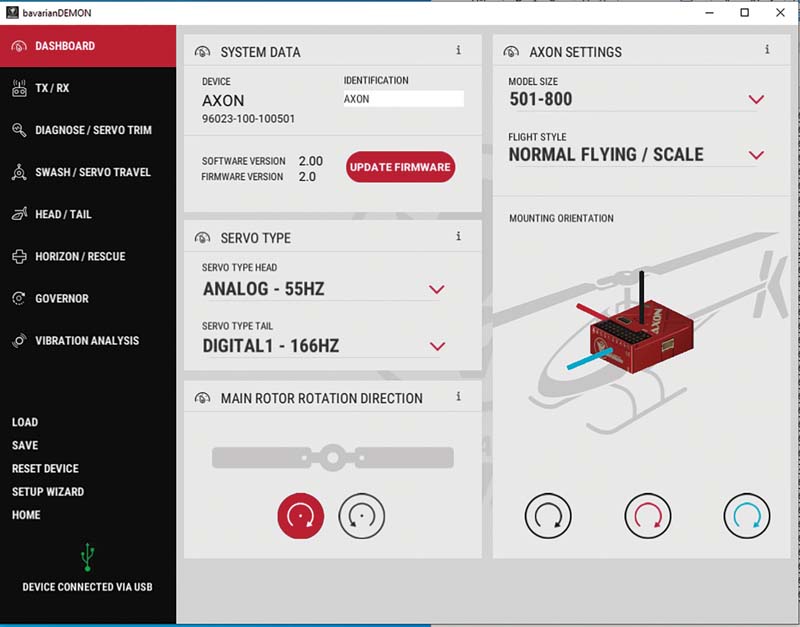
This screen is where you can download and push firmware updates, define your helicopter size, desired flying style, mounting orientation and most importantly, servo specs. Flying style will determine many default settings for gain and response. I set scale for smooth flying on my Cobra, 3D settings are also available.
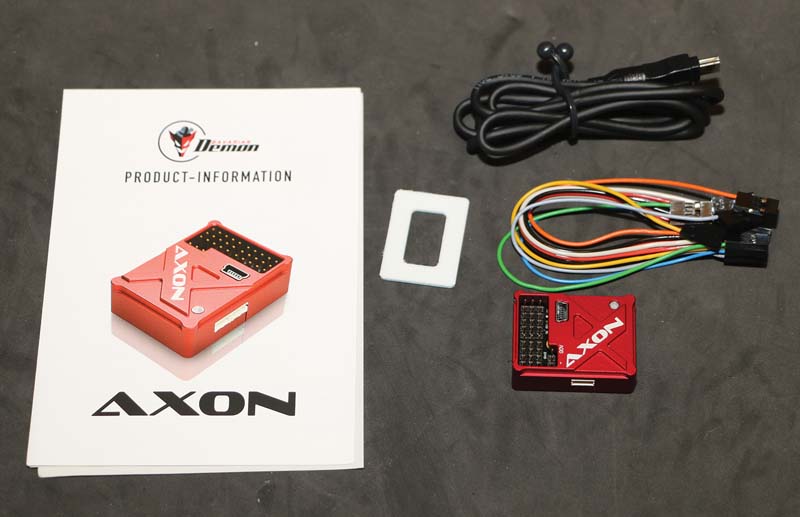
The contents of the BavarianDemon Axon include the unit, USB cable, wire loom to connect to your receiver, and a mounting pad.
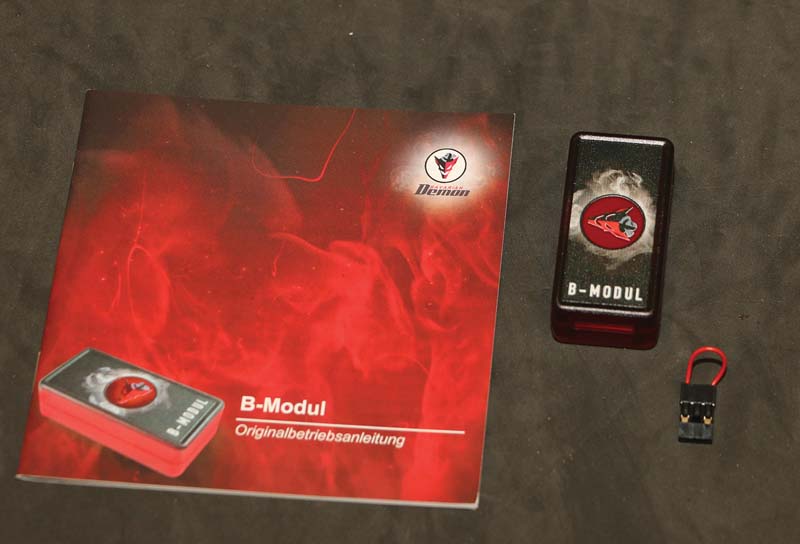
The B-Modul is the Bluetooth interface that can be bound to a smart phone and allows you to make system adjustments at the field without a laptop.
The Axon software was downloaded to my phone and laptop and I connected the Axon to my laptop via the provided USB cable. The software, while identical on both the phone app and laptop software, the laptop is a lot easier to see and navigate so I set my Axons up with a laptop and use the phone app to tweak settings at the field.
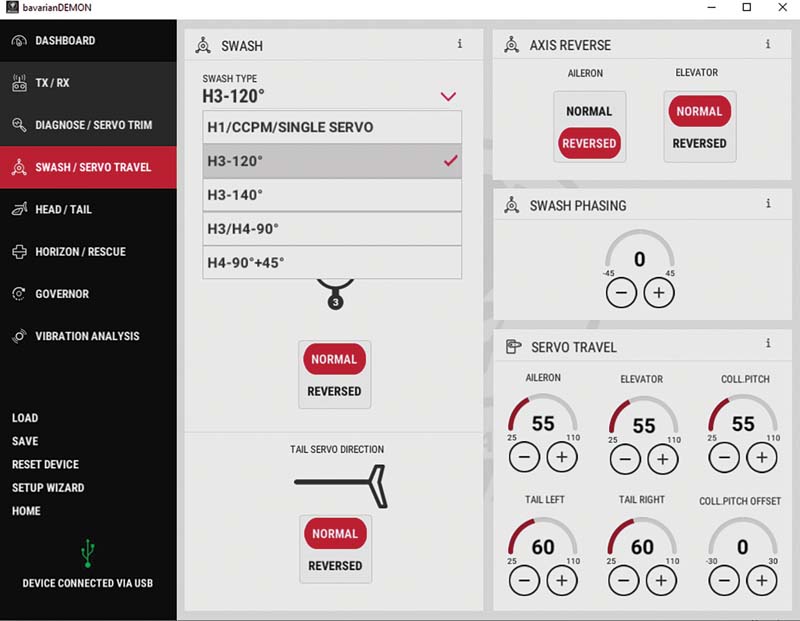
A wizard guides you through setting up your Axon by establishing servo connections and gain controls. You then trim your servos and adjust your linkages so that everything is centered and square. Defaults are established by answering the questions about the size and type of helicopter that you’re configuring. establishing default settings that work perfectly for a wide variety of models while giving you very granular control if you’re a compulsive tinkerer that enjoys diving deep into the various settings. The bottom line is, the Axon can be setup and flown successfully by most pilots without needing to understand the complexities yet still exploring them as you gain experience.
The software allows you to save setups to disk so if you want to dive deep and find yourself facing unintended performance you can always load your last saved setup back to the Axon and you’re back in business.
While setting up the gains, I set the head and tail gain inputs each to a knob and slider respectively. During the test flight or flights, I plan on adjusting the gain until I obtain the desired feel. Once I establish the values needed on the gain channel, I will transfer these to the control banks via the software and disable the knob and slider so I don’t inadvertently change settings while handling my transmitter.
When it came time to hit the flight line, I was getting the jitters usually reserved for test flying a turbine or large model. I double-checked that the Axon was correcting in the proper direction for each axis then had someone else verify my results just in case, an old habit of not being able to inspect my own work when repairing Navy aircraft.
When I was satisfied that the setup was correct, I took a deep breath and switched into Idle 1 and held my breath as the blades came up to speed. So far so good! A quick test hover told me too things, I had way too much cyclic throw and I had some forward and right drift. You can’t use transmitter trim on the Axon or it will interpret it as stick movement, radio center calibrated during initial setup and not during gyro boot up, so I had to land and manually adjust the cyclic linkages and took that time to tame down my dual rates in the transmitter. It took a total of three test hovers to get the linkages setup for zero drift.
The next step was to set the head gain. I used the knob and carefully dialed up the gain until I started to get a shimmy or oscillation in the head and then backed it off a few clicks. The same was done with the tail gain. Gradually gaining confidence I increased forward speed so that I was doing fast circuits, and everything appeared solid. It took a total of 2 battery sets to get the Axon perfect and the Cobra dialed in to my liking.
The ultimate compliment to a scale pilot is to hear someone say “Wow! That looks just like the real thing!” and I’m happy to report that the conversion was a success, and the Cobra is flying as well or better than it was before the conversion but looks 100 percent more scale!
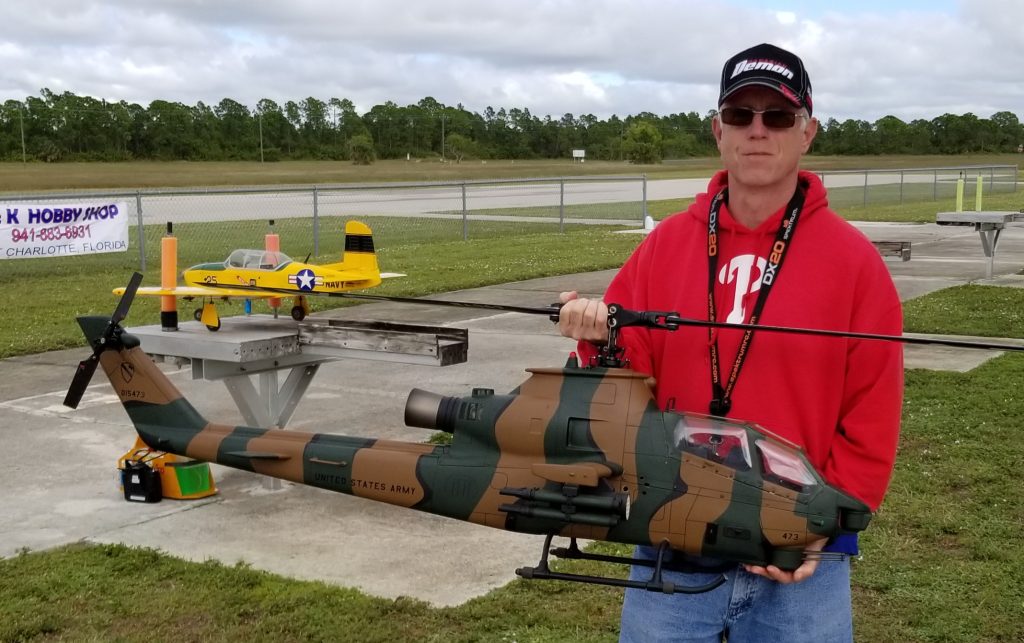
Author Andrew Griffith with his Hirobo Cobra