
In this final installment, Lane Crabtree creates his CARF Models P-51’s Hurry Home Honey nose art, invasion stripes, and engine exhaust stains. In earlier articles, he started by documenting how he primed and painted the silver and olive drab, masked the canopy and created the stars and bars, and then he applied the squadron markings and the checkerboard pattern.
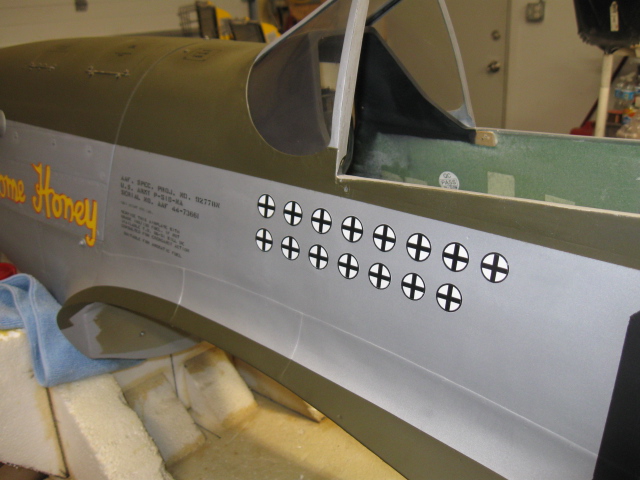
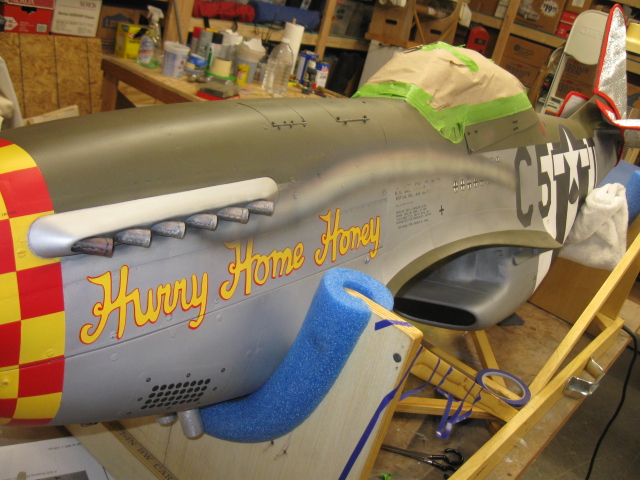
For the Hurry Home Honey script “nose art” (left side only), Callie provided a much-needed two-stage paint mask. This is one of the invaluable things paint masks can do for you – artist work. I couldn’t do this in 100 years by hand. Here’s how it works. The first paint mask is laid out on the nose with careful positioning. After sealing the edges and masking off around it as required, paint the base coat of yellow. Once the yellow is dry (remember to wait a LONG TIME) add the second paint mask that covers up most of the yellow and then hit it with the bright red. This will give you a shadow effect around all the letters. You need to use a very light mixture of dish washing soap sprayed under the second masks to slide them around a bit till you get them where you want them. Again, let that dry thoroughly before painting. Remove all the masks and you are done. And use rattle can paint for this as latex just won’t work as well for fear of peeling off when removing the masks.
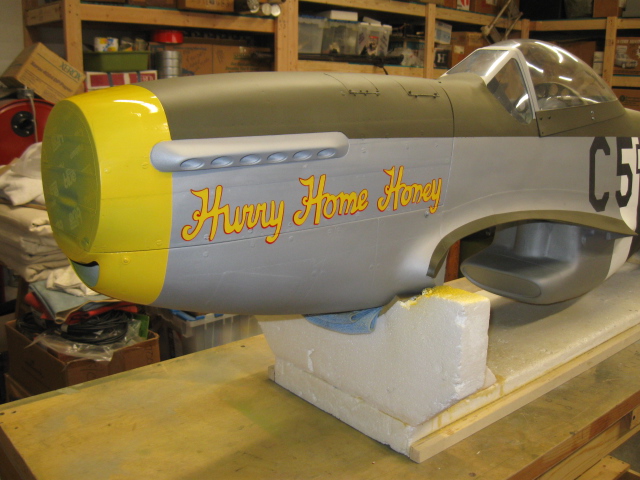
Before I finished the checkerboards, waiting for the yellow to dry, I added the HHH script. Now, I just discovered I have no in-process photos of this! See text for instructions.

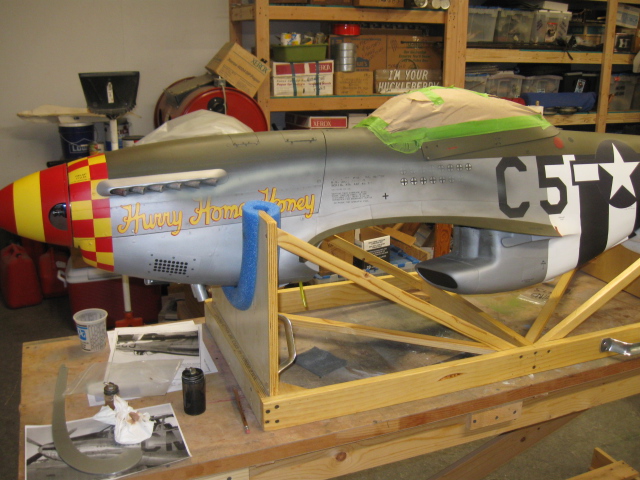
One of the last things to do on the fuselage is to add the tail numbers. Callie provided paint masks for these also. Just remember to alternate paint colors. On HHH, I discovered on the rudder the 413 on the right side and 586 on the left side were black paint, rather than OD Shade 41.
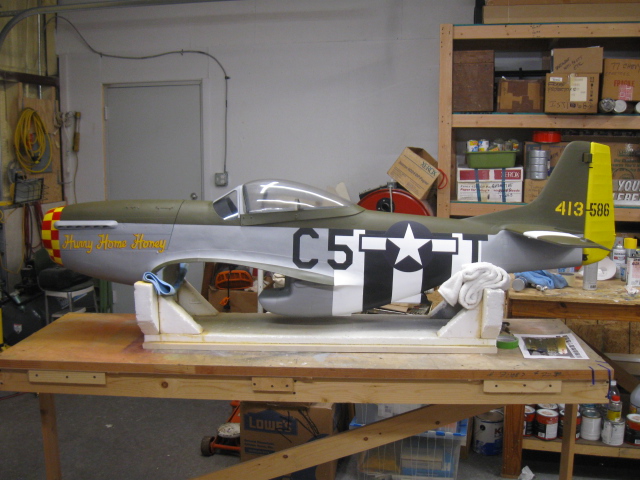
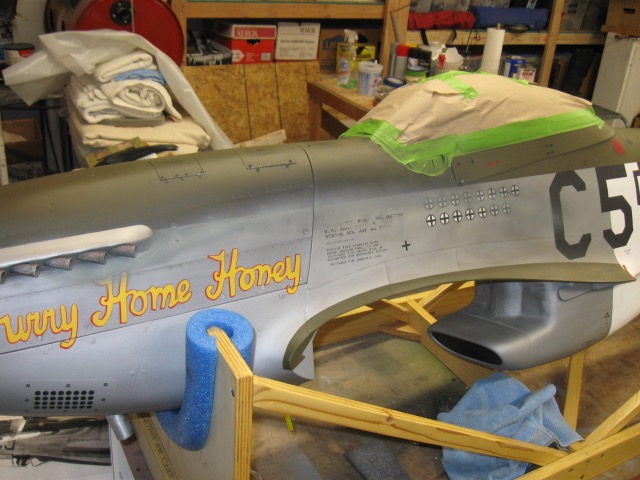
This is where we are so far. Not totally discussed is that I used Matte Polycrylic Water Based Clear coat over the entire fuselage. This protects the paint and gives an overall even sheen to the paint job. This is an optional step – exterior latex house paint by itself has been shown to be very effective on gas powered RC planes of all sorts. Suit yourself on this matter.
What we have left to do are the wing halves. All the processes are the same as we’ve seen so let’s walk thru the parts without all the individual steps.

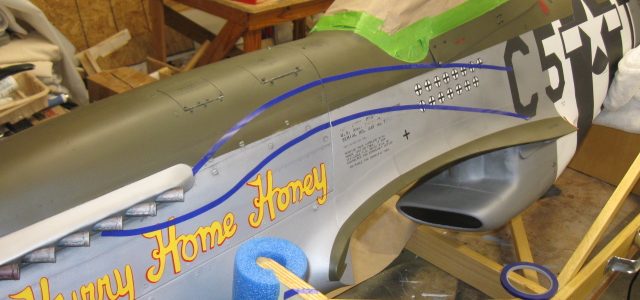
Wing has been primed on both sides, bottom painted silver, top painted OD shade 41, and the invasion stripes applied. Nothing really different than the fuselage. Just be sure to check that your stripes are parallel to the wing root. Then after the white has been done, lay the black stripes out parallel to the entire layout. I seem to recall all the stripes were 4 inches wide, times five, equals 20 inches. This agrees with the full scale layout very closely.
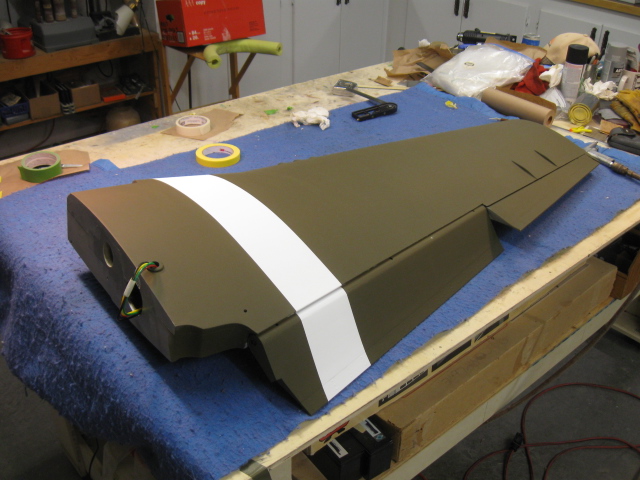
Top of wing is OD Shade 41 and the white wing flash is added. The white flash meets the inboard white invasion stripe on the bottom wing leading and trailing edges. Another note, I left all the control surfaces on the wing and fuselage while painting. I didn’t see the need to remove them for painting. I was able to extend the flaps as shown above to get paint where it was needed without removal.
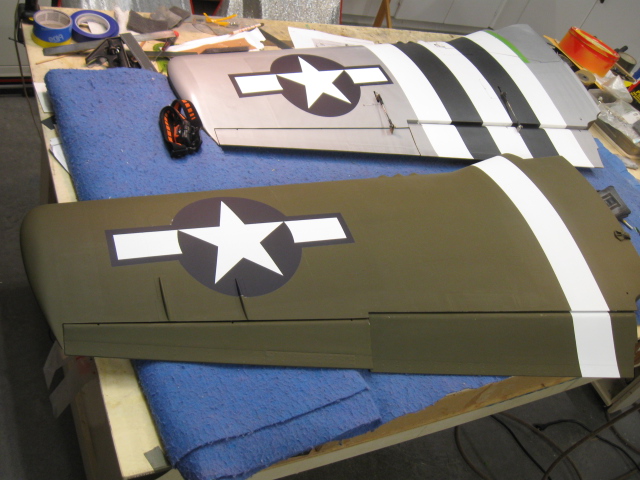
Again, let’s cut to the chase and see the final throwdown – Stars and Bars. One thing I discovered AFTER painting is that the top-side STAR is supposed to be split dead-center on the small fairing in front of the aileron. Ooops! Just an inch or so too far inboard. Bottom of wing is OK.
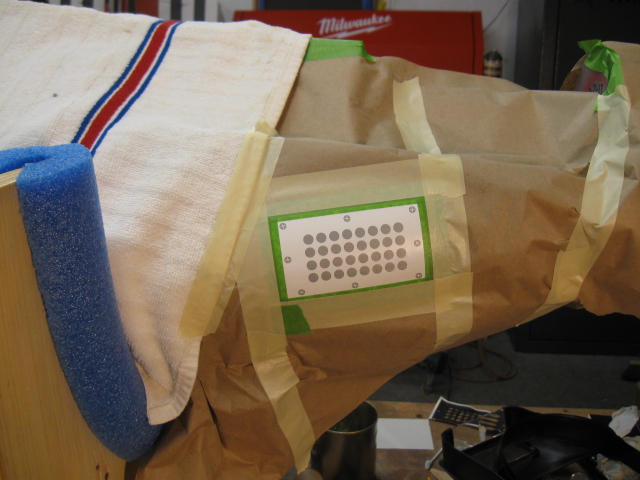
No warbird is complete without victory markings! Callie provided these as well. I sent her an E-Mail suggesting that the spacing could be tightened up both horizontally and vertically. Other than that, worked out very well. Also note, the small nomenclatures are shown here – dry rub-ons. They need clear-coating after application or they will flake off.
One more paint mask from Callie is the air intake screen This is a one-step mask I painted black. I used this because I didn’t open the actual holes in the fuselage. I needed them closed to force cooling air past the engine cooling fins.

Those screws ahead of the screen got painted later with silver. In fact, I painted a slew of screws in several colors to use for extras in case I lose a few along the way.
One of the HARDEST parts of this paint job to get correct were the exhaust stains from the mighty Rolls Royce V-12! I’ll show a couple of early attempts before showing the final version. This is one area that Cassie doesn’t supply masks for. You are going to have to be an artist for a little bit. But, my advice here is to seal the fuselage paint beforehand with Polycrylic and then use acrylic paints from Hobby Lobby or some other craft store for the exhaust stains. Purchase some black, white, bone white, yellow ochre, burnt umber, etc, that you will need to mix the colors with. By sealing the fuselage with Polycrylic first, if you mess up, the acrylics can be wiped clean with a wet washcloth, and you can have another go. After 5 tries, I got it right on the 6th! Whew. The hardest part on the stains is using restraint and GOING LIGHTLY. You can look at any warbird and see that they are almost transparent. It is the natural tendency (for a non-artist) to make them dark and heavy. Looks kinda cool, but more like a cartoon than real-world. You can see some of my attempts below. I have to give many thanks to the guys at Radio Control Scale Builder web site for their comments on getting the stains correct. They were kind, but relentless till I got them correct! haha. Once the exhaust stains were satisfactory, I clear coated them to seal the water colors.
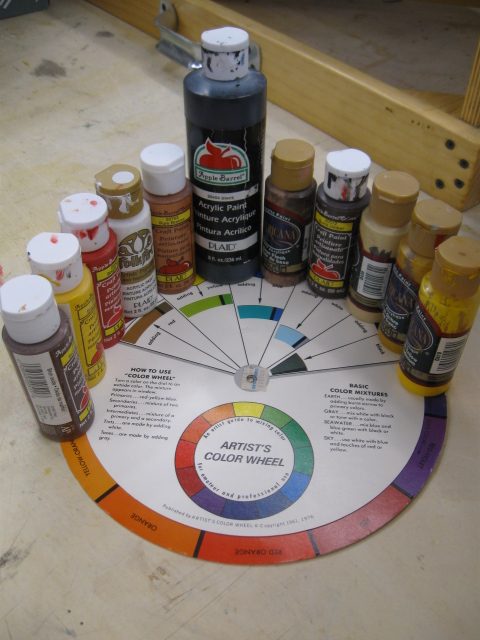
Assortment of acrylic paints from your local craft store are great for painting exhaust stains and pilot figures. Buy a color wheel to help in mixing your own colors.

I felt a warbird needs some exhaust stains so I laid some tape down to get the flow correct. I didn’t leave the tape for painting, but traced some light pencil lines to go by.
One of the first attempts. I like it. But very cartoonish. Too heavy. Flow line is very close to correct, however. Also note the exhaust stubs. The first one is just rusty looking, but the next 5 get that whitish grey lead coating.
A little better effort, but still too heavy. Not transparent at all. I like this one too; RCSB guys … not so much. Ha.
Finally got it right! You have to be very light with the airbrush to do it correctly. It is easy to get carried away. The final exhaust stain version used two colors, a light charcoal-black and then a light greyish color. You have to “waft” the paint on. Of course, these water-colors (acrylic paints) do not come ready-mixed in the lights and darks you see here, you have to mix them up yourself. It’s not that hard to do. Experiment on a cardboard box before actually painting them, not only to check the colors, but to set your airbrush flow rate and air pressure.
Opposite side. Pretty close to the left side, but slightly different as the real deal would be.
That’s a brief run-thru of the paint process for Hurry Home Honey. Many more hours can be spent weathering and detailing a warbird like this one. But to use a quote attributed to Dave Platt, “You never really finish a scale aircraft, you just quit working on it.” Like most projects, glad this one is behind me but looking forward to the next one!
TEXT AND PHOTOS BY LANE CRABTREE


I am just getting back into building and flying RC models. I’m what you would call a balsa bender. I need to know where I can purchase silk or silron for covering models like a 1/5 scale P-51 D and some other large quarter scale giants.