
There are lots of good reasons to use gasoline engines to power your model airplanes. Generally speaking, they are easy to start, and run very reliably while producing their peak power at lower rpm than glow engines of similar displacement. With lower RPMs they tend to make less noise and burn less fuel per minute than comparable nitro burning 2-strokes. But as with all things RC, to operate properly, your gas-fed engine needs to be installed and set up correctly. Let’s take a closer look.
MOUNTING
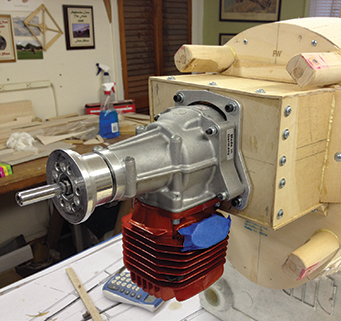
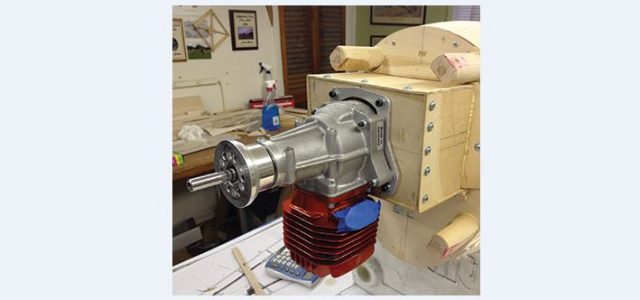
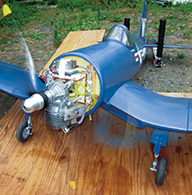
Here is a typical hard-mounted gas engine installation shown on my friend Mike Gross’ Ziroli P-47 Thunderbolt. The rear-mounted carburetor passes through an opening in the firewall.
Here is a typical hard-mounted gas engine installation. The rear-mounted carburetor passes through an opening in the firewall. To keep the carburetor in front of the firewall long metal standoffs can also be used to install the engine.

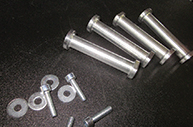
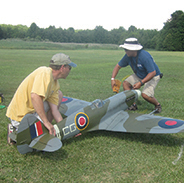
Soft mounting the engine helps isolate the fuselage from engine vibration by using rubber inserts around the engine bolts.

Installation starts with properly centering and attaching your engine to the model. This can be done with soft-or hard-mounting points. Hard point mounting can be as simple as drilling holes in the firewall and bolting your engine directly into place. For engines with rear-mounted carburetors, this will often require using long metal standoffs. In both cases, the mounting hardware (nuts and bolts) need to be secure and tight. For lightly built airframes, soft mounts are often used. These include rubber isolators that separate the mounting bolts from the firewall. They also minimize the amount of engine vibration that finds its way to the rest of the fuselage structure. Be sure to follow the airplane’s instructions for side and down engine thrust angles.
LINKAGES
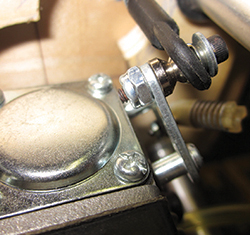
Secure throttle linkage is very important. I prefer to use heavy duty ball links to make the connection.
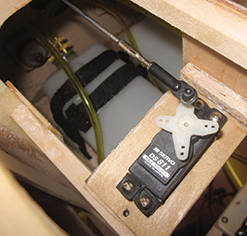
You have to first install the throttle servo to determine the length of your throttle linkage.
After the engine is properly installed, the next step is to work out and install the throttle and choke linkages. Start by installing your throttle servo. I prefer to use 4-40 music wire with a threaded on heavy-duty ball-link at the carburetor and a soldered-on metal clevis at the servo. You can determine the length of your throttle pushrod by using your transmitter to position the throttle arm all the way to the idle position with full down throttle trim setting. Here too you should visually confirm in which direction the servo needs to move to open and closed the throttle. Since one end of the linkage is threaded you can fine-tune the length mechanically after you solder the clevis into place. The overall throttle travel endpoints can be fine-tuned by programming the travel volume or endpoint adjustments. I personally like to remove the return spring from the carburetor throttle arm to minimize the throttle servo drain on the receiver battery pack. Once this is all done, be sure to remove your throttle linkage and use a solvent to remove all the solder flux to prevent corrosion later one. For the choke you have the option of using servo control or a simple mechanical linkage operated by hand. Using a servo also provides an emergency engine shutoff during flight.
PLUMBING
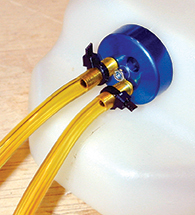

Your fuel tubing tank hardware has to be made using gasoline compatible materials. Also use small cable ties to secure all the fuel tubing connections.
Next is the fuel lines to connect the engine to the fuel tank. The tank position is less critical with a gas engine than with a glow engine because most gas engines use a Walbro or similar pumper carburetor. These draw the fuel into the carburetor so the tank can be further away from and lower than the carburetor without any issues. The most important thing is to make smooth loose fitting holes in the firewall so the fuel line does not chafe. I drill a larger hole, slip the fuel line through it and then add a dab of Zap Goo to seal around the fuel line. Also, be sure to use a gasoline compatible fuel line like DuBro’s Tygon or similar for your fuel system plumbing. Use it inside the tank also as well as a gasoline-proof rubber tank stopper. An excellent way to make sure all your tank hardware is gasoline compatible is to use the Heavy Duty Multi Fuel Stopper Kit from Sullivan Products.
For the actual plumbing setup, I prefer to use a 2-line fuel tank setup with a tee fitting installed in the fuel-supply line to the engine. The other line is the vent which exits the bottom of the firewall, close to the exhaust pipes. I always install a fuel filter between the carburetor and the T-fitting.
FIREWALL FORWARD
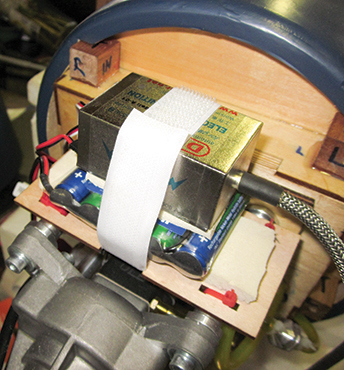
Keeping the engine compartment neat and uncluttered helps keep engine performance reliable by preventing the wires from touching the hot engine case of muffler.

Securing fuel tubing with cable ties also improved reliability by preventing them from coming in contact with the engine.
The insides of an engine cowling can get crowded especially if you are installing a smoke pump system and adding ballast weight in the nose to adjust the balance of your model. So, in general, it is better to work out all your engine installation issues during the construction of your model, than to try and cram everything into place after the plane has been built. Prevent loose wires or fuel lines from coming in contact with the hot engine or exhaust system. Take your time and work on everything one at a time. I use plastic cable ties to secure dangling wires and fuel lines. If you need to do some maintenance, they can be easily snipped away with a pair of wire cutters.
ENGINE COOLING

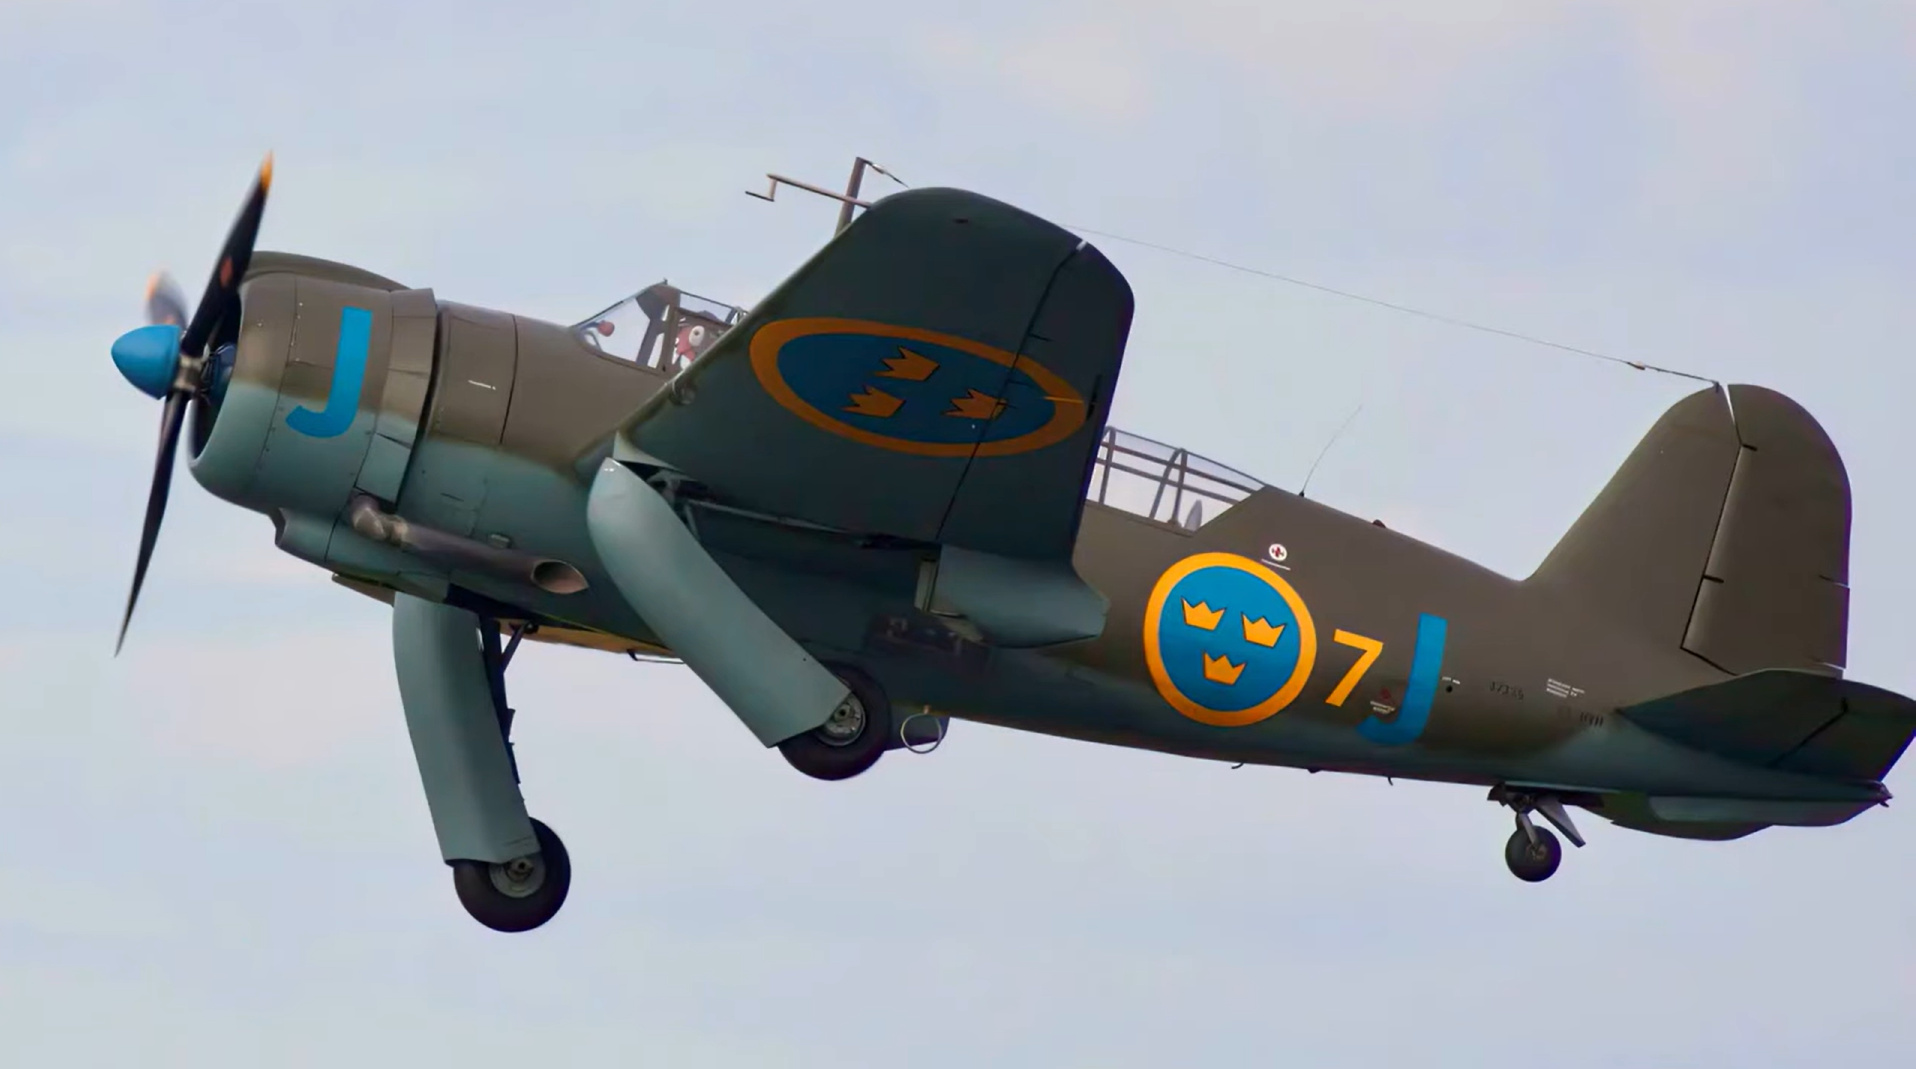
Inline cowling like on the P-51 Mustang can suffer from not enough cooling air intake.

Here you see a radial engine cowl. Notice that there is only a small area allowing cooling air into the cowl just in front of the cylinder head. You can have too much inlet area.
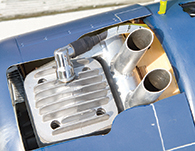
For proper engine cooling, the air outlet should be bigger than the air inlet opening.
When you are test running your engine on an open air engine test stand, cooling is seldom an issue. I like to test run my engine on my test stand, so I can get to know it and adjust the fuel mixture, before I install it on the plane. Though running an engine too lean or spinning a propeller that’s too big can lead to overheating, the primary cause of dead-stick landings is insufficient airflow into and out of the engine cowling. Fully cowled engines tent to run at higher temperatures than uncowled engines so be sure to set your fuel mixture slightly on the rich side, so the engine runs at about 200rpm below peak speed.
For proper air flow the outlet area has to be larger than the inlet area by about two to one. With inline designs like P-51 Mustangs and Spitfires, the trouble is usually not enough inlet area. With radial cowl designs like the Grumman Hellcat, F4U Corsair and Japanese Zero, the problem is usually too much inlet area, compared to the outlet. Most ARF planes with cowled engines will provide proper instruction for how much engine cooling is needed, but if not, just remember that your outlet area should be about one and a half to two times as big as your air inlet. Some airplanes will also benefit from internal ducting that helps guide cooling airflow around the engine cylinder’s cooling fins.
Safe Starting
Always have a friend hold your airplane during engine starts.
For safety reasons, I recommend the use of an electric starter, but if you want to hand prop your engine, here’s the best way to do it.
- 1. Make sure your flying buddy holds your model so it can’t move forward, and be sure the propeller is properly installed. Always use a balanced propeller.
- 2. Position the propeller (relative to the engine’s compression stroke) according to the instructions.
- 3. Turn the ignition kill switch off, and close the choke. To draw fuel into the carburetor, flip the prop until you see gas flowing through the fuel line and into the carburetor.
- 4. Open the throttle fully, turn on the ignition system but keep the choke closed.
- 5. Flip the propeller again until you hear the engine “bark” telling you it is properly primed.
- 6. Close the throttle, advance the throttle trim fully and open the choke.
- 7. Flip the propeller a few times and the engine should start. If it doesn’t, switch the ignition off, and repeat the procedure.
FIELD EQUIPMENT

These are just some of the must-haves you need at the flying field for a happy gasoline engine.
For filling and defueling gas-powered airplanes, I prefer to use the Kwik Fill Fuel Pump from DuBro. It works great and is gasoline proof and eliminates any worry of using electric fuel pumps around gasoline. Also I also have a small field kit handy for spare spark plugs, fuel filters, fuel line and basic tools for making engine adjustments. A spare balanced prop is a good idea also.
With the use of today’s 2.4GHz transmitters, resistor spark plugs aren’t seen as really necessary. But to minimize any possible RF interference, it is always a good idea to use spark plugs with the letter “R” in its ID number. Also, keep a proper spark plug wrench in your field kit to tighten and remove your spark plug. Be sure to check the gap of a new spark plug with a thickness gauge. The gap should be between 0.025 to 0.035 inch. Check the instructions if you are unsure.
Safety First + Always install an easy to reach engine kill switch.
Test run your new airplane on top of a sheet of plywood to minimize dust and pebbles from flying around.
- + Keep all engine fuel stored in a safe place, away from high heat or flame.
- + Do not run your gas engine in an enclosed garage. Engine exhaust gives off carbon monoxide so open the door for proper ventilation.
- + Always install an engine kill switch
- + The propeller can throw up dirt, so place a large sheet of plywood under my airplane for engine tests. It is also a good idea to wear eye protection.
- + Remove anything from your shirt pocket that could fall out and strike the propeller.
FUEL MIXTURE

If you are worried about running your gas engine with gas station fuel that has ethanol in it, you can get pre-mixed SEF (Small Engine Fuel) from VP-Racing at powermasterfuels.com.
Today it’s getting more and more difficult to find gasoline that does not contain some alcohol. While it will take some time and a lot of gas run through your engine before it will eventually affect performance, alcohol attracts water and moisture causes corrosion. It’s now advisable to run your gas engine and fuel tank dry of fuel at the end of the day and use some after run oil. Marvel Mystery Oil is an excellent choice for after run treatments. Also, if your engine begins to become more difficult to start, check your inline fuel filter and your carburetor’s internal fuel filter screen. If they show signs of becoming clogged, replace them with new ones. Walbro internal screens are available at most small engine repair shops.
For most gas engines, a fuel mixture of between 30:1 and 50:1 will work while providing sufficient lubrication. If you are unsure which ratio to use, refer to the engine’s manual or ask the manufacturer. Here’s some popular ratios recommended by engine manufacturers.
| Ratio | Oz./Gal. (US) |
|---|---|
| 100:1 | 1.28 (For synthetic oils only) |
| 64:1 | 2 |
| 50:1 | 2.5 |
| 40:1 | 3.2 |
| 32:1 | 4 |
BOTTOM LINE
Properly installed and setup gasoline engines are very user-friendly and start up reliably without much effort. Once the carburetor is properly adjusted, you can leave it alone for a long time.


Very informative, just what i needed since i am a novice with my gas engine.
I do not agree with several of the suggestions mentioned in the article. A 3 line system is the preferred method of tank plumbing, as well as no inline filter. A good filter in the fuel container is sufficient. Flex (soft mounting) is never a good idea with big gas engines. Hard mounting a battery and ignition module… bad idea.
Enjoyed the article. I do the same & the article checked me out O.k
Thanks for a very good and complete article on gas engines.
You did not miss a thing.
I am a flight instructor of 17 years and really like a place to turn my students onto to backup what I’m talking about.
Thank’s again.