In the early days of full-size aviation, spins were often fatal because most pilots did not understand how to properly recover the situation. While in an upright spin, the pilot would pull back on the elevator stick in an effort to save the airplane (and their life), which only make the situation worse. Since the spin occurs when the aircraft is in a stalled state, adding elevator just keeps the airplane stalled.
New RC pilots may be unfamiliar with the term “stall” as it applies to various aerobatic moves, as most student pilots are only aware of the consequences that stalling their airplane on landing can have. Some maneuvers, however, are performed while the aircraft has stalled, such as the stall turn, the tail slide, and the spin, to name a few.
Let’s examine the key control inputs for executing the three-turn negative spin. A proper negative spin entry begins from inverted horizontal flight at a fairly high altitude. You then decrease throttle and feed in enough down-elevator to maintain altitude. Eventually, elevator authority will not be effective and the airplane will stall. At that instant, the nose will fall and a wingtip will drop in the direction that the spin rotation should be flown. If the left wingtip drops, the pilot should perform the spin to the left, which will require left aileron, right rudder, and down-elevator. Similarly, if the right wingtip drops, the pilot should apply right aileron, left rudder, and down-elevator.
First Things First
Let’s start by taking a look at how your aircraft has been set up. We will then go over the inputs needed to execute this maneuver as well as a few key flight techniques.
I prefer to use flight modes, and in the simplest form, this means that all dual and/or triple rates can be found on one switch. If you want to perform a maneuver like the spin, you don’t need to remember which independent switch setting you used for the rudder, elevator, and ailerons. Instead, you can apply all these deflection and exponential amounts to one switch position to simplify your life.
If your transmitter does not have the ability to use a flight mode or something to the same extent, I recommend that you make your low-rate settings applicable to the spin. You can then make your high-rate settings apply to only extreme 3D maneuvers. I think it is critical to minimize the amount of time you spend searching for rate switches so that you can concentrate on flying your aircraft.
The amount of control throw required to spin your aircraft will differ among airframes. To start, I recommend 15 degrees of aileron deflection with 20% exponential, 20 degrees of elevator deflection with 35% exponential, and 35 degrees of rudder deflection with 50% exponential for the low-rate setting. Remember that exponential (expo) should be used with care. Expo “softens” the feel of the aircraft around center stick on a given control surface to make the aircraft less erratic. A lot of exponential should only be used with a lot of control throw; otherwise, the aircraft may become extremely sluggish. Start with small increments and increase the percentage until you are content with how your aircraft feels.
The Maneuver
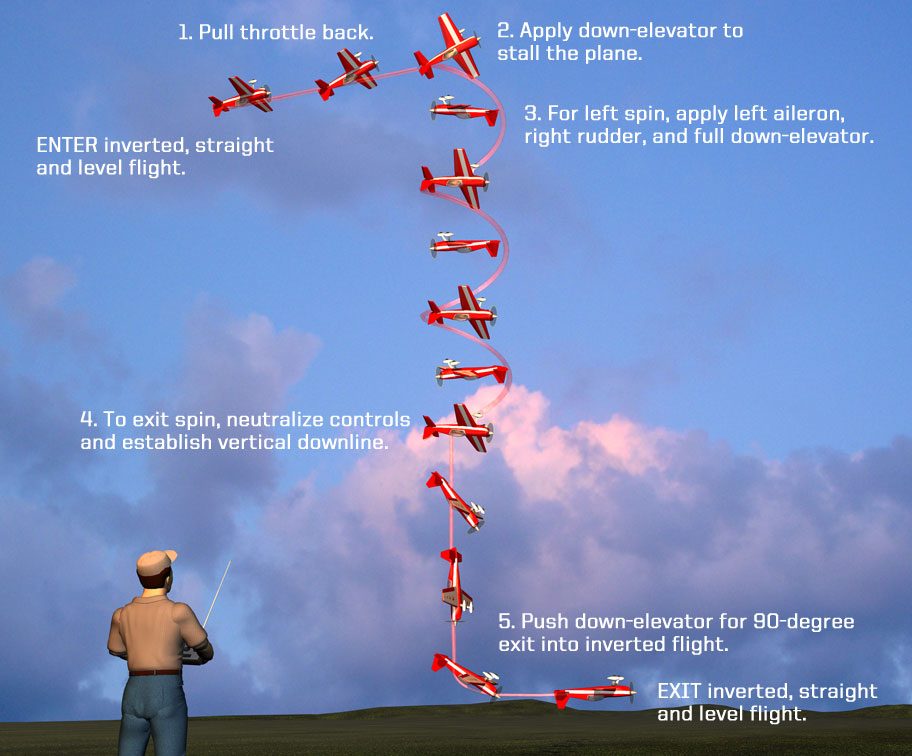
Begin by climbing to a safe altitude. Your entry altitude needs to allow enough space to establish a brief vertical downline after the spin rotations have been completed. Once the airplane is at altitude, fly it inverted and parallel to the runway with about 25% throttle.
When the airplane is about 100 feet away from center, decrease throttle slowly to the idle position and feed in enough down-elevator to hold altitude. At some point, you will run out of down-elevator and the airplane will stall. This should occur while the aircraft is directly in front of you. At this point, both the nose of the aircraft and a wingtip will drop. Let’s say that the left wing drops first; that means that the direction of the spin should be to the left. Use left aileron, right rudder, and down-elevator to complete three complete rotations. Neutralize all control inputs, establish a vertical downline, then push 90 degrees and increase throttle to exit the maneuver in inverted, level flight.
By the Numbers
Let’s explore the maneuver as well as a few key flight tips by breaking this maneuver into four steps:
Step 1. Align the aircraft parallel to the runway and inverted. If the airplane is traveling with some airspeed, pull the throttle back to idle and slow the aircraft down as it approaches you, and activate your “spin” flight mode. While the aircraft is slowing down, you’ll need to feed in down-elevator to maintain altitude. It is important to time this portion of the entry so that the airplane stalls directly in front of you. When the airplane does stall, one wing will drop to determine the direction of the spin. In this example, we are spinning to the left, which requires left aileron, right rudder, and down-elevator.
Step 2. Most aerobatic airplanes will spin using only a touch of aileron input. Using too much aileron may accelerate the spin rotation at times, which is not the desired result; rather, we want to obtain a constant rate of rotation. At most, use about 10 degrees or so of aileron deflection, but hold in full down-elevator and full rudder input.
Step 3. With your throttle still at idle, keep track of the amount of rotations the airplane has performed and maintain the same control inputs.
Step 4. As the last rotation nears completion, you’ll need to neutralize all control inputs and establish a vertical downline. Then, after a brief line segment as shown in the illustration, perform a gentle 90-degree elevator push to exit inverted in horizontal flight.
It is important to realize that heavy airplanes take longer to exit a maneuver like the spin. Once you neutralize control inputs, the aircraft may complete another portion of a spin rotation. When you know the tendencies of your plane, you will be able to compensate for this by timing your inputs properly so that the rotation stops at exactly three rotations.
Flight Tips
When watching various pilots performing spins, I have seen a few problematic areas arise. One major issue is having the airplane’s engine quit during the maneuver. This often happens as the pilot has a relatively low idle when using a glow- or gas-powered model. If this is the case, set a safe idle before you take to the skies. If you are using an electric aircraft, you may want an idle where the prop is spinning at a very low rpm. I know that some pilots prefer to have the motor stop completely in the idle position (with brake function), but I do not like the delay that it sometimes takes for the motor to reactivate.
Before entering the spin, the airplane must stall. As I mentioned, this is shown by having the wingtip and nose of the aircraft drop before you enter the spin rotations. If this doesn’t happen, it means that you had too much airspeed going into the maneuver and a forced entry is applied.
Now that you know the basic fundamentals of performing the three-turn negative spin, it’s time to go out and practice. The cliché “practice makes perfect” is true. If you have trouble performing this maneuver, break it down into steps, examine the setup of your aircraft, and use these tips to serve as a guide.
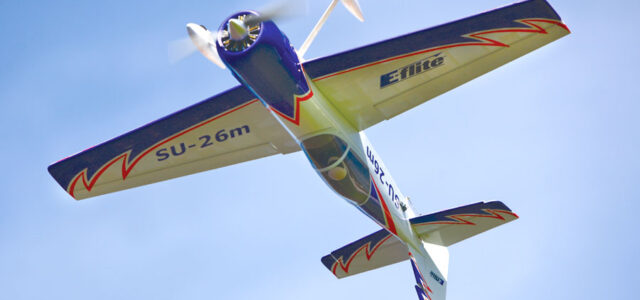
By John Glezellis | Illustration by FX Models